A woman who works with her hands is a LABORER; a woman who works with her hands and head, a CRAFTSMAN; but a woman who works with her hands, her head and her heart is an ARTIST. ~ Louis Nizer
Pages
Tuesday, March 30, 2010
Week 2 with Carla Suto: A Beautiful Easel!
I had never seen these particular Basic Grey papers before, and I am just lovin' the patterns and colors! (I'll have to go put Ocean Mist and Little Boy Blue together to try to recreate this serene look.) instead of coloring the flowers and butterflies, she stamped them onto the solid colored, distressed Basic Grey papers from the same pack for a beautifully coordinated, shabby chic look! Here is today's card recipe:
Stamps: Gina K. Designs A Beautiful Life and A Year of Flowers
Paper: Sage, Baja, and White Cardstock, Basic Grey Stella Ruby Patterned Paper
Ink: Memento Rich Cocoa
Accessories: Copic Markers, Inkssentials White Gel Pen, Yellow Pearls, Martha Stewart Trellis Border Punch, Petite Oval Nestabiltities, Foam Tape
Let's go see what else Carla created! :)
Natural Beauty
I had a Kraft base left over from working on the release and this quarter sheet of neutral DP from the StampTV "Spring Mix" kit (these white silhouettes are one of my favorite prints in the kit!) I thought these would be the perfect for starter for a very earthy and natural "A Beautiful Life" card, with white tulips* to match. I stamped the frame directly on the DP, colored in the borders and leaves, then popped up some tulips stamped on White Pure Luxury, just shaded with a touch of W-3 Copic, it is a lovely match with these other sandy shades...
I also had a black mat that was already cut a wee to short to completely frame up my DP...but that's okay! You can pretend these offset panels sometimes are just part of your cool sketch! ;) I had just a little white scrap left over so I cut out a petite oval for greeting (this one from "Arranged with Love" , and added a few more black accents with a fancy corner punch and fancy tag die cut behind. The frame is really fun to layer different shapes and tags to change the look, just have fun with it! I am completely out of adhesive pearls, so I improvised by putting a 1/4" circle punch of white CS behind a dewdrop, turned out really pretty!!
Have a gorgeous day, thanks so much for visiting! :) Coming up, an altered item and a guest spot with Carla!
* There is no flower that fits more occasions than the white tulip. (so says ProFlowers!)
Monday, March 29, 2010
Take the Scraps Challenge!
I noticed I still have a piece of Ocean Mist already Cuttlebugged awhile back, and thought this color looks so calming with the lilies...those swirls look lovely with the flowers' shapes... so here was my mat! I also had a scrap of black and a bit of this ribbon I am already almost out of (because I love it so much!) but it wasn't long enough to tie, so I just made it a stripe and trimmed the ends. This was my very last card base of Pure Luxury White (but more arrived over the weekend, woo hoo!), already folded and waiting to be finished. I added my last aqua button and a greeting* from "A Beautiful Life" and the card is complete (plus a few adhesive rhinestones) All this stuff was out, no dipping into my stashes!
See what you can make with the stuff on your desk, I'd be interested to see! More than likely, if you've gone a couple card making sessions without reorganizing you have some great stuff in front of you that already coordinates. Add your creation to the linky below by pasting in your name and the post where you upload, link back to me in your description so people know about the challenge. It's on the honor system that you used scraps! (extra points for using GKD stamps, wink) I'll have a little prize for the winner, and will leave it open til Friday and post a winner over the weekend! (But for SOME of you, I know this will be a very difficult, perhaps impossible task, because you always clean up as you go... (you make me a little sick! jk! LOL!) but, I know you will manage, because you save all your scraps of paper and they are all neatly filed away in their proper color file, blah blah blah... :) since you have a few days to enter let things go for a bit and see how it feels! (kind of liberating!)
* "Hello beautiful" reminds me of some wonderful old black and white classic film; can't you just hear the leading man saying "hel-LO beautiful!"? ;)
Sunday, March 28, 2010
Beautiful Butterflies (Embrace the White, or Bring the Bling!)
The Black Onyx and white panels are popped up onto the Pure Luxury White base. I used a piercing template as a guide for the little dotted row I made on either side with a pen.
Now I made something later to go with this, but don't have it photographed yet, I will be sure to share it later this week! :) (BTW, in case you are wondering I have not abandoned my DIY "photo tent" (hee!) just took these pics before the last post!) ;)
Have a beautiful Sunday!
Friday, March 26, 2010
Tulips and Daffodils
I stamped both the frame and daffodils onto Lemon Drop Pure Luxury, and used just three Copics to color everything: Y15 for all the flowers and leaves, leaving the Lemon Drop color of the paper for the lighter areas, and G24 and G94 for the stems and leaves. A little yellow ink was also sponged inside and rectangle and oval frame. TIP: After coloring the daffodils, cut off one side and an angle towards where the stems meet at the bottom, then turn the image sideways on your cutter and trim the other side at a 90 degree angle to side you already cut, the image will now tuck perfectly into a corner! Then you can go in and trim around the petals and leaves at the top with some scissors. Stamp your greeting inside the oval, then pop these added flowers up and layer onto Black Onyx, Fresh Asparagus, and finally a Lemon Drop base. NO ribbon or embellishments here, but I am lovin' how elegant this card turned out!
So based on today's photo, how do you like my new "photo tent"?? It is actually just a 30 cent white poster board I threw on the floor up against the wall of my craft room! I ran out of all my white CS for staging (could you tell in the last week?? LOL!) and have been too lazy/not had the room to make one of the nice DIY sytems for photographing your stuff. When I'm not taking pictures with it, I can just lean the poster board back behind the open door to my room, out of sight. (It wants to fall forward when it's back there, shaping itself into that perfect curve for a seamless photo...) Try it youself and see if you like how your photos are looking! :)
Thursday, March 25, 2010
Asian Mosaic
For this card I used both white AND ivory: ivory for the background to make my greeting and white lotus pop. I stamped the koi in Vivid Brick Red to match the Red Hot cardstock (mat is Black Onyx), isn't that sharp in red uncolored? I shaded the white cut out flower with aW-3 Warm Gray Copic, as simple as tracing along the undersides of the petals and drawing a quick stripes down the middles. I popped it up and added a white panel with "thinking of you", also from "Inspiration Mosaic", adding a row of squares below from that same set inked up with markers.
Wednesday, March 24, 2010
Week 1 with Guest Designer Carla Suto
I literally gasped when I opened the attachment, these colors and patterns are just speaking to me! Love how she popped up all the different colored mats inside the oval and let just a touch of that gorgeous printed paper peep through the middle and around the edges. The greeting is from my "Arranged with Love" set. The little organdy bow at the top and pearls below are perfect way to finish it off! Below are Carla's card making details, and then a little more about the lady itself! :)
Stamps: Gina K. Designs "A Beautiful Life" and "Arranged With Love"
Paper: Gina K. Designs Pure Luxury Layering Weight Ivory, Rose and Moss CS, Karen Foster Designs Patterned Paper
Ink: Memento Rich Cocoa
Accessories: Copic Markers, Ribbon, Pearls, Petite Oval Nestabilities, Foam Tape, Martha Stewart Border Punch (inside)
and now some questions for Carla!
FAVORITE TECHNIQUE: coloring and sponging
COLORS/COLOR COMBO: blue and green
FAVORITE GINA K SET BY MELANIE: A Year of Flowers (and now Pressed Flowers, too!)
FAVORITE GINA K SETS (FROM ANY ILLUSTRATOR) : It's hard to choose from all the fantastic sets, but Asela's Friendship's Garden and Nina's Lovely Shelf are definitely among my favorites.
CRAFT SUPPLIES I CAN’T LIVE WITHOUT: Patterned Paper, Nesties, Copics, Cuttlebug
I’VE BEEN STAMPING FOR (HOW LONG): ~2 1/2 years
I GET MY INSPIRATION FROM: Melanie and the other awesome Gina K. designers, StampTV and SCS galleries, friends' blogs and challenges
THE MOST IMPORTANT THINGS I’VE LEARNED ABOUT STAMPING/CARDMAKING ARE:
to color better (still working on that), to have fun and try new things, to take a break once in awhile to refresh my mojo
SOME OF MY STAMPING/CRAFTING GOALS ARE: to one day have the nerve to submit something for publication, to keep learning, to organize my craft space (!)
FAVORITE THING TO MAKE THAT AREN’T CARDS: altered items, templates
SOME OF MY STAMPING/CRAFTING ACCOMPLISHMENTS: Guest Designer/Featured Stamper on a couple of blogs; being selected for the Center Stage Spotlight Team on StampTV and continuing as an Alumni; being a Guest Designer for Melanie - this is such a thrill and an honor for me!
CHALLENGES I LIKE TO PARTICIPATE IN: I try to participate in all the challenges on StampTV. I also participate in challenges on SCS and PaperCraft Planet and on a few blogs when I find ones that inspire me.
WHAT I DO WHEN I’M NOT STAMPING:Until last year, I worked full-time in the biotech industry, but now I'm just consulting. When I am not stamping, I am helping care for my 85-year-old Mom who I moved here last summer. I also enjoy casual golf with DH and with friends (I'm trying to improve).
Let's go see what else Carla made!
Tuesday, March 23, 2010
Card Positioning Systems Sponsor
I inked up the tulips with markers and stamped them onto Pure Luxury White, cut them out, then popped them up over this houndstooth Lovely Label. I used greetings from my new "A Beautiful Life" set, inking them in red then balck on the bottom to create the two tones. For fun I decided to make the classic houndstooth a little funkier by adding some red to the pattern. Mats are Black Onyx and Red Hot. Thanks for looking! :)
Monday, March 22, 2010
Honey, honey
The sentiment from "A Beautiful Life" fits perfectly into one of Nina's "Lovely Labels". I die cut it and then traced the die on Black Onyx to make a lager mat. After randomly stamping a pattern of bees in Versamark to create a background paper, I colored my stamped bee with Cadmium Yellow and Honey Copics and then popped it up, adding a little trail of these "Say it in Crystals" flourish behind. I am in love with these crystal flourishes (from Hobby Lobby)! They are a little pricey, but when you consider how you can divide a large flourish into many smaller parts and how much it adds to the card, it is a great value! :)
"A Beautiful Life" Tip Sheet
The frame can be turned in 4 directions to provide you with a variety of vertical and horizontal layouts.
You will love the double border in this frame! Similar to that of "Festive Frame", you can color these in any hues you choose to give the illusion of extra layers without adding the extra bulk or time to cut them. Notice however these borders use both a bold and narrow line: when left uncolored, this creates the illusion of a beautifully embossed panel!
Stamp the frame onto colored cardstock in Versamark or a matching ink for a beautiful tone on tone, embossed look.
Emboss the frame in silver or gold for an elegant wedding or anniversary card.
Cut out the oval window to create a window into your card or to layer another color under.
Cut out just one tulip corner or the other and pop it up over the corner of a greeting panel on another card, already masked for you!
Add buttons, pearls, or punched corners to the open corners to dress the frame up or wrap a ribbon around each and tie at the top or bottom.
Color in the corners of the frame around the tulips and/or color the borders to create the illusion of several different mats without all the cutting or adding extra bulk to the card.
Stamp onto designer papers to let the beautiful patterns show through. color directly over the pattern to make the tulips and narrow borders pop out without adding extra mats.
Paper piece the different parts of the frame to look like quilting.
A little bee and butterfly have been added for quick adornments here, as well as provide you with more options for your "A Year of Flowers" and "Arranged with Love" sets. Pop them up in the corner or lighting on the flowers for the perfect little embellishment. You can also use these new delicate images with any other flowers on your cards to create focal points and backgrounds.
Some ideas for creating a flight path for these insects:
pierce it
stitch it
stamp a flourish or use a rub on
a row of adhesive pearls or rhinestones
doodle it with a pen
Add glitter or Stickles to the butterfly wings for shimmer. Fold the wings in half and adhere the center of the image to your card so they pop out. layer a cut and folded butterfly over a stamped one on your card, this creates the illusion of flapping wings!
Cut the butterfly straight down the middle, between the antennae and through the body's center. now you have two new butterflies that can be viewed from the side! This gives more versatility to the image, mix these up with the front view and it will look like you have a lovely little swarm on your card.
Stamp it all over cardstock or your favrotie patterned papers to make beautiful coordinating butterfly backgrounds.
Make the bees wings translucent by stamping them on acetate or vellum and layering over the body, or cover with Crystal Lacquer, clear or iridescent embossing powder or Sakura glaze. Try flocking his little bumble bottom with black and yellow flock! :)
Ink just the "utiful" in "beautiful" and place a popped up bee in front of the word, that spells bee-yootiful!
Create a honeycomb background for your bee by inking up bubble wrap and stamping, the result will be hundreds of little holes in a hive!
The bee has his own quote: "Hope is the only bee that makes honey without flowers", which can be used for so many occasions. Make him the focal point of your card with this sentiments, yellow, black and white cards are so crisp and cheerful!
Add quick color to these tulips using the stems, leaves and blossoms from the coordinating "Pressed Flowers" set.
This set includes sentiments for year round occasions like birthdays, anniversaries, weddings and thank yous, as well as sympathy and encouragement. Greetings are sized to fit in the oval whether you orient your card vertically or horizontally.
The smaller greetings like "thank you", "friend" and "bride" look beautiful when stamped into the corner of the border or onto a tag.
Sentiment Combinations:
beautiful friend, bride, or mother
hello beautiful
thank you beautiful
you are a beautiful friend, bride, Mother
Mother, friend, bride, you are beautiful
you make life beautiful
hope your birthday (wedding, anniversary, Mother's day) is beautiful
have a beautiful day, wedding (day), anniversary or Mother's day!
These classic fonts will never go out of style and can work with so many other images you have collected whenever you need to make a beautiful card, not just for flowers! They also coordinate with the greetings in "Say it with Flowers".
Use some of these new quotes inside your "Festive Frame" set for wintery thank yous and birthdays!
Make a beautiful coordinating gift with your cards by adding a photo into the oval window: lovely for a bridal portrait, picture of you and your mother, Easter photos etc.
Make a wonderful mini wedding or Easter scrapbook using the stamp to frame favorite photos.
Create a bee tag and tie it onto a jar of honey with a little dipper for a sweet gift for a friend or teacher.
Use the frame on the top of a painted to altered paper or wooden box to create a gorgeous jewelry or keepsake box, perfect for Mom!
Create a clock with the frame using a clock kit and panel of painted wood like in this post. Glue the little bee or butterfly to the end of the second hand to make it continuously circling the clock face! (I almost hated to tell you about this one already since I am making one right now for the the blog and wanted it to be (bee!) a surprise!)
The frame creates a beautiful insert to decorate the large acrylic pillow boxes, stamp a greeting into the oval to announce your gift, or cut out the window to allow your treats inside to peek through!
The frame would make a beautiful book plate to line the inside of your favorite books and add your name to the middle.
Create a matchbook style card or pouch with the tulip frame on the front and add a seed packet inside, truly giving the gift of flowers!
Stamp it onto the outside of plain gift bag and color, quick, beautiful and inexpensive!
Create real framed art work with the frame, a pretty acrylic message board for jotting notes, or a wine label with the waterproof labels for special occasions.
Stamp the frame and a greeting onto Polyshrink, color cut out and make a hole in the corner, the heat. Add a chain and you now have a sweet key chain!
Shrink down the bee and butterfly images for charms to use one a wine ring, bracelet or earrings, a book mark, or card bling!
Stamp the frame onto an organdy gift bag, another easy way to dress up a little gift!
Stamp onto a mirror or pane of glass to make a beautiful sun catcher.
More tips to come! :)
Sunday, March 21, 2010
Piecing Together a Beautiful Life...
First I stamped the frame out onto Pure Luxury White, Lemon Drop, and a patterned piece of paper from the new Spring Mix Stamp TV kit. Love that delicate floral!
Thursday, March 18, 2010
A Beautiful Life... Stepping it Up!
All our March Gina K Designs releases are now available for purchase! So sorry I had to miss the party for the first time in two years (did you even notice I wasn't there??) I am actually out of town right now, have been ALL week, but we come back tomorrow. I was able to pop in for just a couple minutes in the middle from my phone on the way back from the beach, but my son I fear scratched his cornea tonight* so this is a quick post of one of my "A Beautiful Life" card that Theresa uploaded for me during the festivities, thanks Theresa!
I stamped the frame on one of the quarter sheets of patterned paper included in the the new StampTV kit and the colored in the flowers and borders with Copics. TIP: I stamped out two butterflies to pop up, cutting one in half, you can use the halves for two side views of butterflies, this is a nice way to change up the image! :) I matted it onto Black Onyx and Bubblegum Pink. Easy peasy!
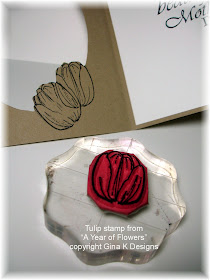
Now here is a quick step it up to add some punched scalloped corners and dew drops if you want to add a little somethin somethin! I wish I'd had my Stardust pen that day, LOL, too!
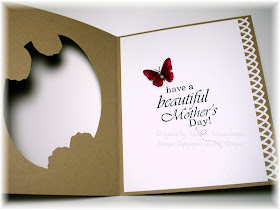
"have a beautiful day!"
*I'd so appreciate if you could keep my little William in your prayers tonight, I've scratched both corneas at two separate times and it was was the worst! I don't think it's as serious as mine or he'd be having a LOT more pain, but he's very miserable and hurting, and we have a big day of travelling tomorrow and the weekend coming up which makes trying to see a doctor tough. I will have to get my tip sheet for this new set up after we return!
Wednesday, March 17, 2010
Sneak Peek Day 4: Nana's Needlework and Sentiments and Spring Has Sprung
I used one of the small patched elements in the set that can be stamped on the blanket, this time the heart, on it's own frame up in some oval die cuts to look framed. I couldn't resist tucking the bear from Rupa's "O Baby" set on top, the scale of it and legs dangling over the edge was too perfect! :)
For even more inspiration with tonight's new stamp sets:
The Release Party is tomorrow night Thursday, March 18th starting at 7pm and ending at 10pm (all times CST) when all the new products will be available for purchase in Gina's online store.
To keep informed of all the party plans and activities, check out this link:
Tuesday, March 16, 2010
Sneek Peek Day 3: Stamp TV Kit "Spring Mix" and "Friends"
A few of the images have a little open space inside to stamp the greeting, one being this shy little mouse holding a sign, I added "Feel Better Soon". After coloring and cutting it out, I popped it up inside this dashed round border stamp also in the kit, which is perfect for framing up all the images, you will love it! I die cut it with a Classic Circle Nestabilitie. The card base is the new Pure Luxury Little Boy Blue, and don't you love the new beautiful 5/8" grosgrain to match?! I kept this layout simple because I wanted to use one of the patterned quarter sheets in the kit, they are some of the prettiest patterned papers Gina K has ever offered (IMHO) wait til you see them all!
Next we have the "Free with Three" "Friends", you will get so much use out of all the greetings in this set! (do you send cards to anyone who's NOT a friend? LOL!) there are no images in this set, just sentiments, so I used a floral patterned piece of Basic Grey Origins to go with the gardener part of the quote....
For even more inspiration with the new Spring Mix StampTV kit and the new Free with Three stamp set:
Mark your calendars for the Release Party this Thursday, March 18th starting at 7pm and ends at 10pm (all times CST) when all the new products will be available for purchase in Gina's online store.
To keep informed of all the party plans and activities, check out this link:
Monday, March 15, 2010
Sneek Peek Day 2: By Your Side and Happy Spring Card kit
Everything is colored with Copics, I used this link for help with Koi marking and colors, and sued Strong Red, Apricot and Honey Copics on the fish and tulips. (I've never made any tulips deep orange like this, and I don't know what I was waiting for! The black white and red color combo give the card a very Zen feel, base is the new Pure Luxury Red Hot.
Are you ready for even more inspiration?
Asela Hopkins {Illustrator of By Your Side}
StampTV is celebrating it's first birthday and the festivities are in full swing with this month's release! We'll be holding this month's Release Party on StampTV and couldn't be more excited about all that Gina has planned for everyone! The party kicks off this Thursday, March 18th starting at 7pm and ends at 10pm (all times CST) when all the new products will be available for purchase in Gina's online store.
To keep informed of all the party plans and activities, check out this link:
Sunday, March 14, 2010
Sneek Peek day 1: A Beautiful Life, Fairy Tales, and Sending Sunshine
A large "beautiful" greeting is included, that acts as a base for most of the other greetings in the set ((but not all, wait till you see some of the other heart-melting sentiments! I bet we'll spot a few on our hop today!) , just stamp the occasion you want around it and you can wish someone a beautiful wedding or day, to simply "hello beautiful!" You will also love the little bee and butterfly images I've included in this set, they are a wonderful addition to bring all your nature cards "to life" as well as coordinating with all my other floral sets from Gina K Designs, like you just stepped out into the garden! :) I made the borders pop with a white Koh-i Noor pencil and colored the butterfly and tulips with Strong Red, Cardinal Copics, and Willow and Spanish Olive for the leaves. Shadows drawn with Warm Gray 1.
Next we have Tami Mayberry's "Fairy Tales" set, I picked my favorite images and greeting from it to make this sample. The doodling and whimsy of the Sugar Rush paper is perfect with this set and fun, wonky font she used in the quote!
My next card uses Theresa's "Sending Sunshine" set. Perfect for Spring, it has several lovely park images, my favorite being this lazy tree and tire swing, can't help but think back to simpler, innocent times! I started with a Kraft base and stamped my tree on Pure Luxury White. After coloring the tree (a wisteria, you can really have fun choosing the colors for your flowers!) I stamped the tire onto scratch paper so I could cut off the rope part of the image (if you want to it's very easy to just stamp it in the spot you wanted, but I chose to make something interactive this time!) and then tied on some hemp twine, perfect for the old rope (here is the jute Gina K sells). The color is perfect with the natural Kraft! Poke a hole through the branch on the tree with a piercing tool and thread your twine through.
Here you can see the motion (I dare you try not to give it a few pushes if you received a card like this, irresistable, hee hee! wheeeeeee!) ;)
Are you ready for even more inspiration?
Then, visit these Illustrator's blogs of these new stamp sets:
Melanie Muenchinger - A Beautiful Life (thanks for visiting!)
Tami Mayberry - Fairy Tales
Finally, check out these Designer's blogs:
StampTV is celebrating it's first birthday and the festivities are in full swing with this month's release! We'll be holding this month's Release Party on StampTV and couldn't be more excited about all that Gina has planned for everyone! The party kicks off this Thursday, March 18th starting at 7pm and ends at 10pm (all times CST) when all the new products will be available for purchase in Gina's online store.
To keep informed of all the party plans and activities, check out this link:
Friday, March 12, 2010
Surprise Party!
I chose the previous StampTV kit "Organize It!" I wanted to do something a little different with the dashed semi circle, which is made for making tabs and dividers; I thought it would be really pretty and easy to create a simple scalloped border with it to dress up this stitched ribbon and single layer card! (This 5/8" ribbon is a sneak peek from the new kit, shhhh!) ;) I colored the butterfly with Copics, cut it out, and popped it up on two layers of pop dots for extra dimension. All the dashes add some whimsy to the butterfly image, simulating a flirty little flight path. :)
Hope you enjoyed this CAS card! This kit is not just for organizing! :)
Be sure to check out ALL of the birthday cards on these blogs:
Carolyn
Jessica
Melanie
Theresa
Lee
Tami
Lynn
Erika
Emily
Cathy
Valerie
Bev
Tina
Karen
Vicki
Nina
Sneak peeks are almost here!!! :)