Pages

Monday, August 31, 2009

Big Brother

Here is a little two piece (well, three piece if you count the hat from "Just So Sporty"!) set I made using "Wee Tees" and some solid Basic Grey DP. If you stamp the onesie image onto two pieces of paper and then draw a line through the middle of one (here the Pure Luxury Ivory) you can create little tops and bottoms from the image, which is a fun (and sporty!) way to change up the onesie! The outfit is made to look like something his little sister might wear. I paper pieced the middle of the ivory section onto the orange DP so the sleeves would be burnt orange as well.

I made this card for the son of some friends of ours (UT alums) who at age 3 recently became a proud big brother. The little star on the shirt and cap is also from "Just So Sporty" and all greetings on this card are from "Wee Tees".

I used my Scor-Bug to create the stitched borders and Square Scalloped nestabilitie for the mat. just a bit of shadowing with a pale gray marker will give your cut out images a lot of dimesnion.

Happy Monday! Two tip sheets this week plus TWO guest design spots, get ready! :)

Sunday, August 30, 2009

Bold Flowers!

Here is a card I made with "Inspiration Mosaic" and Gina K's "Bold Flowers". To match up with the circle motif in the bold flower center greeting, I took the small circle outline from "Inspiration Mosaic" and stamped it over various places in the grid, isn't that fun? Grid stamped in Memento Black on Pure Luxury White, and colored with Copics. Card base is Pure Luxury Rocket Red, bold flower was punched and matted using the EK Success Flower punches, so easy to use!


Happy Sunday!!! Live Boldly!! :)

Saturday, August 29, 2009

Back to School!

Today's card I made for my friend who is changing careers to attend nursing school, I am so proud of her! This is kind of a whimsical card, because it won't be like high school, but I know it must be really hard going back, so I'm trying to help her get in the spirit! :)

I used the locker, pennant and megaphone from "Sporty Accessories" and used two new greetings to fit in them from the new set "School, Sports, Spirit!": "Back 2 School! and "Congrats!" I added the new homecoming mum to the locker that were always so fun for Spirit week, and a duffle bag with her name on it (lots of words can be added to the pocket, stamepd or hand-written!) plus some bling. (I have some GREAT tips for this bag, there are so many things you can do with it! Stay tuned!) Cardbase is Moonlit Fog.

Inside I added "Go for the goal!" and this new little graduation cap. The inside would be a really CAS to do for a graduation card outside!

Working while going back to school will not be easy, but I am certain this is the Lord's plan for Donna, in a few years she will be a working nurse and probably ministering and making handmade gifts for all her patients!

For any of you readers who are going back to school to either follow a dream, make a life change, or make a better life for you and your family, I just want to say, "I'm proud of YOU!" (and if you're thinking about it, I say, GO FOR IT! It's NEVER too late to start learning and doing something you love! Have a wonderful weekend! :)

Friday, August 28, 2009

"A Year Of Leaves"

"A Year of Leaves" is now available for purchase from Gina K Designs! (How 'bout that party last night, weren't the design team and CSS gals on fire??) This is a year round set including an assortment of leaves and nature images with coordinating quotes and greetings to suit any occasion, and I have to say, is one of my favorite releases already!

Here is a super simple one, using a piece of sky paper from a DP slab I had, but you could easily create clouds with a bit of sponging. I wanted this card to evoke the feeling you get when are blue or missing someone then get that little "nudge" from God, or a loved one, from a leaf falling in your path, as if an angel's watching over you... :) One leaf is popped up in front of this sympathy quote on the Labels Four die, I chose this die because it frames the sentiment so nicely and the shape echoes both leaves and clouds... Card base is Pure Luxury Green Apple.

I made this card for our release party last night, I'd like to go back and add some more details but I was in a hurry! All week I'd been meaning to mask some of my new leaves under the blooms from "A Year of Flowers", (I used just the sunflower from that set here) as fall bouquets are some my very favorite! These two sets compliment each other perfectly!
This uses the SCS color challenge CC233 for the week: red, chocolate and Kraft, I used all Gina K Pure Luxury CS for my card.

I am so excited about the response this set has gotten and can't wait for your sets to start arriving so I can see your leafy creations! You can see more samples today using "A Year of Leaves" from the lovely and talented Sharon Johnson, Laurie Schmidlin, and Geri Utterback! Thank you SO much ladies for stamping with my designs and sharing your artwork and talent with us today! :) look for more samples, a tip sheet and mid month blog hop with the set coming soon!
Have a terrific weekend! (Next up, the new "School Sports, and Spirit!" You can see a fabulous project using this set NOW at Melissa's blog, my guest designer for the "School Sports, Spirit!" set this month! Check it out!) :)

Thursday, August 27, 2009

A couple winners, then it's time to Party!

The winners of my two new sets from our sneak peeks this week are :

"A Year of Leaves" goes to:
joy said...
I would like to work with those leaves and some snow flakes - maybe from Gina K's Magic of Christmas, it has a tiny snow flake and white embossing powder. Hummmmmmm... I'm thinking.
August 24, 2009 10:15 PM


"School Sports, Spirit!"
stampqueen said...
My 2 kiddos have tried everythingdance, gymnastics were short lived but we had many good soccer years and at the same time they wwere doing karate - a couple years of softball/baseball and then last year it was swim team. This year looks like swim team again for my son and art club for my daughter.This new set of yours will fit right in on my shelf :)....
August 26, 2009 7:55 AM


Congrats ladies!! Please email me your mailing info so I can put your sets in the mail! Thank you everyone for playing, I so enjoyed reading all your comments and will surely be incorporating many of your ideas into my tip sheets! Stay tuned for those!

Come join us!! at the Gina K Release Party!!

Wednesday, August 26, 2009

Sneak Peek: Autumn Beauty, Elegant Verses, and Tropical Blooms

Last day of peeks, the release party is just hours away, woo hoo! Today we have THREE sets, first up is Theresa Momber's "Autumn Beauty". It such a gorgeous mix of fall images! One of my favorites in the set is a sunflower blowing in the wind. Theresa's wonderful detail and shading in her illustrations give a wonderful vintage feel, but I wanted to share how you can mix them up with modern elements for another look!

I took the small solid and outline circle images from "Inspiration Mosaic" and stamped my patterned background, using Vivid Coffee Bean ink on Pure Luxury Soft Sand. I chose to repeat the brown circle elements all over my card to go with the flower's center. I created the punched sunflower at top using oval punches, a circle and scallop punch, and my Crop-o-dile to emboss small and large circles in the center for seeds! Base is Pure Luxury Chocolate Kiss. I threw on a strip on green accented with more "Inspiration Mosaic" dots and her new greeting (which I happen to love being a native Texan, yes, I am!): "Happy Fall Y'all!" Her adorable mailbox on the envelope is the perfect finishing touch!


Next I have a sample using "Elegant Verses" by Nina Brackett. The verses in this set all coordinate with her "Elegant Post" set from last month, you will love all the new options you have to go with those images. I thought you'd be seeing a with the post in our hop today, so I thought I'd share something using a verse with another Gina K Designs set, "Home Tweet Home" from Rupa Shevde. You'll definitely want both "elegant" sets, but this set will work double duty with your other images in your collection, too! :)

I stamped the verse (it fit, yeah!) and bird in to the boxes of "Inspiration Mosaic" and pieced a few of the boxes with DP to match the colors of Copics I used for the bird and flowers. Card base is Pure Luxury Green Apple. So tweet!


Last we have the "Free with Three" set, "Tropical Blooms" by Gina K! You all got the free with three "Tropical Windows" from last month, right?? (If not, it will be available to purchase Thursday at 10PM, and you can get this new one free when you throw three or more sets in the cart!) Yep, Gina pulled the flowers out of the windows and separated the elements so you can make your own focal points and backgrounds with these beautiful chunky images. Since this set doesn't have any greetings (they will work with ANY others you have!) I decided to share a simple card without a sentiment. My favorite image is this swirly flower, partly because it reminds me of agapanthus, but also because it doubles as a great flourish!
I stamped just the bloom onto Soft Sand in Memento Tuxedo Back and then again for my focal point on Pure Luxury White (die cut with a Labels Four Nestabilitie). I embossed a Cuttlebug border, one that echoed the the design of the bloom) over the edge to add some texture and dimension and tucked a punched black Large Flourish (one of my FAVE punches of all time!) at the bottom corner. Adhered to Black Onyx and base weight Pure Luxury White and it's done! Isn't that elegant?

To see more inspiration with the stamps previewed today, visit Gina's blog, the illustrator of Tropical Blooms as well as Theresa Momber, the illustrator of Autumn Beauty, and Nina Bracket , the illustrator of Elegant Verses.
For even more projects with tonight's two stamp sets, these Senior Design Team Members are participating in previews today: Asela, Carolyn, Cindy, Donna, Emily, Erika Jessica, Kurtis, Lee, Lynn, and Melanie as well as our CenterStage Spotlight Design Team members:Shelly Wilson and Charlene Merrick


Our Release Party starts Thursday night at 7 pm CST. Please join us for contests questions, challenges, lots of chatter as well as a ton more samples shared by the Senior Design team members and our CenterStage Spotlight team too. See you tomorrow night!

Tuesday, August 25, 2009

Sneak Peek: "School Sports, Spirit!" and "Back to School"

The set giveaway is closed, see the winner HERE!

Today we have a few new sets from Gina K you'll love, the first is my new "School, Sports, Spirit!" which perfectly captures and celebrates you AND your kids year-round sports and school activities and events, from the first day of school to the last! This set coordinates with "Just So Sporty", "Tee Talk" and "Sporty Accessories". Not just for school (and not just for kids!), you'll also be able to scrap and recognize your family and friend's favorite pastimes and achievements. I'm peeking just a couple images today, the images are so varied, but lots more to come at the party!

Here's a sports card I made for my 4 year old who starts soccer for the first time this fall. I included some shoes with cleats in the new set ( you'll love these shoes, the cleats can be removed to make running or dance shoes!) I cut them out and adhered them to look like they are running in to kick the ball. To suggest a soccer field, I stamped "Inspiration Mosaic" in Cream White on Green Apple Pure Luxury, I know it's not "regulation" soccer LOL! but I hope it suggests the feeling of playing field boundaries and helps ground my elements. Adding a small shadow under the shoe helps create the illusion of a little invisible person kicking it, no? :)

The "Go for the Goal!" greeting is curved so you can stamp it and then flip it and stamp again to create a circular greeting, this is really fun to frame up small or round images and use with your punches, here I have the soccer ball from "Sporty Accessories".
It is also nice for putting over images, which leads me to our next sneak peek set, Rupa Shevde's "Back to School"! I couldn't help use them together to show how many fun school projects you an do with both in your collection! Here I stamped it over the adorable stack of books and apple from her set to make a card for my big second grader.

To create the "spine", make a regular A2 card, then score again about 3/4" inch over from the center, fold and adhere with Scor-Tape. I stamped my solid line from "Inspiration Mosaic" across the spine in pairs to make a detail that match the books in the stamp image.


Inside my "book", I added the little pennant from "Sporty Accessories" and the "2nd" from "Just So Sporty" to go with this new "Back 2 School" greeting (more shaped greetings that fit the pennant and the megaphone! yeah! I stuck a bunch of these flags in cupcakes for the kids this week, they were a big hit!) and "Grade" sentiments included in the "School, Sports and Spirit!". Use that with numbers and you can recognize and scrap any year of school you need! The star and A+ are both from Rupa's set". It's going to be a ton of fun using all these images together for school pages!

Would you like to win "School, Sports and Spirit!"? Please leave a comment on this post telling me what hobbies, pastimes and activities your family is most involved in and traditions you might have that go with them (Friday night games, tailgating, dinner after awards etc). I will choose one person randomly to win the set and will announce it on my blog Thursday before the party!

For more inspiration with the stamps previewed today, visit Gina's blog as well as Melanie Muenchinger, the illustrator of Sports, School, Spirit.
For even more projects with tonight's two stamp sets, these Senior Design Team Members are participating in previews today: Carolyn, Cindy, Donna, Emily, Erika Jessica, Lee, Lynn, and Theresa as well as our CenterStage Spotlight Design Team members: Tina Gilliland and Vicki Dutcher

Don't forget about our Release Party on SCS starting at 7pm CST on Thursday, August 27th. There will be contests, challenges, lots of chatter as well as a ton more samples shared by the Senior Design team members and our CenterStage Spotlight team too. We'd love to have you join us!

Monday, August 24, 2009

Sneak Peek: A Year of Leaves and Fruitful Harvest

The set giveaway is closed, see the winner HERE!

A year after releasing "A Year of Flowers" for Gina K Designs, I am thrilled to bring you "A Year of Leaves", a nature set filled with greetings and images that will take you through the entire year, year after year, no matter the occasion! The changing seasons will allow you to color this festival of leaves in Spring and Fall combinations you will love. (Try adding them to your "A Year of Flowers" images, for stunning greenery or spectacular seasonal bouquets!)

The card above uses the new Gina K Pure Luxury Pumpkin Spice and Green Apple Cardstocks. The greeting is stamped on Summer Sun and the leaves are colored with Copics.


Leaves symbolize beauty, life, growth, change, and ultimately, death. We all have times we need to celebrate or recognize each of these themes with a card to a loved one, and you'll be able to do them all, (even masculine cards!) with this ONE set.


Now, I didn't think a a set of leaves would be complete without a hungry little caterpillar! I have always been fascinated with them, even before I was old enough to truly appreciate the miracle I held in my hand: the humblest of creatures transforms into one of the most magnificent in all creation. Here is a leaf scape made from one leaf image, masked and colored with Copics and the popped up caterpillar. I masked some diagonals and sponged to create some sunlight pouring down on this scene and added the first half of this wonderful Richard Bach quote (included in the set):

"What the caterpillar calls the end of the world....

to reveal "... the Master calls a butterfly." (It gets me weepy every time I read it!)

I made the inside a pop up card using Gina K's "Take Flight" butterfly to hover over the sentiment and another pattern along the bottom (butterflies!) from the same Basic Grey Ambrosia pack I used on the card front. Card base is the new Gina K Pure Luxury Moonlit Fog CS, a fabulous, elegant neutral. This story of the caterpillar and this sentiment of change is such wonderful reassurance when a door is closing, be it a job, relationship, opportunity, losing a loved one; it's a gentle reminder that the story is not over and God is calling us to become butterflies...
Would you like to win "A Year of Leaves"? Please leave (ha! get it? "leave"?!) a comment below telling me your ideas for the leaf set, I will randomly select a winner and announce it here on Thursday before the big party! :)

Before you leave (there I go again!) one more peek! This next sample uses Asela's new "Fruitful Harvest", my favorite image from it being these grapes. (Do you know, I came this close to adding some grapes to my "A Charmed Life" set I released in March, but opted to give you more quotes and charms at the time... well, now we have some grapes to go with my glass!! Hip hip hurray!) Don't they create a beautiful focal point here? A match made in rubber heaven!
Images (and quote, also from "A Charmed Life") are stamped onto Gina K Pure Luxury White (edges sponged with Antique Linen Distressing ink), I distressed the edges and matted onto Pure Luxury Black Onyx and Soft Sand, added some ribbon and a real charm, which was fun to bring attention to the stamped leaf charm I added to the stem. I really look forward to using both these sets for my fall and holiday cards, very seasonal and festive!


To create dimension and have the grapes show through the glass:

1. Stamp the glass.
2. Stamp the grapes separately.
3.Without re-inking the grapes, stamp them AGAIN over the glass image.
4. Cut out both and color, coloring the grapes paler on the glass.
5. Adhere with pop dots to card, lining up the grapes on the glass with the grapes behind it.


For more inspiration with the stamps previewed today, visit Gina's blog, as well as Asela Hopkins, the illustrator of Fruitful Harvest.
For even more projects with tonight's two stamp sets, these Senior Design Team Members are participating in previews today: Carolyn, Cindy, Donna, Emily, Erika, Kurtis, Jessica, Lee, Lynn, and Theresa as well as our CenterStage Spotlight Design Team members: Denise Kelemen and Geri Utterback


Our Release Party will be held once again over on SCS starting at 7pm CST on Thursday, August 27th. There will be contests, challenges, lots of chatter as well as a ton more samples shared by the Senior Design team members and our CenterStage Spotlight team too! You won't want to miss it!

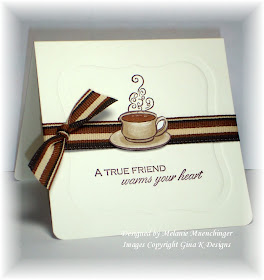
Heartwarming Cuppa'

Here is a CAS card made with only contents from the Stamp TV Kit Signs of Autumn. I made a square card from the Ivory Pure Luxury CS, rounded the corners with a punch, and embossed the Labels One die on the front. Next I stamped the coffee cup and greeting in Vivid Coffee Bean ink. Then I popped up a cup I had colored with Copics over the striped ribbon.


This is a fabulous kit! Get it! :) Gina K Sneak peeks start at 10PM CST Monday!!

Sunday, August 23, 2009

Deep Purple

Only a few more days left to get the Free with Three set "Tropical Windows" for FREE! :) Here I paired this popped up a flower image from the set (which I inked up with Almost Amethyst and Lovely Lilac markers before stamping) with "Inspiration Mosaic". I took the small square outline from the mosaic set and stamped 4 more times to overlap the grid and create more little facets, then I colored with several shades of purple Copics, isn't that pretty using different colors to fill in the squares, as if the colors are blending to create a new color when they intersect? Mat is 4 x 5 1/4" Lovely Lilac, edged with black marker and card base is Almost Amethyst. A very simple card!

Have a blessed Sunday! New Gina K Sneak peeks start tomorrow!!

Friday, August 21, 2009

Twilight Inspired...

Wanna win a free stamp set?! Calling all "Edward" fans, create and post a card inspired by the film/book "Twilight", link it on Cammie's blog here, and you could win a FREE Gina K Designs set of of your choice! In the link above you can read all about the challenge her daughter Kara has thrown down (along with mother /daughter samples, how fun is that?!)

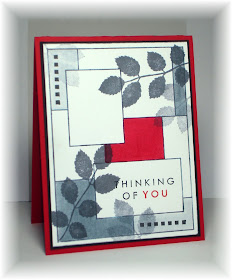
I didn't go as literal as I could have with this, but obviously the red, white and black was a must (in addition to the cover art for the novel these colors all have a lot of symbolism in the story), the sahdowy gray leaves add some mystery and atmosphere, and the "Thinking of You" (ahh, young love...to be truly be thinking of someone ALL THE TIME! LOL!) fading over to red (since he craves her blood, get it?? ok, maybe not!) Anyway, I hope you like it! (card uses "Inspiration Mosaic" and leaves from the"Signs of Autumn" StampTV kit) BTW, You can read the whole series in about a week and get lost in it, although you might feel a little guilty for doing so. Making sure you know what Rob Pattison looks like before reading really adds to the experience! ;) I'll go ahead and add a nice one for you...

(sorry, i didn't realize it would be so tiny, I'm sure you're straining for a better look!)
I hope you'll play the challenge, but you better step on it, you have until 8 AM CST this Sunday morning, August 23rd to link your card for a chance to win! :) (Sorry I didn't let you know sooner! I'm sure you're all busy getting ready for back ot school like I am!)

Custom Clock

I always had a thing for clocks and watches that had little characters on the face, so I thought it would be fun to try my little teddy bear from "Wee Tees" on Theresa's alarm clock from "Timeless Treasures", I've used colors and papers that would be perfect for a new mom.

This is such a fabulous quote about time and so many moments of mother- and babyhood are breathtaking to be sure! Background uses two prints from the Basic Grey Porcelain DP and Apricot for the base and ribbon. I found a piece of the lace trim on the print that was perfect for punching the threading water border along the bottom. The little clock is framed up in a classic and scalloped square Nestaibilties die cuts.

Try picking through your small stamp images to make a customized alarm clock, sure to bring a smile to someone's face!

Thursday, August 20, 2009

Guest Designer: Jennie Harper

A little inspiration today from my guest designer for "Inspiration Mosaic", Jennie Harper! I LOVE this monochromatic card she made! She used Blue Bayou and Soft Sky (retired SU colors). and sponged over the the Floral Fantasy CB panel with Soft Sky ink. The greeting and dandelion are stamped white CS and embossed with Clear EP and heavily sponged with Blue Bayou ink to make it POP! The delicate white stitching on the ribbon is so perfect with the tiny white spores and san serif font in this set, isn't it a great look?

For another project with this set, please see Jennie's blog and leave her some love! ! :)

Tomorrow I will have a sample with the current Free with Three set, Tropical Frames, and it's only free for one more week! Can you believe the next Gina K Designs release is just one week away?? eek! One of our biggest releases EVER, and I have TWO sets coming out! can't wait, can't wait!!

Wednesday, August 19, 2009

Creating Patterns...

Is it DP or is it stamping?? Today I have a card I made using just the square images from "Inspiration Mosaic" and one of its greetings. ( This card also works for my color challenge for this week on STV, click here to see another sample I made using the mosaic and the challenge colors: black, white and green!)
A gridline block makes stamping a pattern with unmounted rubber as easy as using clear stamps! NO stampamajig used here, just keeping the lines on the block parallel to the top and side of the paper. Once you have a row you can also line up the lines on the blocks through the middle of the diamonds in the row next to it, see? I placed the solid and outlined squares tip to tip on my block and went in rows, alternating the pattern by shifting up one each time so it would go black white, black white...
Here you can see my images on the block. Once I filled the mat, I cleaned my stamps without removing them from the block and went back with Certainly Celery in the spots in between my stamped black pattern, refer to top pic to see the finished pattern.

I then made some celery and black and white mats for my greeting, adding the tiny squares around the "thanks", then moutnign it on a digonal to match the diamonds. I edged all the mats with a black marker to match my square outlines and a few punched corners to make the black pop. If I could do this card over, I would re-ink my pads first they are not as vibrant as they should be here, I've really been giving my pads a work out! Fortunately, the transparency of the organdy with the solid black edging kind of makes up for the not-so-black black ( I hope!) Cardbase and mat are Pure Luxury.
Try making your own patterns with the little shapes in this set! Next I'll do some "spots and dots"! :)

Tuesday, August 18, 2009

Transportation Inspiration DP!

Today I have a 4.25" square card and some "homemade DP", I started by cropping down "Inspiration Mosaic" on one end and then ran a black marker along the cut side to give it a new border to match the other sides. I used a greeting and most of the images from Rupa's "Are We there Yet?" set in the blocks.
I put the greeting into a box that fit it nicely and used the dashed and straight line below it to make the space more like a square and then the line, dash, line below kinda looks like a road, no?? Since I wanted to fill every space I just masked off each area with Post-Its, just lining up the sticky edges with each border and stamping each image with Memento Black onto Pure Luxury White. (Most I only had to mask on two sides but a couple I masked three...) I chose which image went where based on their sizes and to alternate them going in different directions. I love the finished "on the go" look! I matted it on Rocket Red (edged with black marker)and popped it up onto the base weight Pure Luxury White card. The greeting square is colored in red to match.

I hope this gives you some ideas about how to create DP with several images from a single set for a totally coordinated background and how easy it is to make the quick change to a square! (Next I'm going to give my grid a well-earned rest LOL!, and share a card using just shapes for a super cool pattern, I think you're gonna really dig it!) :) Stay tuned! Keep in touch! ;)

Monday, August 17, 2009

Stitched Mosaic

I have a nature inspired "Inspiration Mosaic" for you today, using Gina's "Tree Silhouettes" images and greeting. I colored on the images directly with brown and olive markers and stamped them onto the olive stamped grid (mat is Pure Luxury Soft Sand) grid, masking the edges of the frame.
TIP: Be sure to stamp the images again without reinking so you get the fainter version for some that look farther away. Next, I sponged some Cream White ink over it for clouds to give it some atmosphere, and created the sun/moon by sponging over a punched circle before removing it. I drew the little birds by hand. It is so faint in this pic (that I might just need to stamp it again!), but I stamped a faint mountain from Theresa's "Happy Camper" set where the circle is in Versamark, makes it feel like a complete scene (but I guess I need to rei-nk my Versamark pad, LOL!). Last, I distressed the edges of the mat, adhered it to my Pure Luxury Green Apple Card base, and then stamped the stitched line from "Inspiration Mosaic" all around the border in Vivid Coffee Bean. I love how easy it is to make borders with this set, it is so simple to line up with a small grid line acrylic block.

Happy Monday, hope you week is off to a good start! Tomrrow I'll share cropping the grid and making some custom DP, stay tuned! :)

Sunday, August 16, 2009

Sporty Mosaic

Here is a sports collage I made with "Sporty Accessories" and "Inspiration Mosaic" for my son, he'll be playing baseball this fall and is really excited to finally be "off the tee"! We don't know what his team colors will be, so I just asked him to pick for the card. I added the "GO" from "Just So Sporty" and "Slugger" and "Love U" banner from "Sporty Accessories" to give it a little "back to school encouragement" as well, he's starting 2nd grade next Monday is really sad for summer to be over.

Some off the images are framed in the boxes like a picture (shoes) but others are placed almost like they are sitting in a cubby (ball and bat, with the ball resting on the line.) The bat, banner and glove are cut out to go over the grid and add dimension. TIP: when deciding what images will go where in my grid, I like to just lay the unmounted stamps directly into the boxes of my rubber grid, it's easy to build my layout this way before I ever start inking anything up, try it! :) Picking just a few colors to add to the smaller boxes and the star stamped with a circle and circle trims finish out the design. (The dots are kind of reminiscent off the holes for the laces in the glove and shoes) After trimming the stamped grid I ran my black marker around the edge off the mat to give it a double border. Cardbase is Yoyo Yellow. It looks pretty tolerable with just orange, black and white! ;) I'm really digging these sets together, the result I think is just as appropriate and cool for a kid who's 7 as for one who's 17!

Have a wonderful Sunday, I've got a busy week ahead preparing for our next release, less than two weeks away! :) Did you all see the coupon code in the new Stamping Lifestyle Magazine on STV? If you have a wish list, you'll want to taake advantage of that savings this week, code ends August 21st! As for the rest of the issue, I believe I'll be making an infinity board per that article's instructions for taking pics of the new release samples, be sure to check that out!

Friday, August 14, 2009

Elegant Post Blog Hop!

Time for another hop! Today we are focusing on Nina Brackett's "Elegant Post" set!


The post image in this set is very tall, so to add even more versatility you can flip it like I did here and use the base like a pedestal (or a cake stand?!) for a smaller focal point. The fine lines and intersections of the "Inspiration Mosaic" grid are a perfect match to go with the bars of the cage in this image. I added a rain dot heart over the birds silhouette and a smaller one on the rooftop. The stamped cage is beautiful without coloring, but I brought in a few shades of pink (Blush R20 and Tea Rose E93) to match the Basic Grey Porcelain print. (Nina has two gorgeous sets of digi papers she created that use the colors and patterns you see in the banner above, but my color printer is not working right now-wahhh!) I filled in the outside of the grid with one of the pink Copics and edged it and my focal point mat with the chisel tip of my Black Copic.

TIP: The mosaic grid also helps you with placing your images: see how the vertical at the top goes down through the top of the cage and seems to come out through the post to the meet the vertical at the bottom? It creates such a nice flow when you use these lines that draw your eye around the card and unify everything. Also, how the rectangle shapes under the focal point frame the top left and bottom right corners? That's what helped me figure out how high to mount it! It left the perfect spot at the bottom for a sentiment from "Elegant Post" (I used a Stampamajig to make sure the line fell exactly in between the two words so you can read it!)


Last I added some punched Pure Luxury Black Onyx scalloped corners under the mat to make it more "girly", and a "brad" to the corner, the circle from "Inspiration Mosaic". (I am getting so lazy adding real bards now that I have that tiny circle LOL!) That little dot balances out the greeting at the bottom, and I chose the circle rather than a square or something else since you have the tiny doorknob and the dots to the "i"s in "Birthday" and "wishes" ( Do I over think these things??) Card base is Blush Blossom.

For more inspiration with her Elegant Post stamp set tonight, please see Nina Brackett's blog. Nina has also designed two gorgeous digital paper pack that coordinate perfectly with her stamp set. They are called Grungy Elegance and Simple Elegance.
Nina has asked her friend Silke Ledlow and Melissa Czapor to join in her blog hop tonight. We also have several of GinaK's Senior Design team members participating: Cathy, Donna, Emily, Erika, Jessica, Lee, Gina, Kurtis and Theresa
And finally, be sure to check out our CenterStage Spotlight Design team members' blogs: Brenda Turner, Shannon Bracken, and Sue Walsh for even more great projects!

Thanks for stopping by! Have a great weekend!

Arranged with Love Notepad

Here is a notepad I altered last month but hadn't shared yet ("Arranged with Love", I've missed you the past couple weeks LOL! I've always loved brown with aqua, and I was inspired one day at the mall when I saw a beautiful sundress in a fabulous, brown, white and turquoise floral print! I just had to recreate it with the "Arranged with Love" stamp! I stamped the image onto Pure Luxury White in Vivid Coffee Bean ink, left the roses uncolored and used a brown Copic for the background and a turquoise for the leaves. Isn't that fun?? So don't be afraid to try some wacky, unnatural color combos with these flowers; if you like the colors, it WILL work!! (This looks so close to the inspiration piece, I wish I'd had a camera that day!)
You can find these 5x7 note pads in inexpensive packs of 4 or 5. I cut a piece of Cool Caribbean CS the same size as the pad for the front cover, and a piece of Pure Luxury Chocolate Kiss the same width as the pad but a few inches longer and scored twice so it would come up and over the top of the pad. Adhere these to the front and back of the pad with Scor-Tape.
After I took the pic of materials needed I decided to add another panel of white CS I Cuttlebugged with D-Vine Swirls. See first pic. Isn't the large framed flower image pretty on this larger format? Sentiment is from "Many Wishes", the free set from last month but now available for purchase!
Another hop coming up tonight, it should be a very fun weekend!! Happy Friday!!

Thursday, August 13, 2009

And the Inspiration Blog Hop Candy goes to...


waltermouse (who) said...
Melanie, beautiful cards! I really love those Basic Grey papers you chose on the first one. I'm completely inspired by my LSS - I love staring at not only their samples but also the way they've arranged their papers and ribbons into blocks of color. I've tried to recreate the effect of these enormous color palettes in my home crafting area with lots of papers, ribbons, and markers, all out where I can see them. Thanks for the blog hop of ideas and another generous giveaway! I can't wait to get this set at payday! :)
August 12, 2009 10:41 PM


Congrats!! Please send me your snail mail address and I will put all the goodies pictured above in the mail to you! :)


Thanks everyone for playing! I loved reading all your comments, I will be back later with what inspires me! ;)

Wednesday, August 12, 2009

Inspiration Mosaic Blog Hop!

The candy offering for today's hop is closed, click here to see the winner. But for inspiration, scroll down! ;)

It's here! :)


For today's hop, I wanted to share some simple samples that show off "Inspiration Mosaic" differently than I have so far. Both are easy to create, but I love the effect. The first is a card using paper piecing, but this one doesn't look at all like a quilt! Cardstock is Pure Luxury Ivory and Black Onyx. I stamped the grid in Memento Black onto the ivory CS and pieced with two prints from the Basic Grey Granola DP over it. Don't you just love these "textures"? One of my faves in this earthy pack is this gorgeous black wood grain. Really makes this card feel like it has wood panels instead of just paper!
To keep the piecing simple, the black print is all one piece, and then I cut out three separate pieces of the fern print on top of that. And that was it! The greeting from the set on top is one of the top boxes on Ivory cut out and then mounted in the middle, you can pop up a focal point anywhere on the grid, centered it makes a really strong statement. How's that for a masculine card?

On this next card I was going for stained glass look like the Mission style or Prairie School stained glass windows, click here for designs to inspire, modify or recreate. The grid is a little different this time, right?? To give the grid more facets for coloring, use Post-it notes and the solid black line stamp included in the set, it is the same width as the grid border so your new stamped lines will blend in with the original layout seamlessly.
When you adhere the line to your gridline block, simply cover the borders of the small areas you want to break up with your Post its and use the lines on the block to keep your stamped lines parallel to the parallels in the grid. I stamped three new lines at the left, right and bottom of the mat to make three little sections for the green, orange and blue. Next I used the square outline image, mounting the corners diagonally across the gridline on the block and stamping over the horizontals of the grid to make this repeating pattern. It was fun adding all the colors of the rainbow to contrast the black and white for a festive birthday card (a little like modern confetti! LOL!)


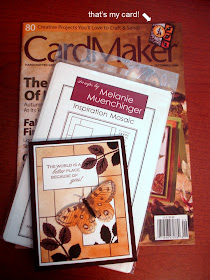
So here's the deal with the blog candy!! I'm so excited about this new set along with 500, 000 hits I added some extras to the stamp set donated by Gina K! Please leave a comment in this post about what inspires you. I will announce a winner this Thursday night. That person will receive a signed copy of the "Inspiration Mosaic" set, a card I made with it, the September issue of CardMaker which features two cards I created using Gina K Designs stamps, an assortment of over 60 Basic Grey and Black Market Designer papers, AND a bag of buttons and brads to match! :) If you already have the set, you can still enter, just promise if you win to give it the stamps to someone who inspires you, okay? ;)


After leaving your comment for a chance to win, it's time to hop!

I have some guest designers joining in tonight:
Jennie Harper, Tina Gilliland, Linda Payne, and Jenny Charboneau


These Gina K Senior DT members have "Inspiration Mosaic" projects on their blogs as well: Cathy, Emily, Erika, Jessica, Donna, Lee, Gina K and Theresa


and finally, don't forget to check out our Center Stage DT members:
Shannon Bracken and Brenda Turner

You Hold the Key...

Here is a card I made with Theresa's "Timeless Treasures" and "Inspiration Mosaic". I stamped the grid and sentiment in Vivid Coffee Bean onto Basic Grey DP, and added some of Theresa's images with a mustard ink pad. I added the hourglass to the other box and popped up the cut out key is strung with some copper cord around the mat. The doubled lines of the "chain" add a lot of interest, I made sure the one on the left line up with my boxed image. Finished it with a few copper brads , and popped up the mat onto the Pure Luxury Soft Sand base.


The Inspiration Mosaic Blog Hop is just hours away!! I am busy getting all the goods photographed! See you at 10PM CST!

Tuesday, August 11, 2009

I Wheelie Miss You!

Here's a card I shared at our party and just realized I hadn't blogged it yet! This uses three sets: "Inspiration Mosaic", Rupa's scooter form "Are We There Yet?"(painted pink here for your best girlfriend!) aaaand, my little frog from "Hip Hop Accessories"! Who knew how well this frog would fit? (or that they could ride scooters??) Can I just say how much I love him waving and posing here??? I didn't use a stamp positioner, just stamped the scooter first and then eyeballed it. His little webby hand will just be resting on the handle and his tippy toe on the frame. :)


I chose a piece of striped paper (DCWV Spring Stack) with the lines going horizontally to suggest the forward movement of the scooter, then used circles of Black Onyx to frame up him and my embellishments (some buttons from Basic Grey Cupcake pack) that were a nice match for the pastels in my DP. I place the buttons at intersections of the grid and placed my focal point on the opposite side, see how you eye follows the piece back and forth down the card? Finally I added the circles trim stamp from "Inspiration Mosaic" above and below Rupa's greeting, (there I go again with the circles!) to "wheelie" tie this theme all together. ;)


Are you ready for the "Inspiration Mosaic" Blog Hop tomorrow? Feel free to add this banner to your blog to let people knowabout the hop and the candy! Thank you!