Thursday, February 12, 2009

I'll Fly Away

Today's card I sent last week to Gina's mom, Ruth. I spoke with Gina yesterday and she said they both got to sit down the other day and go through all the cards that came in, and how much they all meant to them, thank you everyone on their behalf! This card uses Allison's sketch from just So Sketchy, click here to see the original sketch !) It fits in a regular A2 envelope.
I was inspired by the story Gina shared on her blog about the butterfly leaving its coccoon (read here). I wanted her mom to have some butterflies to always remind her of how Gina's dad left his old body to fly away in a beautiful new one, to a new home. I stamped a butterfly from "Take Flight" twice onto a piece of patterned Basic Grey Granola Paper in Rich Cocoa Memento ink, cut them out and added some flocking to the bodies. Your fingers are all you need to add a few bends and curves to the wings for dimension the paper holds the shape. The circle and background are both neutral papers from this pack. I embossed my CB Leafy Branch onto the tan paper and sanded with my sanding block, and drew a brown line around the edge with a straightedge and marker to frame it up and tie it in with the delicate lines of the butterflies' wings. Card base is SU! Bordering Blue. I like these muted colors for this type of card, they're soft but not somber.
The top butterfly is attached, but the bottom one can be getnly pulled away to reveal a greeting! So where's the adhesive? Take two Basic Grey magnetic snaps, put one on the back of the butterfly(which can be displayed on the fridge) and put the other half of the magnet behind the circle mat. Now she has a small keepsake but then can put the pair back together any time she wants. :)
The "I'm praying for you" greeting is from the new Free with Three set "Taglines". TIP: these are straight greetings but you can give them a slight bend when you need to by making tiny snips along the bottom of the rubber (not into your image, mind you!) and anchoring the ends to your acrylic block with a little Dot n roller adhesive to keep the curve down long enough to stamp (Dot n roller adhesive rubs right off when you're done.) :)
I wanted to go ahead and post Ruth's address again. I know Gina was especially concerned about how her mom would do after all those initial cards and letters came in and the house was quiet. It would really brighten her day.
Ruth Aurelio
P.O. Box 164
McFarland, WI 53558
Hope your day is glorious!

Tuesday, February 10, 2009

A Tinful of the Best Things

No, this is not the other long tutorial I mentioned! LOL! And it's pretty straightforward, forgive the short(er) post today, I have a lot going on here. This little Altoid Tin will hold ALL the words (magents) from "The Best Things in Life", I was able to stamp them all in Memento Black ink onto a piece of Gina K Pure Luxury 80lb CS that I attached to a self adhesive magentic sheet( I forgot to write down the dimensions of the sheet I bought but it was about 6x8", similar to the size of the untrimmed stamp set, it was under $3 at Hobby Lobby).
Instead of permanently covering the inside or outside of my tin, I left it a blank slate, the magnets will of course stick on all sides, I love how you can put them around the edge or create your "phrase of the day" for the top. Doing a color or some different DPs would have been really fun, but I decided to keep it all back and white9with the exception of the "pink" and "chocolate" of course! LOL!), classic fridge poetry-style. To dress it up a bit I punched out some flowers with the Basic Grey Cupcake DP and stuck a coordinating Basic Grey Cupcake Glazed brad through each. I bent back the prongs and then used my leftover bits from the magentic sheet on the back so I can decorate the top or inside of the tin or bling up my phrases (there is room to store these inside as well when I'm not using it)

This is a fun little gift to give to a friend, co-worker, child or yourself! Keep it with the tin as a desk set or keep it out on the fridge in the open for the whole family to enjoy....

Back later! the phrase of the day is: caffeinated things make you laugh!

Monday, February 9, 2009

"Open Your Heart" Gatefold* Tutorial

I am so excited to share this original design with you today. Please stick with me through the many pictures, there is a bit of a "wow factor" at the end! It is not that hard or time-consuming to put together (once I figured out exactly how I wanted it!) You'll need the heart Nestabilities, Scor-Pal, embossing folder of your choice and some oval punches (SU!) for this project. (I was also inspired by a couple of my favorite new papers from Paper Temptress to create this special card. ) You'll need two large die cut hearts the same size and slightly larger scalloped mats to layer each. Here I used Poison Ivory Iridescent and Wild Cherry Pop Tone CS.
Then you need to score both hearts and mats down the middle, lining up the "v" at the top going down through the point at the heart bottom.

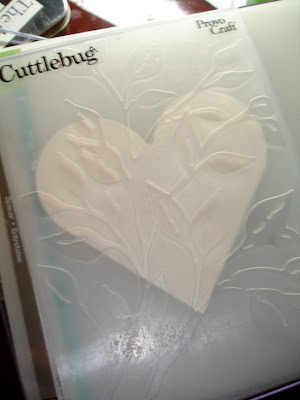
Create a gate fold card with the Poison Ivory base with 5 1/2" x 8 1/2" piece, scored at 2 1/8" and 6 3/8". When folded, the sides meet in the middle. Next I embossed each side with the Leafy Branch Cuttle bug folder. You have to do each flap separately, so emboss your left flap with the left side of the folder(shown below), then repeat with the right, so when they are folded together you will have a continuous pattern across the two flaps.

Now emboss both of the ivory hearts with the same pattern. Place in the spot in the folder where you'll be adhering them on the card (middle, and slightly closer to the top than the bottom), this way the pattern will be continuous when mounted. Adhere each heart to your red scalloped mats.

Put adhesive on only one half of the back of each scalloped heart, one with adhesive on the left side, one on the right. (I used Dot nRoller, but Scor-Tape or Mono Multi will work too)

Fold your scores and adhere your hearts so they wrap around the folds with the adhesive half on the inside. (so you place the heart with adhesive on right back half onto the left panel, and the one with it on the left back half to the right side) When the card is closed, it looks like one heart.
I stamped my greeting "forever" from "Say it with Flowers" and framed it up in 2 SU! large and small oval punch outs (did the same with "friends" from this set for the inside, you'll see in a minute). Then I placed a dimensional on the edge of the left flap in the middle to attach the left half of my oval punched greeting so it will overlap the opening. I did the same thing on the right heart INSIDE, so as it pulls apart, the two ovals kind of "mirror" each other shown below.
If you've ever made a gatefold card, you know it doesn't want to stay closed(and can be really hard to photograph!) To keep it together, I attached a Basic Gay magnet to the right half of the front oval punch, and the other magnet behind the heart on my right flap so that's hidden between the heart and front of the card. The nice things about magnets, you don't have to see exactly where to attach it on the back of the heart, just peel off the adhesive and hold it behind the heart without touching the paper, then move the magnet on the oval towards it, it will jump right into place and snap shut!

I wanted to repeat the red in a few other places and add some embellishments so I punched out a few fancy corners for each flap at the bottom and adorned then with vanilla sateen flowers and a halfback pearl (all attached with glue dots). Don't the flower and the punch look made for each other? I love this flower with the embossing!! And hopefully you can see from this pic why I adore the Poison Ivory so much, it is the exact sheen and shade as these flowers, the sateen flowers add such elegance to a project and the Poison Ivory is like having whole sheet of it!
I added my pearls to each of the framed sentiments as well. Below you can see how the card is holding together with that magnet, ready to spring open at your touch!

And here is how the hearts unfold from each other, revealing the lined inside, this is the Red Pepper Classic Columns CS from Paper Temptress. Beautiful embossed stripes (without having to emboss!), in 8 1/2 x 11 size! This piece is trimmed down to 4" by 5 1/4". (All papers in today's card are in the Paper Temptress Valentines Day Package but can also be purchased separately.) I just love how you still get to see that gorgeous leafy embossing from the front of the card on both the hearts and the flaps on this inside with this design!

I intend to put a picture of my husband and I inside with another framed caption, but still deciding on just the right pic, back with that later! Not just for Valentine's Day, wouldn't this design make the perfect wedding invitation, announcement or anniversary card? And as for symbolism, I'm just over the moon about the whole "two hearts coming together to make one" theme this has going on, you know?? (as well as how they still can be separate, and how in a relationship you need to have open hearts, blah blah blah!! **LOL!) It is such a thrill to come up with a design that not only pleases me aesthetically but also echoes the occasion I am trying to capture, for me it is one of the very best part of the card- making experience!

I hope you'll give this design a try, if so please let me know, and link your creation here! Have a beautiful day!
*which title is better for this? that or "Sweethearts Gatefold"? hmmmm...
** "opposites attract"?? hee hee!!!

Courting Owls

When you stamp out the owl from "Framed Friends" twice you can trim out just the owl on its perch and place the branch ends together to extend the limb. I colored the image with Copics and added a little hand-drawn stem for the popped up flower. I love the expression they have, like an old married couple, I think of the joke about how people start to look alike LOL! I "broke tradition" and just used two colors that were a nice compliment and contrast to the brown and orange rather than matching it all up: SU! Ruby Red and Bliss Blue DP. (There is also a layer of Creamy Caramel that ties in their little bellies.) The red is nice with these warm tones (I chose to make this layer scalloped to go with red petals on the flower) and the blue is tied in with a very pale blue Copic shadow under the image. Sentiment is framed up in SU! oval punches.

No, this is not one of the promised tutorials, but a post I had saved, thankful to have it, William is very clingy today (and it's raining out, perfect snuggle weather) so I'm trying to give him lots of attention. Hopefully I will have one up tonight!

Sunday, February 8, 2009

Birthday Blowout (double meaning)

Thank you everyone for the birthday well wishes for William! (his actual birthday is Wednesday) Here we are in one of the only pics I got the boys smiling: decorating the cake BEFORE the party! It was a Scooby Doo theme (William's fave of the moment) so we piled on the Scooby Snacks, piped on a sentiment and plunked our Scooby poseable slip-slide fashion in the cookies! TIP: buy a plain cake from Sam's or Costco and decorate with your own (washed!) toys and favorite candies or snacks, your kids will really dig it!!

Although our guests claimed to have had a great time, both my boys suffered some casualties about five minutes into the celebration: William high-sticked Jonathan in the eye during mini-golf, and William wiped out running on some black top and took out both knees and an elbow, it was very bloody! (boooo!) Fortunately, Jonathan recovered after about 20 minutes of packed ice but William never quite rebounded, there were a lot of tears shed the rest of the afternoon.
:( Oh well! We did survive and he is happy now with his gifts. Just had to share!

(Still not done with those tutorials, but soon, I promise! (for new samples in the meantime, go check out a few I made "pre-party" in my Splitcoast gallery!)

How THICK is it?!

Just an FYI about embossing with your Nestabilities with Gina K Pure Luxury 120 lb CS (not the 80 lb !): my experience is that the prescribed embossing sandwich for the Cuttlebug (which calls for three pieces of CS and the tan mat) is too thick for this weight paper and will cut through instead of just embossing. This happened to me more than a couple times before I realized there was nothing that kept me from taking out a sheet or two of the those extra CS shims, right? The recommended sandwiches are obviously what has been tried and tested with lighterweight papers (if you have some of this 120 lb paper, I know like me you are probably still fooled from time to time thinking you are holding onto two sheets and it's just the one!) Soooo, try just one or two pieces with the tan mat (depending on how used/warped your B plates are, as well as how deeply you want the embossing) this will give you the results you are looking for!

For a list of all the embossing sandwiches for the Nestabilities with other die cutting machines, see here. Find the one you use if not the Cuttlebug and think about how you can adjust for thicker papers.

Hope this helps! Just want to spare some frustration and cutting through some of that great CS and ruining your design (oh, I know you'd find a way to use the scraps, but still!)

I am in the midst of tryting to get two completed projects written up here for you, I am so excited to share, but the tutorials have more pics than any I've ever done! So it's taking awhile! I appreciate your patience! :) Have a great Sunday! We're celebrating my little boy's 4th birthday party later today!

Saturday, February 7, 2009

Luxury Chocolate, Part 2

Had to share one more designer chocolate bar since they are so fun and easy to make, this time using two sheets from the Basic Grey Bittersweet pack. This print has such a different feel from the other I made, more homespun. I just got these Scalloped Heart Nestabilities so made a cut out in my brown print to have the red distressed print show through. The threading water punch down the sides allows the red to peep through there as well. This time I changed my "The Best Things in Life" sentiment to "shared" (stamped in Memnto Rich Cocoa) and added the little key charm (but no lock!) as a reminder to really share it LOL! I tied my brown satin ribbon around the the red paper below so the knot would come through the middle of my cut out, I really like the look of that, like a big heart shaped candy box with a bow. :)


When I was little I specifically remember two different Valentine's gifts from my dad, he would always come home for work and have something for and something for my mom. One year it was a little pink heart box of chocolates with a silk rose on top, another year, it had a Holly Hobbie on it(yes back in the 70's!)...The first Valentine's Day my husband and I spent together when we were still dating, he snuck into my workplace and had a big bouquet of balloons, tied to a ginoromous teddy bear, we'd only been dating a few weeks but I really knew I found a great guy... :) What's the best Valentine gift you've gotten? Let me know! (But if it's naughty, just smile at the memory and keep it to yourself today pleaseLOL! Too much information for the blog!! ;)

Friday, February 6, 2009

Fortune Cookie View Master

I've been meaning to make one of these view master-type cardswith the fortune cookie from "Have a Cookie" for months! If you've never made a view master card, it's very simple:
For this card I cut a piece of Gina K Pure Luxury White 80 lb 3 1/8" square and a circle 3 inches in diameter. Poke a hole through both in the exact middle.

I stamped the fortune cookie in Memento ink on the square piece over the hole (since I had these cute heart brads I decided to let it show rather than try to hide it in my design), colored with Copics, stamped my greetings, and placed it on top of my Scor-mat to cut out the inside of the paper fortune with a hobby blade.

I put the circle behind it and put my brad through, then stamped each of my cookie "adjectives" (smart, cute, sweet, tough) into the "fortune spot", giving the wheel a small turn each time to add the next word. Slide a circle punch halfway in on one side between the two layers to cut out a notch to give your fingers room to turn the wheel and change the message.

Last I popped this up on dimensionals (one fits just right in each corner on the back of the square) to give the circle more room to spin freely. here you can see I changed it to "CUTE". I just got the scalloped corner punch, which I thought would be perfect for bringing out that pop or red from the brad, and back mat was cut from a scalloped square Nesties. Paper is Wild Cherry Pop Tone from Paper Temptress, SU! Basic Black, and base is Gina K Pure Luxury 120 lb.

I couldn't be more pleased with this how this came out!! Really gives it a nice "fortune teller" aspect, no? Since I still have lots of room left on the circle background beyond the 4 words included in the "Have a Cookie" set, I may just keep on turning and handwrite some more of my own, hee hee! have a great day! If you try a view master card, please let me know, I'd love to see your creation!

Thursday, February 5, 2009

little things mean a lot

"The best things in life come in small packages." I never cease to be delighted by spying a beautiful little flower and when stepping in for closer look finding an even smaller little treasure, a little ruby ladybug!

The sunflowers and bugs are all from "A Year of Flowers". Although I didn't take a pic of the stamp on the block, to get your ladybug to crawl along your greeting, align the bottom of its legs with a line on your block, then flip it over and stamp so that the line goes across the top of your lower case letters, the midline of the greeting, KWIM? I wanted to keep this card clean and simple, with a focus on the colors and the images, so I only did the little dotted line, made with the piercing grid and black pen. (I always try to incorporate a spot or dot element on ladybug cards)


After coloring the flowerd and bugs with Copics, I trimmed them out and popped them up on a rolled up glue dot, they are too small for a regular dimensional but this worked perfectly! I added my Crystal Lacquer to each after adhering. (My little boy was totally faked out by the ladybugs when he saw this card on my desk, thought they were real!) :)

Today's card I actually made for Allison Fillo whom many of you know had a baby (Avery) last month, who has had some surgeries. She was only slightly premature, born at a nice healthy baby weight and is doing very well, praise the Lord! I decided to make something that wasn't so obviously "baby", but inspired by a quote I saw on a preemie's wall I once babysat for, "Some of God's miracles are born small." I thought tiny ladybugs on these happy flowers would be perfect with this quote I put together with words from "The Best Things in Life". (and I was completely tickled when I saw this post after I made the card, think she's going to really like it! Enjoy that little baby of yours, Allison! :)


Have a happy day, everyone! take time to enjoy "the little things"!

Wednesday, February 4, 2009

Want to WIN a Digi Kit??

and see what the "digi-fuss" is really all about?! I know from the comments the other day on the post about the PCP Digi kit many of you are awfully curious about digi crafting but still not sure whether it's for you, here's you chance to get one for free! Create a card (do not have to use "digital" stuff to play) using this sketch from Allison Cope (OR one of her other sketches posted Jan. 28, 29, 30 on her So Sketchy blog, <-- click here to see)....
... and you could win your very own copy of a beautiful digi kit, "This Kiss" Scraps by Jenn" from Divine Digital. (Samples made with the kit and sketches can be seen on Ally's blog. Isn't it purty?!)

You have until February 11 to enter. (you gotta make some Valentines anyway, so why not try to win something FREE while you're at it?) I hope I get to play, too, does being a Sketchy Sista disqualify me?? This started before I got on the team LOL! Send your card creations to Ally at sosketchy@live.com with the subject line "This Kiss Contest".

The winner will receive a FREE download of the digital kit, "This Kiss" - Good luck!!!

Tuesday, February 3, 2009

I Wanna Hold Your Hand

I know most of you have already read about Gina's father, this is the first chance I've had to sit down and make the card I wanted to send her. The different vignettes from "Hand in Hand" here will hopefully remind her of not only me wanting to be there for her, but all the friends and family she has, as well as memories of being with her dad.

You don't need to adjust your monitor, I photographed these earthy tones on a chocolate background today, I was inspired by the Basic Grey Granola pack I just got. I ordered it for "masculine" projects but when it arrived I saw it was so much more than that beautiful, earthy prints, rich, warm colors and textures (although it's not "textured", just to be clear). Isn't that floral DP amazing? I stamped each of the hands onto one of the solid colored off-white sheets in the pack and colored just the backgrounds with Copics to match the paper. I love how the plain border around the colored areas is the same size as the vanilla outlines around each flower on the patterned paper...BTW do you recognize those borders?

An occasional happy accident that occurs from leaving a mess on my desk is sometimes noticing two images I might not have thought about together before! I realized Asela's "Framed Friends" stamps have borders whose curving lines and pen width and stamp size were fabulous for framing up my hand images! Ink up just the border (omitting the image inside) with a marker, stamp, then mask the sides or top of the border and stamp in the hands you want. I trimmed them out and found that last week's 100th CPS sketch would do very nicely. :)


Card base is SU! Confetti Vanilla, I ued their taupe grosgraiN and punched the bottoms with a small corner rounder to match the frame stamp image. I didn't use any "sympathy" greetings I had, instead just "I wanna hold your hand!" I hope it's one she can look at often and know how many people are touched by her.


When I asked her what I could do, you probably won't be surprised to read she is most concerned about helping her mother Ruth right now, and thought your handmade cards and wishes would do wonders! (She and Gina's dad were married for over 56 years.) If any of you are able to send a card to Ruth, we would be so grateful. Gina gave her blessing to share the address here with you:

Ruth Aurelio
P.O. Box 164
McFarland, WI 53558

And to anyone who would like to send a card to Gina, please do! her birthday is this Sunday! Read details here for sending her some mail.

Thank you for reading, have a happy, happy day!

Some Very Sketchy Stuff!


Today Ally is posting the first skecth with samples from her new Card Sistahs, I loved, loved this sketch! (click here to see and play along) I used the new "Sweetest Blessings" set from Gina K and Mary Duffek and my Basic Grey Cupcake pack. All those little strips are actually trimmed from the cover of the pack , you know how they have that sampling of many of the prints inside? (it has a bit of a glossiness to it) Well, these swatches were already the perfect width to fit the card sketch so i just sleiced in between (plus I just love all these different patterns on one card to spice up my festive party theme! the strips in a row on the sketch also remind me of party candles...) :) Every other strip is popped up to give it some more dimension and interest. The base is Gina K Pure Luxury 120 lb white and the image is stamped in Memento Black and colored with Copics to match the Basic Grey prints. A little Stardust Stickles swirls on the frosting and Crystal Lacquer on the cherry finished it off!

Let's go see what the other sistahs made!

Monday, February 2, 2009

PCP Valentine Digi-Kit!

Are you "digital" yet? Papercraft Planet is offering a fantastic digi-kit for valentines cards, treat and boxes, with printable paper, embellishments and templates for only $5! All you need is a printer and some nice cardstock to print the elements and you'll be ready to go. Here you see three of the 4 pre-designed cards you can easily assemble, and a mini-pizza box you can make with some wrapped chocolates (not all projects included in the kit are shown here)

This bird card on the left above? It's just two layers! One Gina K Pure Luxury 120 white for the base printed with all those fun patterns (and I'm lovin' the fonts, colors and sassy patterns in this kit!) and the bird focal point is an extra element for you to cut out and pop up. You also get instruction for how to make each project and examples of how you can jazz them up even more with your own bling. :)

In the pic above you can see more stuff you can print out with the kit. If the fold up boxes aren't "your thing", use that beautiful red print as a one sheet wonder to make several more cards. You can also see the rest of the elements included in the kit I had left over from just 2 printed sheets after I made the cards above.

Here I took that one patterned sheet and cuts outs and made 10 more very simple Valentines with 5 more sheets of CS (1 Basic Black, 2 sheets Gina K Pure Luxury White, and 1 Paper Temptress Pink Lemonade, this last one from the Paper Temptress Valentine's Package , a beautiful assortment of all your favorite Valentine-y colors!) These could have been much fancier with some Cuttlebugging, more ribbon, etc but I wanted to show how quickly you could make some fresh, fun cards with few supplies. I popped up all the extras on dimensionals and added just a couple sateen flowers with rhinestones. Many of the elements are blank and allow you to frame up a stamped image or greetings, which I did on the cards at the bottom.

Here is a close up of three cards I used sentiments from "The Best Things in Life" on. As you can see, that black and pink scalloped circle is huge and frames up this big greeting perfectly, I love it! I created "you are priceless" for the bottom of the simple pink one and made "you & me" (from inking up just the "me" in "memories") on the scallop punch out from the digi paper. I used EVERY wee little scrap, see the vertical border I made from my trimmed pieces?

This last one I used some of the printed Avery labels from the kit as card elements. The little arrows, also from the kits, give it a fun collage-style. I stamped in a few more "best things" greetings, (this was a new one I thought of today after adhering the little printed "will you be mine?" sticker with all the questions marks, "waiting for you!" is the prompt to hurry up with an answer LOL!!

I'm very excited about this new offering from Papercraft Planet and look forward to what other surprises are in store! For more inspiration, check the the rest of the PaperCraft Planet DT and then go download a kit for yourself!

Sunday, February 1, 2009

Have a Cookie (tip)Sheet!

(Edited to add: I just got a request to see all the images, so here you go, I think I will add these to my other tips sheets as well, I can see it does help to see the images I'm talking about as you read, but you can always click on the set name in the post too to be taken directly to the page on Gina K's site!) :)
Pair the cookie stamps with "Home Tweet Home" sentiments from Rupa for the perfect welcome gifts for new neighbors (my 6 year old Jonathan stamped today's sample, stamped in Rich Cocoa memento ink on a winodw bag, cookies made by ME!) : )


I was a little horrified to go back through my blog posts today and see that (eek!) I never posted my tip sheet for one of my favorite releases of mine "Have a Cookie" (why didn't anyone tell me? LOL!) Anyway, here it is, I went ahead and added some links to projects I and other designers have made with the set since November that illustrate many of these tips, so it's even better now! (You can also click on the "Have a Cookie" label on my sidebar and it will pull up all proejcts i've doen with the set, coloring tips as well) With Valentine's day coming up, it's the perfect time for pink and red heart-shaped cookies, isn't it? So xxpect to see new projects and ideas with this set this week! :)


Cutting tips: I trimmed the little crumb stamp away from the cookie it's closest to to use with any of the cookie stamps, just that extra little bit makes it all the sweeter, (crunch!!) I also made clean snips in between the cookie cutter, measuring spoons and the rolled out dough so I could use them separately OR put them all back together spaced like this to make an easy scene.


Use Stickles to pipe on any designs you wish, see stripes on the gingerbread.


Cover your colored icing with Crystal Lacquer. Drop tiny colored beads into the lacquer before it completely dries for sprinkles! or stamp the "sprinkle" image all over before adding the lacquer.


Cover just the chocolate chips using a Sakura Glaze pen.


Use scented embossing powders for a sweet treat!


The single words fit on the top of the cookie(see here) and the fortune in the forutne cookie (see here), or can be used to say: “You are one sweet (smart, etc) cookie!”


Have fun making different cookie combo phrases on the jar “Mom’s Cookies”, “Store Bought Cookies”, Smart Cookies"....


Add googley eyes to the top of the sandwich cookie (the filling will look like a smile)


Make masks of your cookies and stamp them into a stack, see this sample.


Punch out circle or emboss circles on your card to make an easy plate to frame up your cookie images, see here and here.


Stamp your favorite small images from your other stamp sets onto the large round cookie to decorate it. (for example, a flower, etc)


Decorate the cookies with your favorite tiny bling, like heart shaped brads, see this sample!


Make a “made for each other” couple with your gingerbread cookie for Valentine's day, (see here, just change up the colors!)


The longer phrases can be split up to put on the inside and outside of your card. Make one cut in between the first half of the sentiment and the second when you trim and they will stack perfectly back on your block to stamp them together!


Have the gingerbread cookie drag the little Christmas tree cookie. :)


Tie a tag made with this set to a pretty cookie cutter or decorate a jar of cookie mix for the holidays.


Use the star poof of icing and flourishes to make flower and leaf borders on your heart, round cookie, or mats.


Have fun using the decorating bits atop all your cookies or to make sweet patterned backgrounds, see here!


Take a "bite" out of the cookie by tearing a piece a piece of paper into a semi-circle shape and use it as a mask, then stamp cookie over it. Pull away and draw in your line (bite mark!)


Cover the milk and cookie jar with Crystal Lacquer.


Pair the cookies and sentiment "if I had a cookie for every time I thought of you, I'd be one happy woman!" with any of your "lady" stamps! (one like this, coming soon!) :) or pair them up with your animal stamps, pets need treats too, (see Donna's!)


Make doggie treats or kittie cookies for your "Valentine with fur" like Theresa's sample!


Buy a fancy topping and make a label for it to give someone to make their own "Cute Cookies, "Smart Cookies" etc


Projects:


recipe cards, cookbooks, see Carolyn's sample and Carolina's


aprons (see here) , potholders


advent calendars (see Carolina's)


baked goods containers (see Gina's!)


kitchen magnets and shopping lists (see here)


More fun stuff: check out this sweeeet oven card by Rose Ann!


Create a cookie-shaped card for your stamped images like I did in this tuorial.


Make the simple felt fortune cookies like Donna's, your fortunes are already included in the set! (also don't miss her sweet tee!)


Preserve your favorite baking memories with the set on scrapbook pages, like Erika's here


I know there are soooo many others out there (it took me 2 hours to add just these links!), but I really wanted to share this before I forgot again, so if you have a favorite projects you made with "Have a Cookie", or one you remember from someone else's blog, please link it here for all to see! :) Thanks, I'm off to make some cookies!)

So Sketchy!


I'm very excited to announce I've joined Allison's So Sketchy design team for the next 6 months, I am now officially a "Card Sistah"! This means I'll be playing with Ally's card sketches specifically now every month and sharing new creations with them here and on her blog. Hope you'll try your hand at the sketches, too! They REALLY rock!!

If you'll excuse me, I'm off to see who else will be joining me on the new team ans send out some congrats! Maybe some of you? I hope you answered her call! ;)
I'll be back in a bit!