 So many ways to bling it!! A lot of "busy" bling may not be your style, but a few thoughtfully placed dots on a card are like throwing on a pair of earrings to make you look elegant and pulled together before heading out the door! They complete the look! We will have a BLOG HOP tomorrow with the Gina K Designs team for this set and I can't wait to see all the ways they've used it! :) Until then , I hope this gets your creative juices flowing! I may come back to this post and add pics of the different looks you can achieve using the different techniques for your reference, but until then, here we go!
Ink up any of these images with Versamark and stamp. Leave "as is" for a subtle watermark or add embossing powder and heat for shiny dimension. Powders are available with shiny, sparkly, matte or distressed finishes, try them all! Metallic powders like silver and gold look like brads or nail heads. Clear or colored powders or tinsels with shimmer in them look like clear or colored rhinestones.
Have dimensional bling in any coloring inking up the bling stamps with Versamark then inking on a colored pad and stamping. Add clear powder and heat, your colored ink will show through.
Stamp in Versamark and use the dots as a guide to carefully dot/drop on Crystal Lacquer or Liquid Pearls. The lacquer allows the color of the cardstock to show through, the liquid pearls will be opaque.
Stamp in colored ink and drop Crystal Lacquer over it for shiny, dimensional colored dots.
Stamp in white onto vellum for a dry embossed look.
Stamp in Versamark onto colored paper for a dry embossed look.
Get a jar of Sticky Stuff powder to use with your Versamark and expand the possibilities! Ink up the image with Versamark, pour on the sticky stuff powder and heat like you would when you emboss, you now have sticky dots that you can add flock, glitter, foil leaf, colored sand, etc.
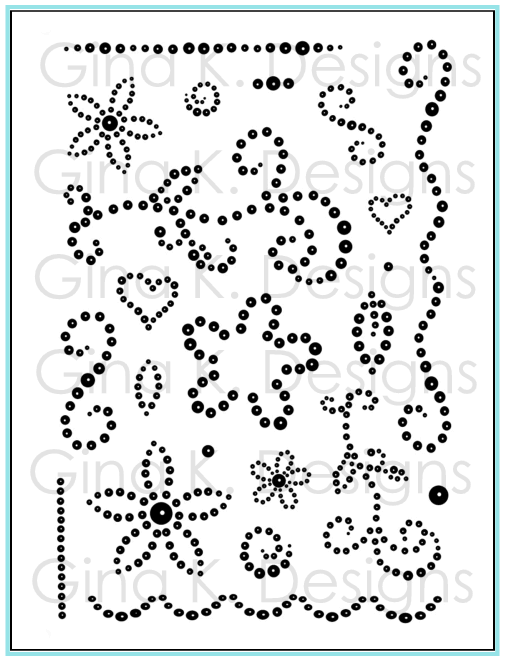
Use the three single big, medium, and little dots in the corners of mats, frames and labels like an accent or brad, or line them up in different orders on your block to go around a curves, add to the end of another flourish in the set to change the shape, etc.
The long die cut swirls, lines and flourishes have a lot of flexibility! Vary the look by curving the image slightly when you put in to on your acrylic block and stamp.
The straight line is perfect to underline or lead to a sentiment or image. It can also be a flower stem or the string to hand an ornament or punch, get creative!
The curvy or scalloped bling looks gorgeous on the flap of an envelope or the edge of a mat on your card front of inside. Tim around the outside edge of the dots with your scissors to enhance those curves for an ornate, blinged border or shaped card edge.
Stack the borders to make more complicated ones, example, the line with scallops below it. Use them to enhance your ribbons: stamp the scallops once and then flip it over and stamp again about a half inch above it. Adhere ribbon in between the scalloped borders.
Stamp them onto solid ribbons to make patterned ones.
Stamp the "S" curves end to and to make a new border, vary the size to change up the look, big, small, big small. You can also create new whimsical border s with just the flowers or hearts, mixing the sizes.
Adding some single bling or tiny flourish at the end of a greeting gives it more flair or can fill out some space around the sentiment within your mat or die cut frame, where you just a need a little "something".
The large flower is open in the middle to add the bling swirls in the middle in a different color or finish. The smaller flower with the roudn petlas also fits inside. You can also add a button or large brad.
Change the look of the large or small flourish by inking up only the parts you want with a marker and stamping. This way you can eliminate the curls, leaves on the sides if you desire.
Use markers to color different dots in the image different colors (direct to stamp) before stamping. Add extra variety by ink up the image in one color and then swiping a slightly darker marker along the very edge or slightly rolling onto a darker pad. This will the outside edges of the bling even more shadowed and dimensional.
After stamping in a colored ink, you can touch up the bling by going over them with gel, glaze or stardust pen. Just put a tiny dot or crescent opposite the highlight, or draw a quick circle around the highlight. You can do the same with the fine point of a colored marker. Enhance stamped colored bling using a Copic Spica or Sakura glitter pen.
Stamp the small and large leaves around the edges of the flourishes or straight or scalloped borders in places that enhance and balance out your layout. Pop up the blingy flower images over it, or adhere Primas, stamped cut out flowers, rolled flowers etc.
The flourishes make a beautiful butterfly, bird, or bug trail and can add whimsy and beauty to any mat or patterned paper. Stamp them onto your mat and layer die cut from over them, with the swirls and flourishes peeking out around the edges.
Clear emboss the flourishes on cardstock or patterned papers and then sponge distressing inks over them for a vintage,weathered look, your dots will magically appear through the ink in reverse!
Stamp the images onto acetate or vellum cardstock and then use the the little highlight in the center of each to pierce through, place a mouse pad or craft pad underneath when doing so. Now you have a piercing template you can reuse again and again, and the best part, it's reversible! Now you can pierce a mirror image of every single swirl and flourish by flipping the piece over, too cool!
You can also stamp onto your paper, piece through and the flip the cardstock over to a pierced look.
Use the piercing for real stitches with embroidery thread or do faux stitching by quickly tracing over the dots with a pen.
Stamp the images onto designer paper to add detail and customize for you theme or to coordinate with your stamped focal point.
Make bold, graphic looking backgrounds by stamping the different images in one to three different colors onto white white or colored cardstock, makes a very fresh, happy background with burst of color in seconds!
Stamp the smaller images like the flowers, leaves and hearts onto colored cardstock or patterned papers and cut outside the dots to make blingy embellishments.
See you tomorrow for our hop and more inspiration!
Melanie thanks for the tip sheet. I ordered it and will try some of the ideas.
ReplyDeleteoooh this does look interesting!Thanks for the heads up:)
ReplyDeleteWonderful tip sheet -- I now need to go order this stamp set -- It will add a lot of variety to my cards!
ReplyDeleteGotta do this quick I need to order your stamp set...a great big THANK YOU for those creative $ juices flowing. Yippee!! And the tips...well don't they just hit the "nail" on the bling...yep, yep, yep!
ReplyDeleteI wasn't sure what to do with your bling stamp set. Now I have some great ideas. Will definitely have to order.
ReplyDeleteOrdered and now the wait...there is just some about YOUR stamp sets that make me want to create. Wow, I am sooo excited about getting this set. The blog post is already saved in YOUR file...then when the stamps come...there I go!
ReplyDeleteThank you for the tips...I ordered this stamp set so will be giving tips a workout!!!
ReplyDeleteJan Castle
Thanx for the great tips. It really makes me want to get this set which I will do soon.You gave me so many ideas. I printed out the tip sheet so I won't forget. You have a great site Melanie,I always enjoy seeing what you post!!
ReplyDeleteCan't wait for the blog hop! I've been waiting for a stamp set like this. I'm going to buy it today, yay! Can't wait to have it and start playing with it. Thank you for the tip sheet, it gives me lot of ideas to work with. :)
ReplyDeleteHugs, Debbie Meijer.
A beautiful card done in an unusual way! Thank you for the "how to".
ReplyDeleteThat's a tip sheet! Thank you, Mel.
ReplyDeleteAlways a learning curve to these skills.
Keep Looking UP!
the cards are cute, pretty, and great. I like the new sets.
ReplyDeleteMelanie, thanks for all of your tips, most important, thank you for that great stamp set. I purchased it and can't wait to try some of your ideas. thanks for sharing.....
ReplyDelete