Monday, September 30, 2013


Wednesday, September 25, 2013
Inspiration Hop, Day 3: Beyond Baskets 2 and Christmas Joy
Good morning! The Design Team for Gina K. Designs welcomes you to another
fabulous Inspiration Blog Hop! Gina and the Design Team will inspire you
with many beautiful ideas, and as you hop through our blogs, make
sure to leave a comment on each of them because we will choose a few
random comments and those stampers will each win a grab bag of Gina K.
Designs products! To see the full list of winners, check the Big News Forum at StampTV a few days after the hops.


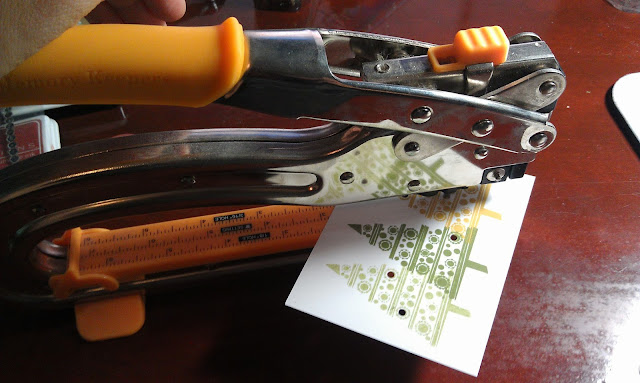
Score at 1" and 2".


For a goodnatured prank,
how about making a "you've been naughty!" version, filled with black
licorice for coal, or worse (depending on how you feel about licorice),
empty? Cross out the NICE with a coordinating marker.


 I used the CB Candy Cane folder to emboss coordinating stripes on Faded Brick and Prickly Pear mats and matted onto a Fresh Asparagus base.


I couldn't be more excited about this new Beyond Baskets 2 ! It's one I'll keep on my desk, long after this holiday season, for all occasions! You can see all the coordinating basket sets here, but today's project uses just this one.
The largest stamp in this set, the tied sack, measures approximately 1 7/8" x 3 3/4". I use a four inch round finger grip block for this and the other containers.
Since I've aready shown alot of cards ideas for the different new containers, and I know you'll see many more beautful cards today on our hop, instead I'm going to show you how to make simple, inexpensive but really unique and festive treatholder for everyone on your list! You'll love playing Secret Santa with these!

Doesn't
that look just like a really tiny bag? (or just some really BIG old
goodies?) Perfect for gift cards, candy, crafty trinkets and more.
Here is a short video showing you tips for stamping and combining these new images and how to make this easy treat holder, perfect for friends, teachers, your sweetie, and little ones! (Unfortunately, I think I must have bumped the camera just before I started, because this one is a little blurry! I apologize, but I also have step out pics for you below if you have trouble following!)
Supplies used: Gina K Beyond Baskets 2, Pure Luxury Red Hot
and White cardstock, Black Onyx ink, Memento Love Letter marker, Sakura Gold
glitter pen, red bakers twine, scissors, Scor-Buddy, Scor-Tape, 1/16
inch circle punch, glue dot.Score at 1" and 2".

Turn and score 1/2" from each side (1/2" and 3 1/2" marks)

Cut flaps.

Fold all score lines.

Turn over and add Scor-tape to end tabs.

Pull together sides and pinch to close.

Just add the cut bags to either side! (refer to photo below for where i added the shadows with the marker) I used this Studio file to cut out multiple bags before I did my stamping. I hope you enjoyed this project!

I hope you enjoyed today's project! I *know* you will love this set! Can't wait to see what terrific ideas you have for it and all the fun things you'll put "inside" these new images. Scroll down for more basket posts if you missed my samples and tip sheet for the set this past week.
Next we have Christmas Joy from Rupa Shevde. The one tree is stamped in Fresh Asparagus, then stamped off to make the lighter one, and stamped finally in Prickly Pear. Greeting is stamped in Black Onyx.

To add more color to these trees, I used my Big Bite to punch out some of the circles in the design that another colored cardstock can show through the holes for a two stamped look. I also added adhesive rhinestones for sparkle and texture.


Now, please enjoy hopping with the rest of the team, and don't forget to leave comments! Hope you've enjoyed out September hops!
Tuesday, September 24, 2013
Inspiration Hop, Day 2: Lots of Lines and Poster Board Christmas
Good morning! The Design Team for Gina K. Designs welcomes you to another
fabulous Inspiration Blog Hop! Gina and the Design Team will inspire you
with many beautiful ideas, and as you hop through our blogs, make
sure to leave a comment on each of them because we will choose a few
random comments and those stampers will each win a grab bag of Gina K.
Designs products! To see the full list of winners, check the Big News Forum at StampTV a few days after the hops.

 I used just a few adhesive rhinestones to accent butterflies' bodies and greeting and add sparkle.
Tip: Roll the edges of the square stamp on your ink pad to pick up just the outside of the image for more texture and variety.


 Now please enjoy hopping with the rest of the team for more inspiration for these two beautiful sets!
First up, we have Lots of Lines by Beth Silaika. You can make stylish cards in minutes with these big bold images and greetings. I made this card for a teacher at school with a fall birthday using Kraft and Dark Chocolate ink. Substitute stars for a male recipient if you want to man it up a bit!

Tip: Roll the edges of the square stamp on your ink pad to pick up just the outside of the image for more texture and variety.
Next up we have Poster Board Christmas from Becky Oehlers, a lovely two step set for the holidays. I stamped the wreath in Prickly Pear and added the dots in Faded Brick. Stamp the sleigh and reindeer in Dark Chocolate and then some score some lines above and below to frame it up. I added some double stitched 5/8 Pure Luxury Kraft ribbon before adhering to my Prickly Pear base. I used two tiny rhinestones to accent the hat and Rudolph, just color one with a red Copic.


- Gina K
- Beth Silaika- Illustrator of Lots Of Lines
- Becky Oehlers - Illustrator of Poster Board Christmas
- AJ Otto
- Carolina Buchting
- Carolyn King
- Cathy Tidwell
- Debbie Corbari
- Latisha Yoast
- Laurie Schmidlin
- Lee Murphy
- Melanie Muenchinger
- Michelle Woerner
- Sean Fetterman
- Sharon Harnist
- Valerie Stangle
Monday, September 23, 2013
Inspiration Hops, Day 1: Winter Blocks and Let it Snow
Good morning! The Design Team for Gina K. Designs welcomes you to another
fabulous Inspiration Blog Hop! Gina and the Design Team will inspire you
with many beautiful ideas, and as you hop through our blogs, make
sure to leave a comment on each of them because we will choose a few
random comments and those stampers will each win a grab bag of Gina K.
Designs products! To see the full list of winners, check the Big News Forum at StampTV a few days after the hops.
 First up we have Winter Blocks by Tami Mayberry. These make for such an easy tags and mass produced cards. After stamping one of the blocks in Faded Brick on White cardstock, I stamped a second block of the same pattern in Kraft Ink (be sure to clean the stamp in between!) I punched out a circle and layered this over the square with a foam square and added a Faded Brick button with a glue dot. This really makes that snowflake pop! The square is layered onto Faded Brick cardstock.
 Before adhering the matted square, I positioned it on the Kraft base,
stamped the greeting below, and then added some embossed rows with my
Scor-Bug and Scor-Buddy to frame up these two elements and bring out the
stitched lines in the square design. I wrapped it up some brown twine and a Kraft button. That's it, easy peasy!
Before adhering the matted square, I positioned it on the Kraft base,
stamped the greeting below, and then added some embossed rows with my
Scor-Bug and Scor-Buddy to frame up these two elements and bring out the
stitched lines in the square design. I wrapped it up some brown twine and a Kraft button. That's it, easy peasy!


Please enjoy hopping with the rest of the team for more inspiration for these two beautiful sets!


Next up we have Let it Snow by Theresa Momber. Branches, snowflakes and a snowman, what a perfect set for your Christmas cards! I just love using different inks to make snowflake backgrounds. First I had to try some of the new Gina K. Designs Color Companion Inks, Prickly Pear, Edible Eggplant, and Moonlit Fog for the different flakes. The pear and fog inks are such nice substitutes for gold and silver for your holiday projects! Aren't these colors so elegant? The Joy is stamped in Edible Eggplant and shifted slightly right and stamped again to create just a hint of shadow. I always love stamping elements from a set into an "O" whenever there is an opportunity to do so!

Next I added a row of coordinating buttons with glue dots. It is so fun picking through the different shades and styles of buttons in the Gina K. packs for just the look you want! Tip: Lay them out first for placement and then adhere them one at a time. Embellish a few flakes with an adhesive rhinestone in the center. Layer onto Prickly Pear and Edible Eggplant cardstock. The opposite corners are punched with a corner rounder, and I adhered the matted stamped panel slightly offset.
Please enjoy hopping with the rest of the team for more inspiration for these two beautiful sets!
- Gina K
- Tami Mayberry - Illustrator of Winter Blocks
- Theresa Momber - Illustrator of Let It Snow
- AJ Otto
- Beth Silaika
- Carolina Buchting
- Carolyn King
- Cathy Tidwell
- Debbie Corbari
- Latisha Yoast
- Laurie Schmidlin
- Lee Murphy
- Melanie Muenchinger
- Michelle Woerner
- Sean Fetterman
- Sharon Harnist
- Valerie Stangle
Friday, September 20, 2013
Beyond Baskets 2 Tip Sheet

All topper images from my basket series can be used with these new containers in Beyond Baskets 2, now available at Gina K. Designs! Woo hoo! Now you have approximately 9 million more combinations ;) (Give or take) I have a Silhouette cut file for this set as well! The one file has BOTH mats and masks, meaning you will be able to cut all these images exactly and with a 1/8" border around, same file! :) Here's what you'll get:

No toppers? Use real tissue paper or patterned paper crumpled and coming out of the top of the bag or box like a beautiful stuffed gift. Be creative! There are so many stamps in your collection already that you will have a blast stamping and peeking out of these boxes and bags!

Bag with handle:
Paper piece this to make adorable gift bags for birthdays and showers (Basket Additions 2 or Basket Blessings), or even use to represent a beach tote, gym bag, or diaper bag!
Stamped on Kraft and it looks like you are brown bagging it, perfect for the craft supplies or fall veggies from Basket Additions!
Any of the flowers toppers coming out of this bag can look like a very modern, fresh arrangement!
Bag with rope tie:
Santa's bag-stuff with appropriate toys, seasonal decorations, paper piece or color with jewel tones like velvet
Color with earthy colors or paper piece with Kraft and it looks like a burlap bag the animals from Basket Buddies or the Halloween spooks from Basket Additions 3 can be popping out of.
Cuttlebug the paper to give a textured, fabric look.
Rectangular box:
Paper piece it to look like wrapped package and place the lid with the tied bow askew as if it's been removed. It works at so many different angles to make the box look very dimensional and give you more variety for your layouts. In this case, stamp the lid first, cover with mask, and stamp the rectangle over it.
Box with the ribbon can be used on its own like flat shirt box.

Use the long image with the flaps, stamped first, and add the rectangle below to create a box where the flaps are open. Draw a line with a marker underneath the front flap to cast a shadow. So cute with the toppers popping out! This box is great for a masculine, we moved or welcome to the neighborhood card!
This long image with the flaps can also be inverted, with flaps pointing down to look like a bed tray. Perfect for putting the spa products on from Basket Additions 2, or a small vase of flowers, perfect for a relaxing or get well!
Stamp just the rectangle on the card front, and then show it open on the inside of the card-surprised!
Stamp on Kraft or brown paper to look like a packing box to stamp the fragile or handle with care or airmail for a sweet care package.
Use Gina's idea to have a real gift card coming out of one of the gift bags or boxes. Perfect for gift giving this time of year!

All the tiny sentiments fit on the tag and cover a wide variety of occasions. Cut it out on pop it up over the handles, the tied cord, or tie on with baker's twine. Pierce the circle with a piercing tool or punch through with a 1/16" hole punch. thread twine through or add brad.
Use the "I made this" on the back of your cards above your signature (followed by the "xoxo" if you choose!
The "Celebrate" greeting works for any occasion. All of these long greetings look terrific stamped on a strep of ribbon or skinny die cut.
If you want to send a naughty card, use a red marker to cross out the "nice" in the stamped you 've been nice tag. The meaning is clear. Add black cut cardstock as coal to sack.
I will have more tips for this set for sure! See you next week for our Inspiration hop for all the new sets!! Thanks for stopping in to our party!
Thursday, September 19, 2013
Gina K. Designs Illustrators Blog Hop...and You're Invited!!
Good morning! Today, the Illustrators and some of the Design Team have put
together a little invitation hop for you! This hop features stamps that
will be released tonight! So come hop along with us and don't forget to
add a comment on each blog. We will pick a random winner to win an
awesome grab bag of Gina K. Design Goodies!!
I am so excited to give you a sneak peek of my newest set Beyond Baskets 2, the newest addition to my bestselling line of basket sets! More holiday and themed project possibilities
abound, and no end to combinations you can make with these new bottoms and all the
previous toppers! There are, however, also lots of ways to go "topless"
(sorry, I couldn't resist) if you don't have any of the additions sets,
by masking in other stamped images to
be poking out, filled with paper flowers, or having crumpled tissue coming out the top, like you see here! Swap out patterns and sentiment and make it a birthday card.


And here with my Basket Additions 3 spookies. This bag is stamped on Kraft cardstock, co coloring! See how easily this image went from Santa's sack of toys to a burlap bag for fall goodies? I just used a W-3 Copic to trace the edges to give shadows, and that's it. Doesn't it look so dimensional?
Of course I've included greetings large (see how" celebrate" fits perfectly stamped on the narrow GKD stitched ribbon?) and small (for this new little tag image!) to go with... :)
Now please enjoy visiting the rest of the team for more peeks of what new stamps will be available tonight at 7PM CST for purchase in the Gina K. Designs store!

- Gina K
- Becky Oehlers - Illustrator of Poster Board Christmas
- Beth Silaika- Illustrator of Lots Of Lines
- Melanie Muenchinger- Illustrator of Beyond Baskets 2
- Tami Mayberry - Illustrator of Winter Blocks
- Theresa Momber - Illustrator of Let It Snow
- AJ Otto
- Carolina Buchting
- Carolyn King
- Debbie Corbari
- Lee Murphy
- Sean Fetterman
- Sharon Harnist
- Valerie Stangle
Wednesday, September 18, 2013
The Peek is Up! (It Really Is)

Final peek now on Gina's blog for our release of new Gina K. Designs stamp tomorrow! Yeah! (I hadn't even though about putting those craft supplies in this bag yet, LOL!) I love this bag image, and can't wait to show some holiday samples with it tomorrow in our party invite and illustrator hop. You are going to LOVE this set!
Any guesses what else the Beyond Baskets 2 set might contain??
Tuesday, September 17, 2013
Wednesday, September 11, 2013
Basket Additions 3 Winner
Sorry I am delinquent in posting a winner form this blog candy post, is it really Wednesday (almost Thursday now!) already?
The winner is
Barbara (who) said...
Well...if I have to pick one as my favorite, I'd have to say it's your original Basket Additions. You have something for Christmas, Valentines Day, fall harvest and that sweet picnic basket of goodies. Very cute indeed.

Congrats, Barbara! Please email me with your snail addy and I will pop the signed set in the mail.
Thanks to all who participated in this blog candy contest. I really enjoyed reading your responses and hearing about which are your very favorite sets and images. It helped me. (Hint. Wink!) :)
Sunday, September 8, 2013
Sale and BLOG CANDY
Have you shopped the Gina K. Designs Super Sale yet? Some stuff is gone but there are still tons of goodies up for grabs!
 Sorry I have been so MIA, just adjusting to our new school schedule, working on lots of projects for publication (ahem, playing just a wee bit of Candy Crush, informative, revealing and hopefully highly entertaining post on that forthcoming) and stamping for our new release in just two weeks!! So lots of cards I can't show you *just* yet. :) Any guess what new set I might be coming out with? I am pleased to tell you I also have a tip sheet ready for the new set, yay! It's been awhile, so thanks to all of who have written and gently demanded I go back to doing these, I needed the extra motivation. ;)
Hey, here's a quick question for some BLOG CANDY: what Basket Additions set of mine is your favorite (click that link to see all the sets) or favorite image topper from one of those sets)? I wanna know! Answer below! I have a Basket Additions 3 set for one lucky reader! (perfect with Halloween coming up!) I will announce a winner Wednesday! Bonus entry: let me know how many of the sets from my basket series you have.
Hope you are having a fantastic weekend!
Subscribe to:
Posts (Atom)