
Today I am sharing one of my favorite "not a card" projects ever, and it is so easy to make with my new "Gifts from the Sea" set! Like sea in a bottle you can create a wave maker to go with the "If you want to know how much I love you, count the waves." Makes a beautiful piece of home decor or paperweight and looks beautiful on a windowsill...lovely beach substitute for a snow globe, too, kids love to shake anything up!
You will need: clear oil (like baby oil), blue food coloring and water, and a clear bottle or jar with a tight fitting stopper or lid. The pretty one below I am re-purposing, it used to contain bath salts. Never, ever throw away a pretty bottle!! Just soak off the label if it has any. Get creative with your containers, this could even be a mason jar or soda bottle...consider who you are making it for to decide what will look best. Optional items which I used in this project: Stazon to stamp on the glass and waterproof labels for adding images to outside (but you could also card stock and just add adhesive or Xyron the back. )
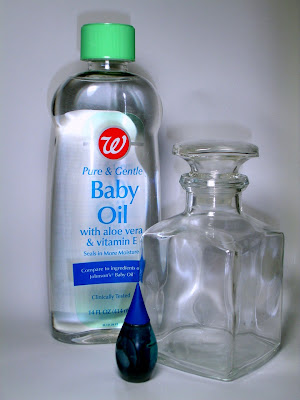 First, just add water! Fill the container about halfway.
 Now add the food coloring, a few drops at a time, until you have your desired shade of sea blue.
 Add the oil.

The layers will separate naturally, looking cloudy at first, by the time you finish the project the bubbles will be gone and the oil will be clear. Add your top. (Glue on if you worry about it coming open, but I didn't here, may add things inside later like a tiny plastic boat or dolphin)
 Here I've tied on some raffia around the neck and added a stamped waterproof label I die cut with a Labels One Nestability, which was perfect for these square sides, and a little cut out shell (all images were stamped on the waterproof labels). If you have a tall bottle, an oval or rectangle would look nice, for a wider container, a Labels Four, etc.
 The stamped sand dollar was perfect for the large stopper. I just love it!!
 Then I adhered a few stamped and colored shells to the bottom on each side. I wondered before starting how the the shells on the other side would look from behind since they'd be white where the adhesive, but was thrilled with how they look through the blue water (there are some on the far right below), like coral further away on the ocean floor. :)
 Another really cool illusion you can create that shows through all sides of the bottle, stamp some of the seagulls using Stazon directly to the glass.
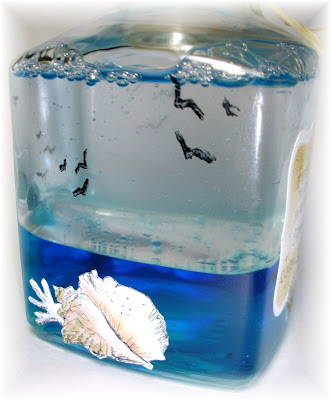
I made this for my son Jonathan in mind, we are in the process of redecorating his room (he asked for sharks) but it turned out so sophisticated looking I think I'll be making one for my husband and for father's Day! I'm excited to see how different they'll turn out using containers of different shapes and sizes. more ideas to decoarate, glue on some real shells, or add a torn layer of sandpaper aroudnt eh bottom on the outside to make sand.
You will need: clear oil (like baby oil), blue food coloring and water, and a clear bottle or jar with a tight fitting stopper or lid. The pretty one below I am re-purposing, it used to contain bath salts. Never, ever throw away a pretty bottle!! Just soak off the label if it has any. Get creative with your containers, this could even be a mason jar or soda bottle...consider who you are making it for to decide what will look best. Optional items which I used in this project: Stazon to stamp on the glass and waterproof labels for adding images to outside (but you could also card stock and just add adhesive or Xyron the back. )
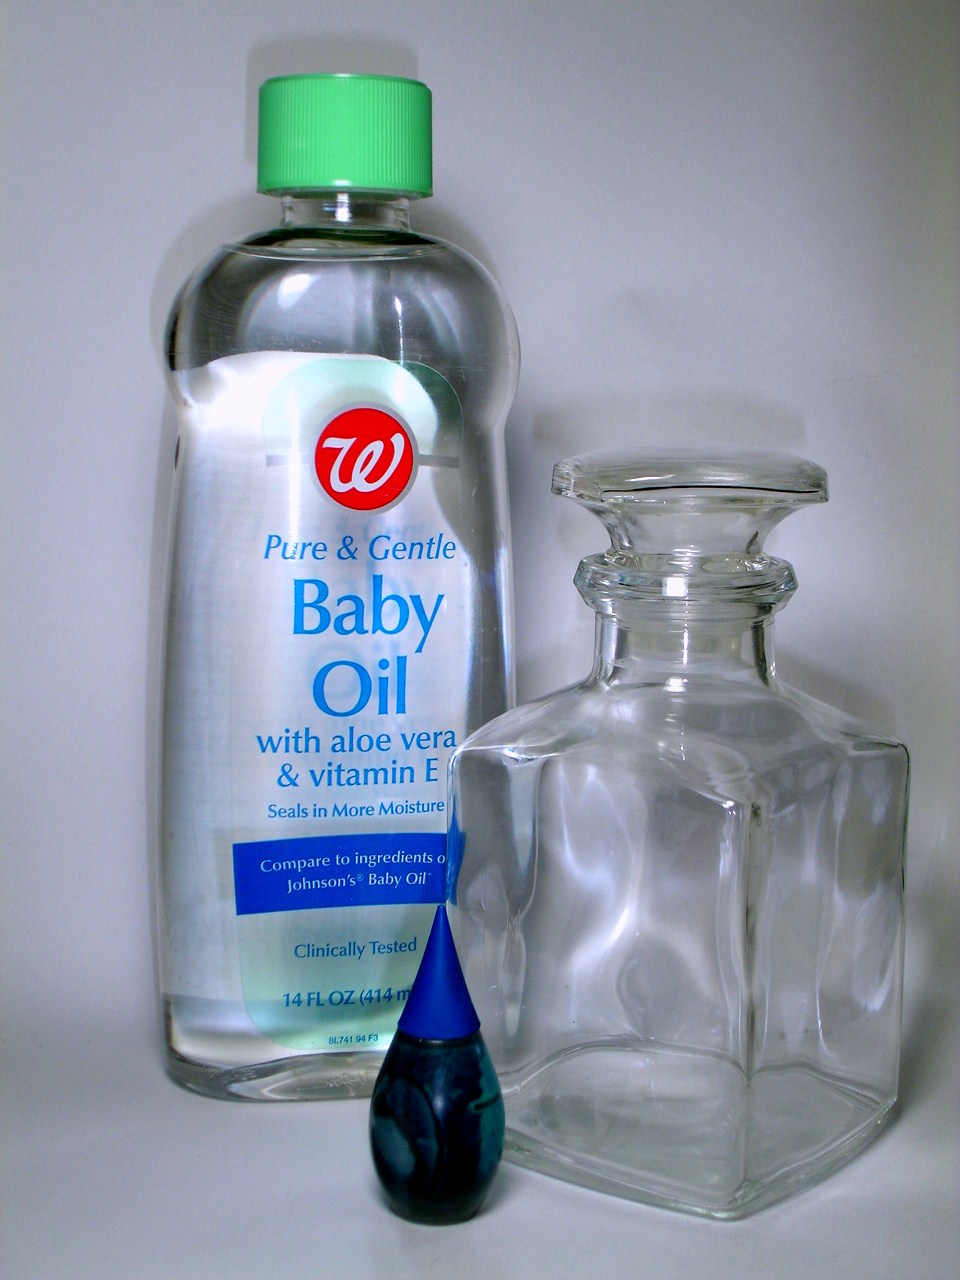 First, just add water! Fill the container about halfway.
 Now add the food coloring, a few drops at a time, until you have your desired shade of sea blue.
 Add the oil.
The layers will separate naturally, looking cloudy at first, by the time you finish the project the bubbles will be gone and the oil will be clear. Add your top. (Glue on if you worry about it coming open, but I didn't here, may add things inside later like a tiny plastic boat or dolphin)
 Here I've tied on some raffia around the neck and added a stamped waterproof label I die cut with a Labels One Nestability, which was perfect for these square sides, and a little cut out shell (all images were stamped on the waterproof labels). If you have a tall bottle, an oval or rectangle would look nice, for a wider container, a Labels Four, etc.
 The stamped sand dollar was perfect for the large stopper. I just love it!!
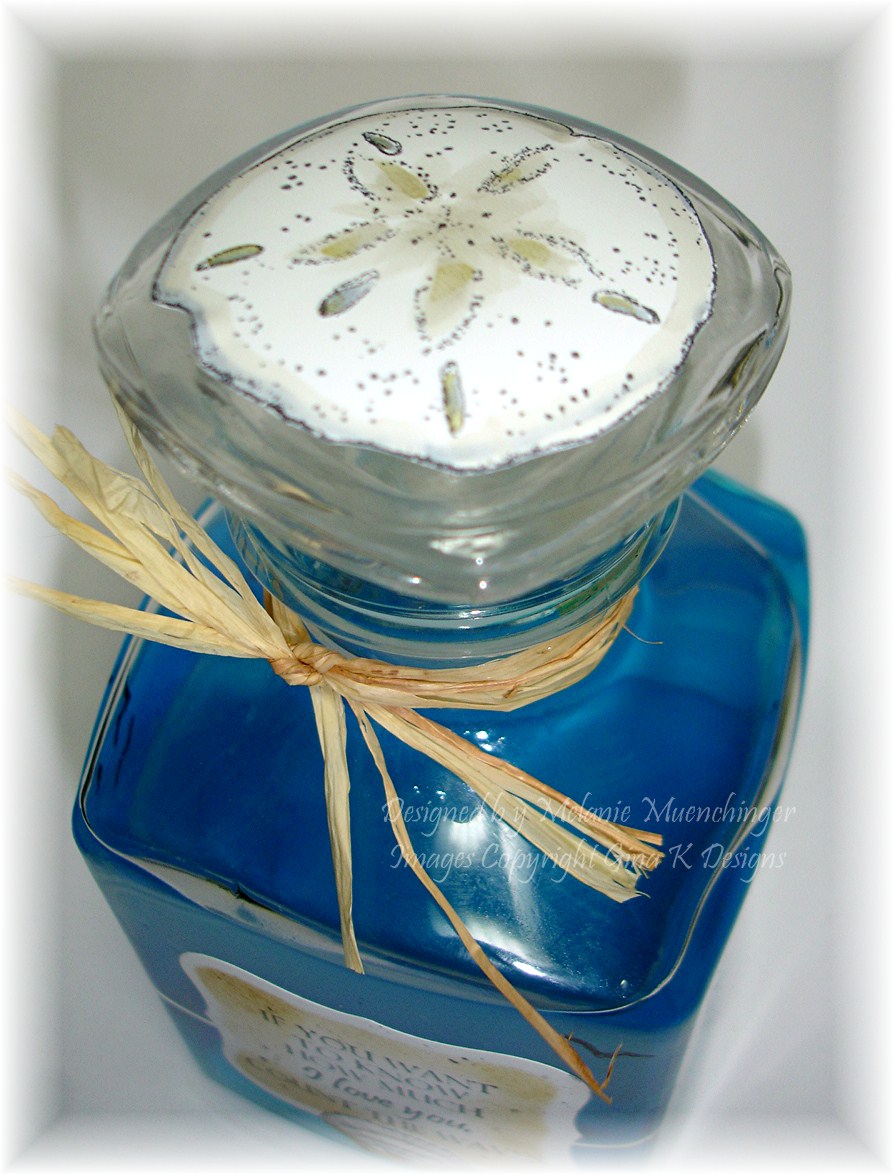 Then I adhered a few stamped and colored shells to the bottom on each side. I wondered before starting how the the shells on the other side would look from behind since they'd be white where the adhesive, but was thrilled with how they look through the blue water (there are some on the far right below), like coral further away on the ocean floor. :)
 Another really cool illusion you can create that shows through all sides of the bottle, stamp some of the seagulls using Stazon directly to the glass.
I made this for my son Jonathan in mind, we are in the process of redecorating his room (he asked for sharks) but it turned out so sophisticated looking I think I'll be making one for my husband and for father's Day! I'm excited to see how different they'll turn out using containers of different shapes and sizes. more ideas to decoarate, glue on some real shells, or add a torn layer of sandpaper aroudnt eh bottom on the outside to make sand.
The video below shows shaking up the bottle and how the layers stay separated, I apologize for shooting it sideways, oops!!
Hope this post was worth waiting for LOL! My arm is burning and I am exhausted (although it wasn't a long project, photographing and typing took more than I had today!), so it might be the last project for a few more days, but I couldn't be more pleased with how it turned out.
Thank you for visiting, hope you have a terrific weekend!
