Good morning! The Design Team for Gina K. Designs welcomes you to another fabulous Inspiration Blog Hop! Gina and the Design Team will inspire you with many beautiful ideas four our newest stamp sets, and as you hop through their blogs, make sure to leave a comment on each of them because we will choose a few random comments and those stampers will each win a Gina K. Designs Grab Bag that could have anything from stamps, to paper, to embellishments! To see the list of winners check the Big News forum at Stamp TV a couple of days after the hops!
First up, we have my new
Beyond Baskets set
. These rustic and whimsical containers coordinate with seven of my previous Gina K Designs sets, plus many more in your stamp collections! The wheelbarrow with its one wheel just demanded some motion, so I easily created this interactive card by cutting out the wheelbarrow, poking a hole through the center of the wheel, and sticking pop dots to the back of the wheel and on the wheelbarrow but WITHOUT removing the backing from the pop dots on the other side, so it only sticks to the back of the image. This just gives it support and pushes it away from the card itself so it
can move freely, but not swing loose after you put the brad though the
mat.
The wheelbarrow stays propped up on the popped up blessings tag when not "in use", hee hee, just give it a little lift! Gardening topper is from
Basket Additions 2. (Like I have a garden, ha! We do have a few herbs, though...basil anyone?) But I like how the
Beyond Baskets' greetings allow to me to say ...
from my kitchen ...garden, or
...home, which is great for all sorts of tags and packaging for foods and other homemade with love gifts! Card uses
Pure Luxury White, Fresh Asparagus, Cherry Red and
Kraft.
Here is a sample I made using the new wagon and a topper from the first
Basket Additions. Now I know Valentine's Day is months away., but I really like this particular image with the candy, bear, and cards for an anytime, pampering, "love ya" stamp! I made this as thank you for some sweet gifts
LEE made for me, because you know if she had a wagon,
that's how she'd roll! ;-)
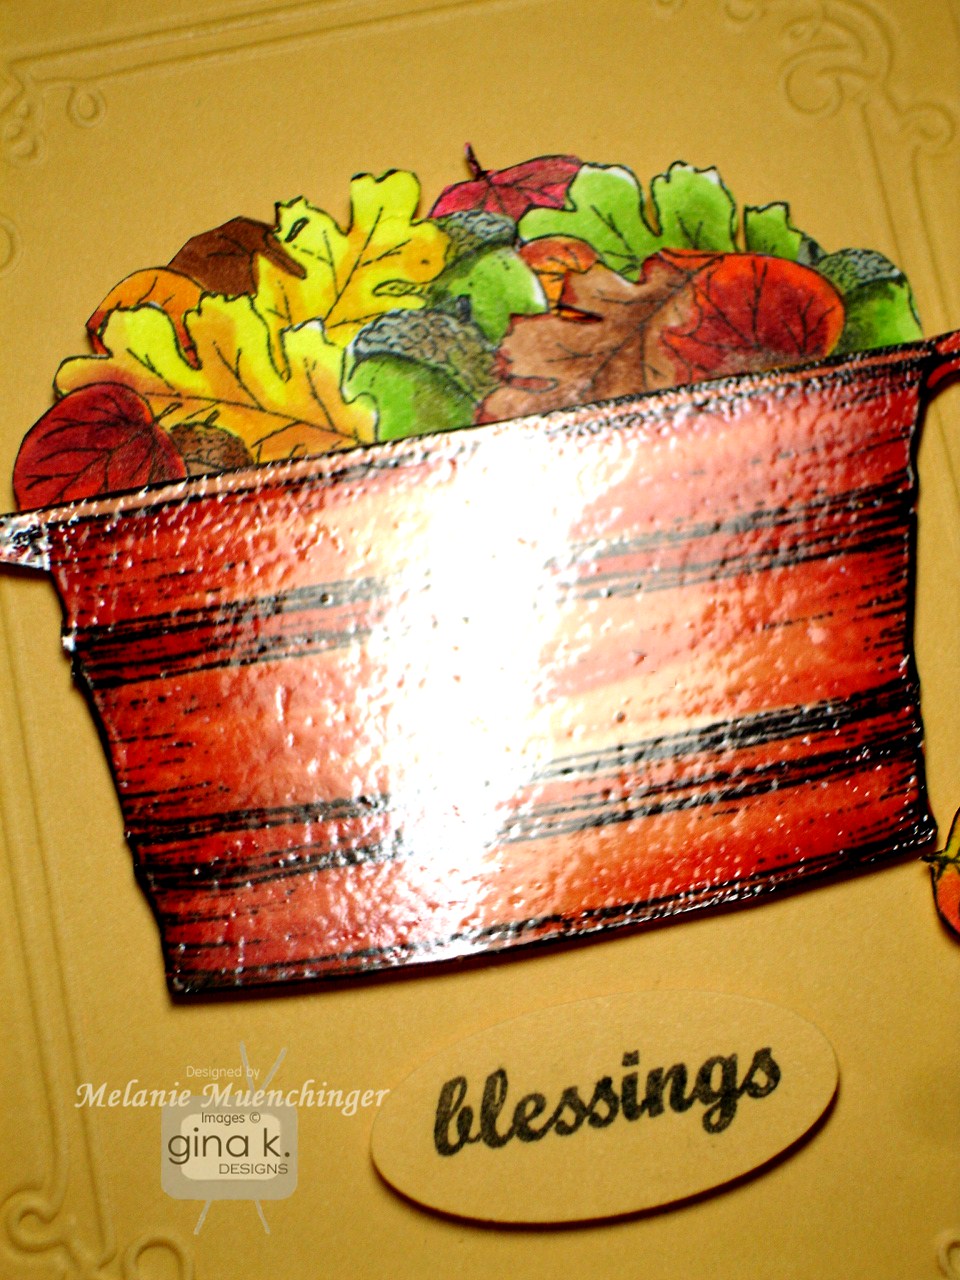
Last, I wanted to show one more idea if you don't have any of the previous Basket or Basket Additions sets. So many ways to fill these masked with other stamp images, piled up punches, paper flowers, etc, but here i filled up the tub (colored to look like copper using YR61 and E08) with the leaf and acorn border from the popular
A Year of Borders set, trimmed to layer into the tub, to make a pretty fall card.
Cardstock is Pure Luxury White Sweet Corn, and Pumpkin Spice. I used
adhesive nail heads at the corners of the embossed
CB Grace's Frame (I get a lot of use out of this folder)
To add some shine, I smacked my
Versamark pad onto the tub before adding the leaves and embossed it with clear EP, which you can really see when I tilted it toward the light! Fun to give the image this smooth appearance and texture, just like shiny metal.
Hope you enjoy this set and all the possibilities! Have fun getting creative with them!
Next we have
Theresa Momber's Joyful Holiday. I love how she provided images for coloring as well as bold silhouettes, which allow you to create a gorgeous Christmas card like the one below with just
two ink pads and
two cardstocks!
I love how the white on white design turned out! The cut files make some really intricate, beautifully cat and dimensional images for mass production a breeze! Begin by stamping the bows at different heights along the cardstock panel. Next stamp on some mistletoe. Add the ornaments in
Memento Rhubarb Stalk and Bamboo Leaves. Pop some up for dimension. Mat on
Cherry Red. Stamp mistletoe on card base, add stamped mat, and finally add cut mistletoe with pop dots.
Accent with
adhesive pearls and
Ruby Red Liquid Pearls and allow to dry. I did have to snip out a tiny part of my popped up mistletoe there at
the bottom, because I accidentally squeezed out too much Liquid Pearls in
one cluster of berries and they ran together! (Nope, not starting over,
the rest looked fab!) Awesome set, Theresa!
Now please enjoy visiting the rest of our design team:
Have a great day!