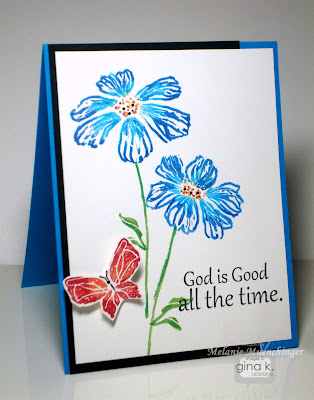
Good morning! Thanks so much for all your kind words this week visiting our hops! :) Going back to Stately Flowers 3 today with my guest Cynthia Olheiser! To remind you, Cynthia lives in Alaska and was a great person to showcase her state flower. Today she works her magic with the two other state flowers in the set, here is one using the bitterroot.
I love that she chose to do a crayon resist technique with these flowers, (loving those pops of white at the ends of the petals!) and then sponged he purple and green in big round sections to give it this great look! The repeating circles in the DP are a lovely complement and the glitter gives it such sizzle! Gorgeous card, Cynthia!
Here is a little more about Cynthia in her own words:
Describe your style/what you think you do best: Clean and simple is probably the style that I would use to describe myself. Most of my card creations are sent to family, friends and church members by mail. I like to keep the layers and embellishments minimal for mailing.
FAVORITE TECHNIQUE: This is really tough because I like to experiment with lots of techniques. However, I really enjoy adding machine stitching to my projects. It’s an inexpensive technique and gives the project a finished look.
COLORS/COLOR COMBO: I tend to gravitate toward “Autumn” colors – browns, oranges, reds, yellows. I am least comfortable using pastel colors.
FAVORITE EMBELLISHMENTS: Ribbon, baker’s twine and pearls
FAVORITE GINA K SET BY MELANIE: “A Year of Flowers”
FAVORITE GINA K SETS (FROM ANY ILLUSTRATOR) The very first set that I bought from Gina was “Just be-claws”. The crab/lobster in the bucket still makes me smile!
CRAFT SUPPLIES I CAN’T LIVE WITHOUT: Copic Markers, Fiskars paper cutter, Cuttlebug, and scissors
I’VE BEEN STAMPING FOR (HOW LONG): I started stamping in the late 90’s when my neighbor invited me to a Stampin’ Up! party.
I GET MY INSPIRATION FROM: StampTV, Splitcoast Stampers, Paper Craft Magazine and various blogs that I visit.
Tell us about your FIRST stamping experience!! I don’t really remember my very first experience. I come from a crafty family and remember making the ink thumb print animals when I was young.
Tell us about your most MEMORABLE stamping experience!! Two highlights for me were making the wedding invitations for my sister and birthday invitations for my niece’s 1st birthday party (then surprising my sister by traveling 2000 miles to be at the party!)
THE MOST IMPORTANT THINGS I’VE LEARNED ABOUT STAMPING/CARDMAKING ARE: Don’t be overly critical of my creations. Create what I enjoy since that’s really what the craft if about.
SOME OF MY STAMPING/CRAFTING GOALS ARE: I have taken a long break from scrap booking and would like to get caught up again this year. A longer term goal is to be published by one of the card making magazines.
ADVICE FOR BEGINNERS: Join various stamping challenges to learn and stretch your creativity. You may be surprised at what you can create when you participate.
FAVORITE THING TO MAKE THAT AREN’T CARDS: Scrapbook pages from our vacations, my nieces and our two dogs (who each have their own scrapbook!). I also enjoy altering frames that I pick up from garage sales.
CHALLENGES I LIKE TO PARTICIPATE IN: My favorite challenge to participate in would be sketches. A sketch really gives me the start to create a card.
Another craft I have a talent for (or one I would like to try): I enjoy scrapbooking, knitting, and cross stitch. Some day I would love to start quilting, but my budget will only allow for one craft at a time!
Tell us about life in Alaska! This is my 19th winter in Alaska. My husband and I moved to Anchorage in the Fall of 1993 and have never looked back! The state is beautiful and we both enjoy the outdoor activities that the state offers – camping, hiking, skiing, 4-wheeling, fishing and hunting. The summer months are generally from June through early September. September is generally raining and lasts until mid-October when the first snowfall can arrive. During the summer months we experience 20 hours of daylight with only twilight during the four hours of dark around summer solstice. Winter months are the opposite with 4-6 hours of daylight at winter solstice. We lose/gain a few minutes each day so it’s gradual, but noticeable at solstice. Of course, Alaska is known for its moose, bear and salmon. We have all three within the city limits of Anchorage! Many moose have taken a liking to my daffodil buds in the Spring…. Munching them as though it were a free smorgasbord. Luckily, we have a 6 foot privacy fence in the back yard to prohibit the moose from reaching our vegetable garden!
TELL US SOMETHING ABOUT YOURSELF THAT MIGHT SURPRISE US…
I have a dual bachelor’s degree in Business Administration and Home Economics with an emphasis in Clothing and Textiles. I took my first sewing class in 7th grade and learned how to use a sewing machine by stitching on paper. It seems as though I have come full circle from my days in that Home Economics introduction class! I still have my Brother sewing machine that I bought in college and it is what I use when adding stitching to cards.
WHAT I DO WHEN I’M NOT STAMPING: In the summer months I spend as much time as possible outdoors. My husband and I have several flower gardens and a vegetable garden. We also spend our summers camping, fishing and riding 4-wheelers on mountain trails with our two Labrador retrievers. During the Winter months I cross-country ski, read and spend time in my craft room.
A FAVORITE QUOTE:
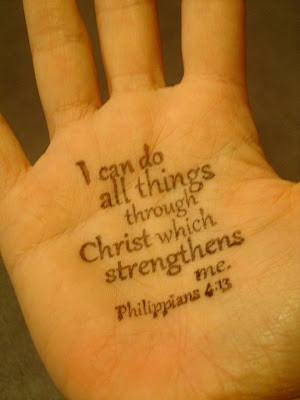
“I can do all things through Christ which strengtheneth me.” Philippians 4:13*
Be sure to visit Cynthia's blog today to leave her some love and see what she did with the magnolia! Thanks for visiting, and have a terrific weekend!
*This scripture is in my new Wild Flowers set :)
 Here I inked up the larger butterfly with a Memento Pear Tart marker and then added a few streaks to the center with Memento Bamboo Leaves marker and stamped.
  Cut out. Snip each butterfly into four separate leaves, or two V shaped clusters. Slip under your flower and arrange as desired. Doesn't this double blossom look terrific?
 The flowers are stamped four times with Memento Angel Pink and cut out. Stamp the separate dotted stamp into the centers inked with Memento Tangelo. Curl edges with fingers and mount one on top of the other with pop dots. I added a bit of Crystal Lacquer to the centers and sprinkled on bit of Doodlebug orange glitter before it dried.
 Finally, Splendid Circles are definitely one of my favorites of the new Spellbinders die sets, can you believe all that pizzazz and detail you get from just one die cut?? I layered a Black Onyx Classic Circle behind it to make the details inside pop more. Pure Luxury White base is embossed with Cuttlebug Leafy Branch folder.


