Showing posts with label Inspiration Mosaic. Show all posts

Tuesday, February 1, 2011

Loving Hands Mosaic

Here is a quickie, single layer card made from White Pure Luxury using "Where Your Heart Is" and my beloved "Inspiration Mosaic" (oh, stamp how I've missed playing with you!!) The rectangular framed hands image is a natural to place over this grid. Here I colored and trimmed out the hands and layered them over Red Hot and Black Onyx cardstock (so this also fits this week's STV color challenge) on pop dots (without the pop dots this would make a really good "flat design" for sending cards to the troops!*), then colored just a few panes of the frame with R27 Copic. Stamp the little greetings and border from "Inspiration Mosaic" into the corner and you're done!

Thanks for visiting! NEXT will be the guest designer card I mentioned, don't have my post written up for that yet, but wanted to get a card up here! Hope this CAS design inspires!

* Wonder where we are at for number of "Where Your Heart Is" sets sold for January?? I'll find out in about week, can't wait to see how many sets all our customers purchased, that's how many cards I'll be sending to OWH! :)

Monday, June 7, 2010

CardMaker July 2010

This month's CardMaker was particularly exciting to receive: if you are published in it, you know what cards that you designed will be in it, but you never know exactly how they will be staged where they will be featured or who else will be included with you..! I literally screamed when I opened the envelope and saw a card using TWO of my stamp sets "Sporty Accessories" and "Just So Sporty" on the cover, not by me but designed by none other than Gina K herself! Swoon!
She has a whole party set inside using these two sets and other Gina K stamps in their "The Total Package" feature! Pinch me, I'm dreaming! (You can also find cards in this issue from my fellow design team peeps, Tami Mayberry and Carolyn King, it is just a big Gina K designs love fest in there, LOL! Way to represent, ladies!)
I was also particularly looking forward to the "Stamping Savvy" feature they are running using my "Inspiration Mosaic" to show its versatility, they peeked one of these cards and did a write up of the set in their last issue. You can see the following three samples and directions for each on pages 24 and 25.

I created a card similar to this one before but gave it a red, white and blue theme for the issue.

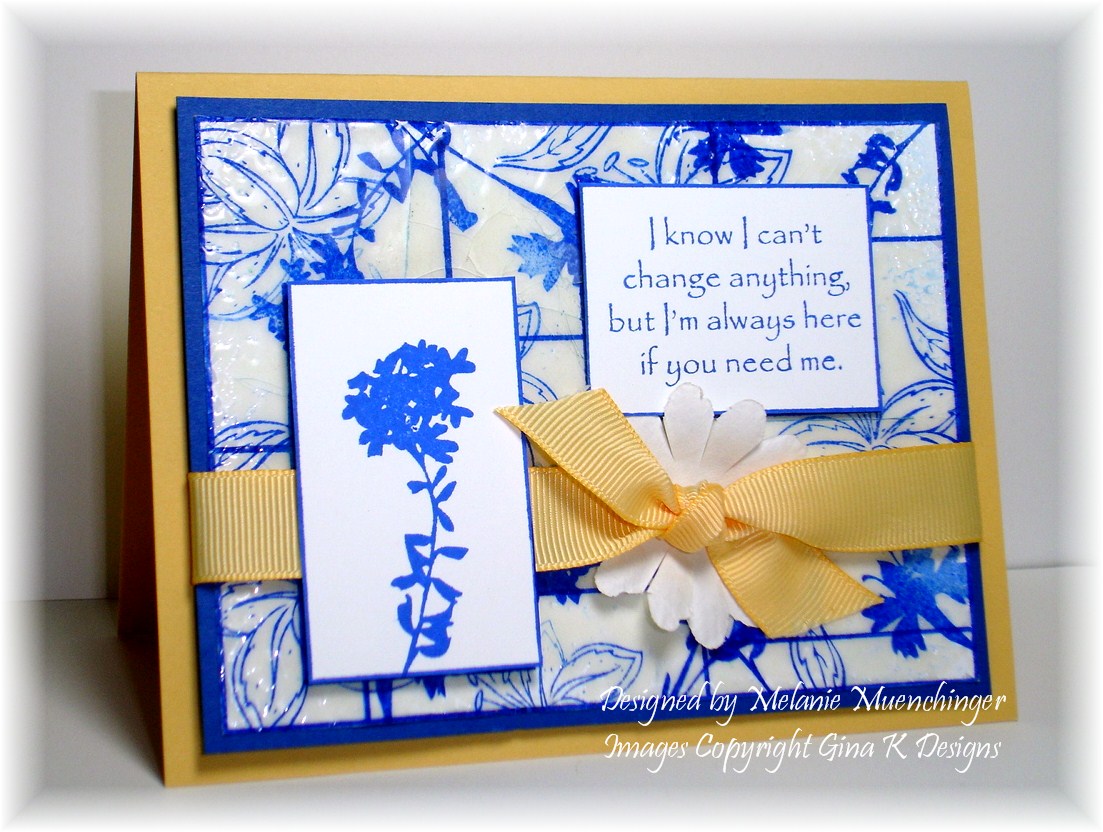
This card features the cracked glass technique.

And finally this one has a little masking and color blocking, without having to cut!
Thanks for letting me share! :) Don't forget to go give Gina a holla on her new well earned "cover girl" status! Thank you Gina for showcasing my stamp so beautifully! :)

Thursday, March 25, 2010

Asian Mosaic

Hello! A new mosaic for you today, with an Asian feel, I knew I wanted to pair it with Asela's koi from "By Your Side" as soon as Gina peeked the set to the team! :) (I had this in mind a few weeks ago, even before Gina threw down the paper lantern inspired challenge LOL! I may just have to go post in anyway!) ;)

For this card I used both white AND ivory: ivory for the background to make my greeting and white lotus pop. I stamped the koi in Vivid Brick Red to match the Red Hot cardstock (mat is Black Onyx), isn't that sharp in red uncolored? I shaded the white cut out flower with aW-3 Warm Gray Copic, as simple as tracing along the undersides of the petals and drawing a quick stripes down the middles. I popped it up and added a white panel with "thinking of you", also from "Inspiration Mosaic", adding a row of squares below from that same set inked up with markers.

I LOVE these two sets together!! :) (BTW, I have a little (big!) secret about the "Inspiration Mosaic" set, I will be sharing very SOON! Any guesses??)


PS As I've told you my husband has a koi pond in our backyard and I think this weekend he is going to be enlarging it, something he has been wanting to do for a long time but was waiting partly til the kids were older so we didn't have to worry as much about how deep it was. (If we are still here after 20 years, and he gets his way, the pond will replace the yard and there will be bridges to get around LOL!) I will have to take some before and after pics for you! ;)

Wednesday, March 10, 2010

Modern Neapolitan

I had to go back and double check all my posts to make sure I hadn't already posted this for you, it is from a looong time ago, but I apparently I never did! I cranked out so many mosaics when this set first came out I didn't have time to show them all before our next release came around LOL! This "Inspiration Mosaic" sample used "100% Sweet"s sundae as it's focal point, all the layers of a sundae were perfect for this color blocking concept! When you cut it out and mount it over the white rectangle it looks like it's sitting on a place mat, and really pops out from the other panels colored in all these yummy sundae colors (all colored with Copics, no paper piecing here)! I colored the bottom of the strawberry dark brown and added a little glaze to make it look chocolate dipped. :) This time I trimmed the mosaic exactly on the edge and then did the matting a little differently with a thick fudge stripe (Pure Luxury Chocolate Kiss) along the bottom and a little punched square at the top corner for balance. Base is cherry, I mean Rocket Red! ;)

I am SO excited, the "Inspiration Mosaic" set will be featured in a publication's "Favorite Products" section in a just a few weeks, I have been on pins and needles waiting for this one to come out! :) Any guesses which??
Hope your day is super sweet!

Sunday, January 24, 2010

Spring Mosaic: Clean and Simple

Today's sample is a card that can be made in less than 10 Minutes and is 3 layers. Base is Pure Luxury Sweet Corn with a 4x 5 1/4" mat of Fresh Asparagus. I stamped the "Inspiration Mosaic" grid onto White and trimmed exactly. Stamp your greeting in the lower rectangular pan, cover it with Post-its, and then stamp a simple arrangement of tulips and lilies from "A Year of Flowers". Color with Copics (use a little C-1 grey to the white lilies. That's it! I took a picture of it at this stage and then added more embellishments and another technique before finishing, which I will share another time, because in this case, quite honestly, less is more! :)
No ribbon, no embellishments on this flat card(great for mailing), minimal supplies, but still very elegant!
Have a great day, hope you enjoyed this Mosaic Monday! Bog hop coming up!

Sunday, January 17, 2010

Mosaic Monday: Chic, PINK Inspiration!

Today's card was inspired by a little thumbnail in an email I received (advertising trendy artwork for sale), of a poster hanging in a beautiful modern bedroom with a gorgeous black bedframe, piled high with back and white floral printed pillows and HOT pink sheets, all of this against a crisp white wall. Well, I could see this card in my head immediately!
Simply stamp the "Inspiration Mosaic" grid onto Pure Luxury White and the new Passionate Pink CS, then cut out two of the sections from the pink to lay over the white. Before adhering these pieces, use Post-it notes to mask off two sections of the grid and stamp the flower from "Square Pegs" into the panes to make this black and white pattern. I am SO excited about this new flower image to make my own pretty, funky floral backgrounds in any colors I want! Stamp this again and punch out the Extra Jumbo flower punch from Marvy and layer onto a Super Jumbo flower punched from Black Onyx. I colored in one small section with a Black Copic but wanted to leave plenty of white space so left the other panes as is. Add the greeting and row of dots to the corner, run a black marker around the edge of your white mat to give it a border, and then layer onto a Passionate Pink base. Don't these colors just sizzle???

Tomorrow night we have a blog hop for my "Sqaure Pegs" set! See you soon!

Saturday, January 2, 2010

Baby Boy Quilt: No Sew!

I loved reading so many comments from the past two days that for many of you "Hand in Hand" is your favorite of all my sets! It certainly has a very special place in my heart, the images all remind me of people who have touched my life. I believe I shared this card at a release party months ago for "Inspiration Mosaic", but I don't believe I shared it here. I colored the image (see my tips for coloring skin and the shades I used in this tutorial) with Copics and sponged Antique Linen Distressing Ink before removing the die. The panel is popped up over the mosaic. The colors and stitched ribbon and brown button give it a definite "boyish" feel. And look how easy it was to create the background...

Stamp the mosaic grid onto a piece of patterned paper (in brown on Basic Grey shown here) and color over select panes with markers to look like a pieced quilt with coordinating patterns of different colors! Did I ever show you the sample I made using the pink piece above and "Wee Tees"? (I'll have to go back and look!)
There will be a RAK request posted soon, along with another Mr.Linky, look forward to more of these this year, I love having you play and stamp along. TWO more days to get your project in for the candy! I really enjoyed going around and looking at all the projects tonight, woweee!! Did you know you can enter more than one project? ;)
Sneak peeks start in less than 24 hours! My first peek for our previews had me trying out a technique that was new to me: a wiper card! can't wait to share, stay tuned! :)

Monday, December 14, 2009

Mosaic Monday

Hello! Today I used the "Inspiration Mosaic" frame to improvise a very modular looking shelving unit, and snuck a few key images from other GinaK Designs sets to fill it out: computer mug, picture and pencil can from "Tech Talk", and made a nature photo and screen saver from "Life is Good". Instead of masking the trees into each, I just stamped them and then stamped the screen and picture over them, and cut out the rectangle to mount on top like I was piecing. the pencil cup is pieced with Basic Grey Granola. Card base is Pure Luxury Kraft. it still needed one small something so I added the little baseball from "Sporty Accessories" into one of the nooks. Oh! and I replaced the heart on the keyboard witha smiley! TIP: An easy way to do this instead of omitting inking up the ehart is to cut out the button and then turn it aorudn and tamp the face on the bck, the piece is symmetrical so you can glue it onon the keyboard that way. :o)

Have a great day, blog hop tonight! :)

Thursday, November 26, 2009

Scored Mosaic

Here is a card I made before the "Inspiration Mosaic" release but hadn't shared yet, realized we are about to get out of the "pumpkin months" for awhile, uh oh! LOL! This was a fun way to use the mosaic for an understated card: stamp your grid on colored or neutral CS (here Pumpkin Spice Pure Luxury), in any color ink, it won't matter because this will be the BACK. Now line up the different lines over your tracks on your Scor-Pal and score away until you have the entire frame scored, I did all the verticals at one time first, then turned the CS and finished the rest. Once done, I flipped it over and now you have this beautiful tone on tone dry embossed look! I mounted it on Ivory Pure Luxury.

I inked up the "Tropical Window" with an olive and pumpkin marker and stamped, then trimmed it to pop up onto the grid. I wanted to recreate that same thin live border on my base as on the image, so I just drew one 1/8" in on all sides with my marker and a straight edge.


Hope this gives you new ideas for how to use that mosaic! :)

Saturday, November 21, 2009

Monogram Mosaic

This paper pieced mosaic uses some of my favorite prints from one of my all-time favorite Basic Grey packs: "Ambrosia", how sweet it is! The easiest way I've found to piece the grid is keep one DP grid whole as a base for the smaller top pieces, here the pale orange and grey print is all one, with 2 - 3 smaller pieces each of the dark gray and dark orange prints adhered on top. I matted the peiced grid onto Pure Luxury Black Onyx and Moonlit Fog, then added some punched curved corners and a monogrammed pieced(stamped with a Just Rite letter over the grid. Last I embellished it nailheads (colored witha black Copic) and ivory sateen flowers.
Thank you for visiting! Curious: would you be interested in doing a Mr Linky blog hop with the Inspiration Mosaic? let me know! :)

Friday, November 13, 2009

Gotta Scoot!

I set out to make this primary colored card with the van or RV from "Are We There Yet?" to make my own color blocked Partridge Family inspired vehicle, but in the end just decided it would be easier to use the scooter LOL! I used a red, yellow and blue Copic for my "Inspiration Mosaic" grid, being sure to leave some white space to make the colors pop. The mulitcolored scooter is cut out and popped up. I added a greeting from the set to the grid, as well as a row of silver embossed dots from the "Inspiration Mosaic" set to go with the wheel theme and added a little silver to the handles and rims. I offset two blue mats at the top left and bottom right corners of the Rocket Red card base to give it even more of a funky, pop feel.

Blog hop tonight!!

Sunday, November 8, 2009

Tropical Simplicity

How about an "Island Christmas"? LOL! Wouldn't this be a cool holiday card?! Card base is Pure Luxury Green Apple with the Mosaic stamped on White in Memento Tuxedo Black. "Tropical Window" image is colored on directly with waterbased markers, and boxes are colored with Pale Olive and Strong Red Copics. I cut it out and then popped it up over the grid! This was super simple to make! :)

Festive Blog hop and candy coming up!!!! :)

Sunday, October 25, 2009

Christmas Quilt

Today I have a Christmas quilt I made using "Inspiration Mosaic" and Basic Grey Wassail DP. I stamped it onto four different prints, the "triangle" print is a solid rectangle and my bottom layer, I add a couple rectangles from the other three red, white and green prints on top of this. TIP: When piecing or coloring the grid, I usually start at one corner and work my way around, alternating colors so I don't have three of the same touching at the end. It also looks pleasing to have a color "bounce" from one side of the card to the next, it draws your eye all around the card.


I put two Scalloped Long Rectangle Nestabilities together to frame the mat. Card base is Pure Luxury Soft Sand. I love a neutral like this light tan with white and red or cranberry for the holidays, gives it such a folk art feel, perfect with the quilt theme! I added a few white sateen flowers and colored the adhesive nail heads with a Cardinal Copic for the Centers. Greeting from "Say it with Flowers" (yes, there's a holiday greeting in that set!) is stamped in Memento Rhubarb.
Have a beautiful day, sneak peeks tomorrow night!

Sunday, October 18, 2009

Mosaic Monday: The Butterfly Inside

Today I have a card I submitted for publication, they were looking for sympathy or encouragement cards that did not have a greeting on the front. It wasn't accepted, but that's cool, now I can share it with you! :) I was really pleased with how it turned out. This is just one more variation on the caterpillar and butterfly themed cards I've done, but this may be my favorite: layering the caterpillar over the body with the butterfly behind it.Because the body of the butterfly and caterpillar (from "A Year of Leaves") are approximately the same size and shape this works a bit like a spotlighting technique even though they are too different images, but what it represents to me is that the butterfly is already contained inside the caterpillar, as our potential for what we can become is already planted inside of each of us, right now.

"Inspiration Mosaic" is stamped in Memento Tuxedo Black on Pure Luxury White and trimmed exactly on the border. I colored a few boxes and the border in a pale blue Copics to match the iridescent facets of the butterfly wings. Butterfly is accented with Stardust Stickles. Cardbase is Soft Sand.
Here is the inside of the card. The quote from "A Year of Leaves" is stamped in black over the versmarked butterfly from "Take Flight" to match the front.

I remember a wonderful story I read while researching Michelangelo for a report in junior high. Though I cannot find the exact quote now, the story went like this: when asked one time how he created such amazing sculptures, he replied that sculpting was the art of "taking away"and said something to the effect of: "God already put the sculpture in the marble. It is just my job to remove the rock around it."
(Sounds to me like a grand approach for life in revealing our true selves...)
I hope this inspires! Have a blessed week! :)

Tuesday, October 13, 2009

Punch it Up Tree #1!

The winner of the "Hip to Be Square" set from our blog hop is:
Jan Castle said...
have to choose the sunflower easel card...all good so it's a tough choice!
Jan Castle
October 13, 2009 12:08 AM
Congrats Jan! Please email me your address!

I love really simple, homemade-looking cards at the holidays, they remind me of my earliest paper crafting days as a girl when you made all your holiday gifts and cards at school! :) Here is the first of a few simple trees I've designed that are easy for you and your children to recreate for some delightful holiday cards!
Now I made this card a few days ago, and then today I noticed a very similar(and gorgeous!) one in the STV gallery by Cathy! It uses a different punch, but you get the idea! :)
This tree was made from a stack of 4 curved corner punches from Pure Luxury All Spruced Up CS (stay tuned for another design using the other half of this fabulous corner punch!) they nest together perfectly. I didn't bother to cover the little spaces in between because that way you can see that they are punches instead of a solid tree. I stuck some buttons(faux stitched on with white Inkssentials pen!) from the Gina K Holiday Button Assortment with glue dots (and a brown one from the Autumn Collection for the trunk!) I also added an oval punch of Basic Grey Junebug DP underneath like a little tree skirt. Mat is Soft Sand and card base is Rocket Red, I love how these three CS colors together evoke a homespun, holiday feel. I sponged a little Cream White ink on the sand mat and then added some green stamped stitches from the "Inspiration Mosaic" set around the edge to match the stitched ribbons from the autumn assortment (which match the button colors, woo hoo!) Stamped sentiment is from Gina's "Seasonal Sayings".

Get ready for anther punched tree card, next time with a more sophisticated feel! :)

Sunday, October 11, 2009

Hand Vignettes

The simple line art hands in "Hand in Hand" are a fabulous match for the simple grid in "Inspiration Mosaic". I reverse masked the hand vignettes into the top boxes and sponged in some Antique Linen Distressing Ink to give them some depth before pulling the mask away. The sizes of the boxes are just right for framing these vignettes.
I wanted to represent the back and forth give and take of friendships, the distances traveled, the shared ups and downs, and tried to capture that here with the dashed lines that decorate, but also pull your eye around the card.

I am blessed to have so many PSFs (Pretend Stamping Friends) in my life! Have a blessed day!:)
PS the first of many GKD blog hops this week starts tomorrow, right here on this blog!! ;)

Wednesday, October 7, 2009

Tile Mosaic

I made this monochromatic card with aqua and teal CS, stamping the grid from "Inspiration Mosaic" in teal, and adding the framed flowers images from "Tropical Windows" over it, overlapping the boxes. The crackle stamp from "Bold Flowers" inked up in Versamark create the beautiful texture and illusion of old tiles. The addition of a white mat, focal point and greeting makes everything pop.


Monochromatic cards are great when you need to make something quick and perfectly coordinated, different shades of one color create such a calming, restful look and feel. :)

Tuesday, October 6, 2009

Around the World...Tutorial

Today I have a spinner card I created with the "Inspiration Mosaic" and Rupa's "Back to School" set, all you need are two circle punches and some white thread. Your recipient will be delighted to see the greeting revealed on the other side of the world! I love how the different sections of the mosaic here look like a collage of things tacked up on a bulletin board :)
1. Stamp the grid onto your card base and color.


2. Stamp the globe onto a small white piece of CS. Color. Edge the mat with a black marker so it will be framed up like the grid.


3. Line your 1 1/4" circle punch facing up over the globe so you can see the image and punch out the earth. Save this.


4. Take your larger circle punch and line it up over the first hole centering it so you have an even border around it, this will give the globe room to turn.

5. Place your punched mat on the card base and line up your larger punch again over the punched globe mat and punch, now it goes all way though the card. Pull the mat away.


6. Stamp the round teacher label image from the school set, color and punch with the 1 1/4" punch. Place a piece of thread between the two punched circle images and adhere. Now add adhesive around the punched hole in the card base, place your thread across it and add your globe mat on top.


Now give it a little push and watch the world turn!


I made this for a neighbor friend who started homeschooling this year, talk about a real mission! :) Have a great day! Thanks for all your sweet comments yesterday, I hadn't made any flower cards in awhile, I know! :)

Sunday, October 4, 2009

Trimmed Mosaic

Today's card uses the circles from "Hip to be Square" as ornaments with the "Inspiration Mosaic" as a backdrop. The grid and red ornaments are stamped on Basic Grey Junebug, then cut out and popped up. (Edited to add: Someone was kind enough to point out I linked the wrong paper when I first posted, my mistake, it has been corrected. This person did not leave their name for me to thank them.) This pack has a great mix of traditional and trendy holiday prints, and it is really fun mixing the styles (brocade, polka dots and graphic!) together. The little row of circles trim from the Mosaic set is a perfect match for this background print so I stamped it vertically from the tops of three boxes to hang my ornaments. I love using dotted lines instead of always straight for hanging ornaments on cards, it's little fancier, like a ball chain. Isn't the snowman one fun?
Mat and base are Pure Luxury All Spruced Up and White. Grid and ornaments were stamped in green to match the mat, isn't that a nice alternative to stamping in black for a Christmas card? (You will love this new green from Gina K! Green is like a neutral for me and one this deep and rich can add all the drama that black does on your cards) ) Here in the closeup you can see the face and hanger have shine and dimension, I traced over each of hese element with the Sakura Glaze Pen, it goes quickly and dries fast, an easy and inexpensive way to add "Wow!" Because it's clear you don't have to worry about getting your tracing exact over the stamped image. ;) Stitched ribbons are from the new StampTV Holiday Cheer kit. TIP: I inked up the carrot in Vivid Butterscotch and then ran a rust colord marker along the bottom edge before stamping to give it the shadowing.

Hope you enjoyed this card and Mosaic Monday! :) This card just makes me happy and ready to decorate the house! (but first we need to tackle Halloween LOL! how about a pumpkin card next?)

Friday, October 2, 2009

A Hip Rocker


So do you remember that rocking baby card (that really rocked!) and video I made a few months back? (one of my fave baby designs ever?) Well, now I have the stamps for you to mass produce the perfect little baby faces for lots of these cards LOL! Here's my new and improved version using "Hip to Be Square"! (little pink cheeks are made by stamping the smallest circle from "Inspiration Mosaic"on either side.


I embossed the Pure Luxury White here with the Cuttlebug Argyle folder, I love how that looks the side of a woven bassinet. Greeting from the s stamped on a Cuttlebug diecut tag, and circle for base is Mountain Rose Glimmer from Paper Temptress. Be sure to check out this link for the rest of the instructions on how to make these rocker cards and see it in motion!