Tuesday, May 3, 2011

More Branching Boxes with Sentiments...

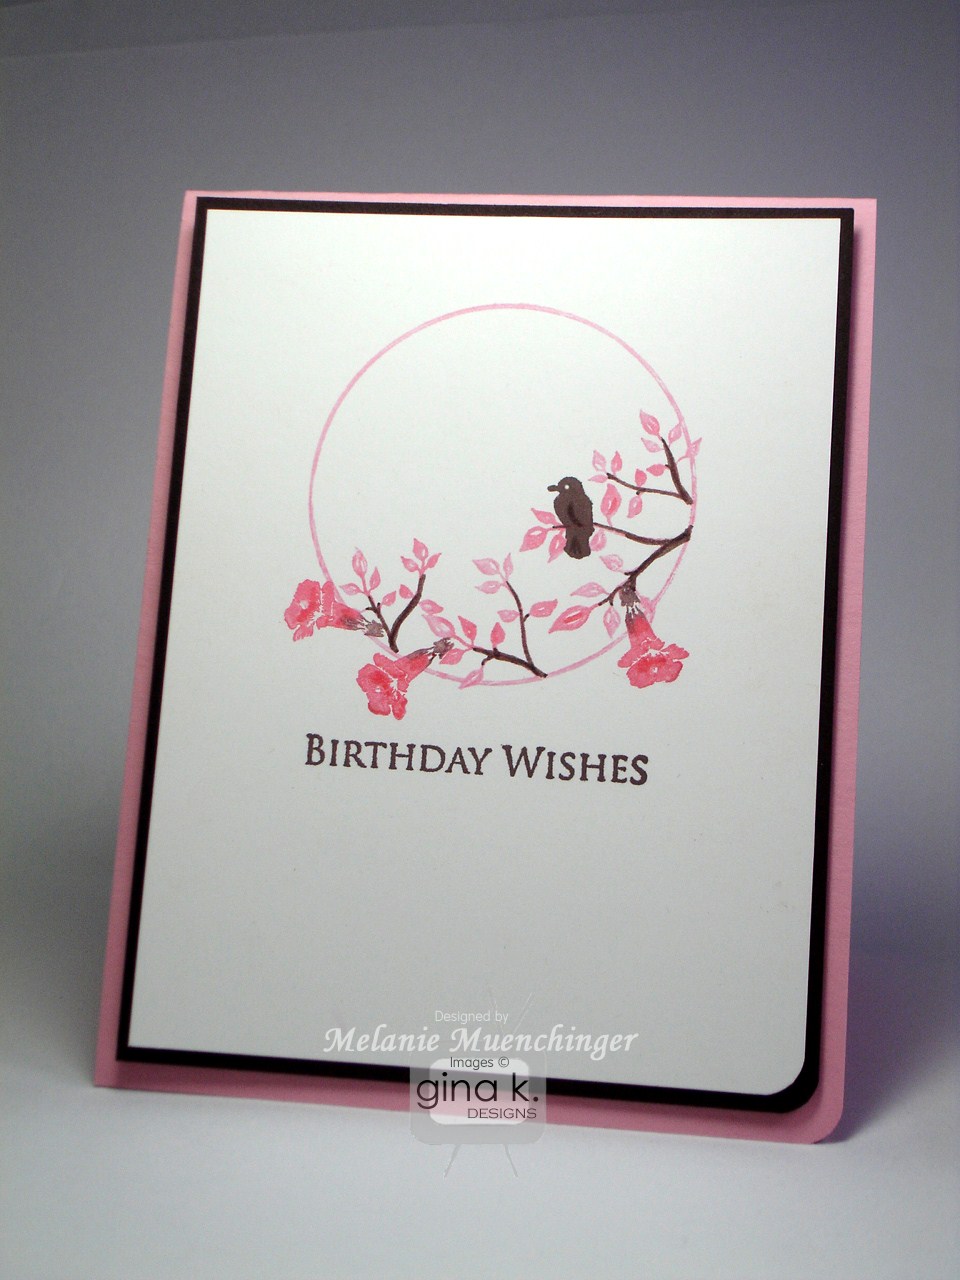
Thanks so much for all the sweet feedback on yesterday's "Branching Out" tutorial!(Scorrll down if you missed it!) Here's another single layer CAS I created the same way as yesterday, making a space in the border for a greeting by omitting part of the image and inking only what I wanted, this time with the bird silhouette and half a greeting (again, ink up only what you want!) from "Springtime Silhouettes".
After stamping your frame a greeting, mask off the edges with sticky notes. I inked up the bird in Memento Rich Cocoa and stamped off onto scratch paper, so the bird would be a paler brown and then swiped over the head and underside of the body wing and tail with a matching Memento marker and stamped. The two tone look adds so mcuh to this gorgeous silhouette! I sponged in just a little bit of aqua around him to create a cloudy sky.
Here is the finished card. I embossed a Standard Square Nestabilities around the frame to accent it more and added little bit of a rhinestone flourish behind and over the eye. Cardbase is of course, Pure Luxury Baseweight White, I wouldn't use anything else for my single layer cards or Copic coloring.

(Why didn't I use "Bring the Bling"? Well, I know you don't ALL have that set yet, don't want to leave anyone out, hee hee. Speaking of "Bring the Bling" I need to work up a new sample for you with that set showing off the NEW LIQUID PEARLS Gina added to the store, did you see?? Good stuff! Some other fun bling things ahead, can't wait, can't wait!) ;)
Thanks for visiting today!

Monday, May 2, 2011

Tutorial: Branching Boxes with Sentiments

Good morning! I hope you had a terrific weekend! Today's tutorial is 2 for 1 and so fun and so easy! I wish I'd had a chance to share this idea with you at the release, but I suppose it's just as good to keep the good ideas coming! ;) I'm sure you've all seen and probably tried to make or recreate the beautiful cards that are so popular where you draw with a pen and ruler or stamp a box to house your main image that includes a sentiment in the border, it is such a great look! Let me show you how easy it is to with the both the large AND small frames from "Branching Out", this might become your favorite thing to do with this set!
Here is a single layer CAS I made from Pure Luxury which also uses a sentiment from "Garden Silhouettes" and the current StampTV Kit "Springtime Silhouettes". I am just lovin' this branch silhouette with the butterfly!


First you'll line up your frame onto your large acrylic block, this is the 6"x6" one Gina sells and the one I use for stamping all the large stamps from my frame sets. Centered in between the grid lines or along the grid line, whichever way you prefer, it's a snap to stamp it precisely on your cardbase. Next, you'll place your greeting where you want it to be above the border, and then ink around it, using a pad or marker. (You can make it a little tighter than I've done here so it comes right up to the edge of your sentiment if you wish, but then you have less wiggle room when adding he greeting later.


Remove your greeting, huff on the stamp to re-moisten the ink and stamp onto your pre-scored cardbase. The score along the middle is another guideline for you to look at to make sure your lines on your block are parallel. TIP: Don't fold the score until after you're done stamping and sponging, this keeps the card from "popping up" on you.


Now go back in with your greeting, making sure you've lined up your greeting with the line on the block and then center it over the line on the frame and you'll be good! Doesn't that look purty??

Now for the sponged sky you asked for that I made for my birdies! Although I really like the look of sponging over a cloud stencil or scallop punch, I typically just sponge without and try to make the color roll across the card in waves so your eye goes up and down. Here I've masked off the edges with sticky notes and sponged in Vivid Butterscotch. Imagine smoke moving and the way it dissipates, getting lighter out toward the edges and darker in the middle.

Now I've added in some pink, keeping some areas white, sponging into new areas so that only pink shows, and over the orange in some areas to create this new fiery color. That's' it, remove the stickies and you're ready to add some stamping and embellishments.

Here is the same card again, portrait style, like the one I shared on our inspiration hop the previous week, this works for me both ways! I clipped a part of a rhinestones flourish that would curve around my greeting for more interest, laying it over my card before pulling off the plastic and adhering to make sure it went where I wanted. I tilted the butterfly to make sure it would go just outside the frame.


Was that an easy card or what? One layer, wowee! See how nice it is to be able to customize exactly where you want your greetings to be and just how long or short the space is? For example, you could also flip the stamp so the vine is on the opposite side or even the top and make a space for a shorter greeting, etc.


Tomorrow I will share a card I made the same way but with the small square frame from "Branching Out". Hope this was helpful! Not just for scenes either of course, you can choose to isolate popped up single or several images that will pop off a white, neutral or colored background in a box like this! This is gonna be a new go to layout for me, for sure! :)

Sunday, May 1, 2011

Textured Direct to Stamp

Happy Sunday! Here is another sample I made using both the new "Timeless Textures" and the Free with Three set "Garden Silhouettes" (how many of you earned it already?) ;) I love these two sets together!
Cardstock is Pure Luxury Sweet Corn, Chocolate Brown, and Ivory. Stamps are inked up with Memento Markers. TIP: I also went over the stamped image to make some tiny details after stamping like the vein on the leaf and the dots in the flower middle appear crisper so they'd really pop.
The large texture stamps I rolled onto distressing pads for the two tone effect. I stamped the flower twice to make the bunch and I like how it's moving outside of the texture block.
Okay, gotta go, busy Sunday and need to finish that tutorial!!! :)
EEKS! So excited to show you tomorrow's tutorial!! I incorporate how I did the sponged sky I got inquiries about, but also another REALLY COOL thing you can do with your "Branching Out" set, you are gonna flip! Stay tuned!!

Saturday, April 30, 2011

Warming up to a new friend

Here is the first card I made with "Branching Out" kind of a "warm-up" card. Unless I have a very specific idea I want to do immediately for a set (and I often DO since I design these sets months ahead of time and just dream about what I can make when I get the rubber in my hot little hands!), I'll instead do a test run in some colors that are comfortable to me and a simple layout just for the sake of getting it inked the first time. I knew I'd like how these branches and flowers would look in aqua and brown, one of my favorites color schemes. These cards almost always are something I'm happy with, but not necessarily something I'd try to "wow" you with at the party or in a sneak peek! ;)

Frame is die cut with a scalloped circle Nestabilities and layered over a standard die cut circle. I used a touch of Liquid Pearls in the center of each flower and added an adhesive pearl to the Chocolate Brown punched Fancy Corner. Base is Ocean Mist and ribbon is also Pure Luxury. Greeting is from "Garden Silhouettes".

Thanks again for visiting! :)

Friday, April 29, 2011

Branching Out with Geometric Patterns

Hello! Here is a simple card I made, again using the square frame from "Branching Out", but this time I created a pattern with it and I am in love with this look!
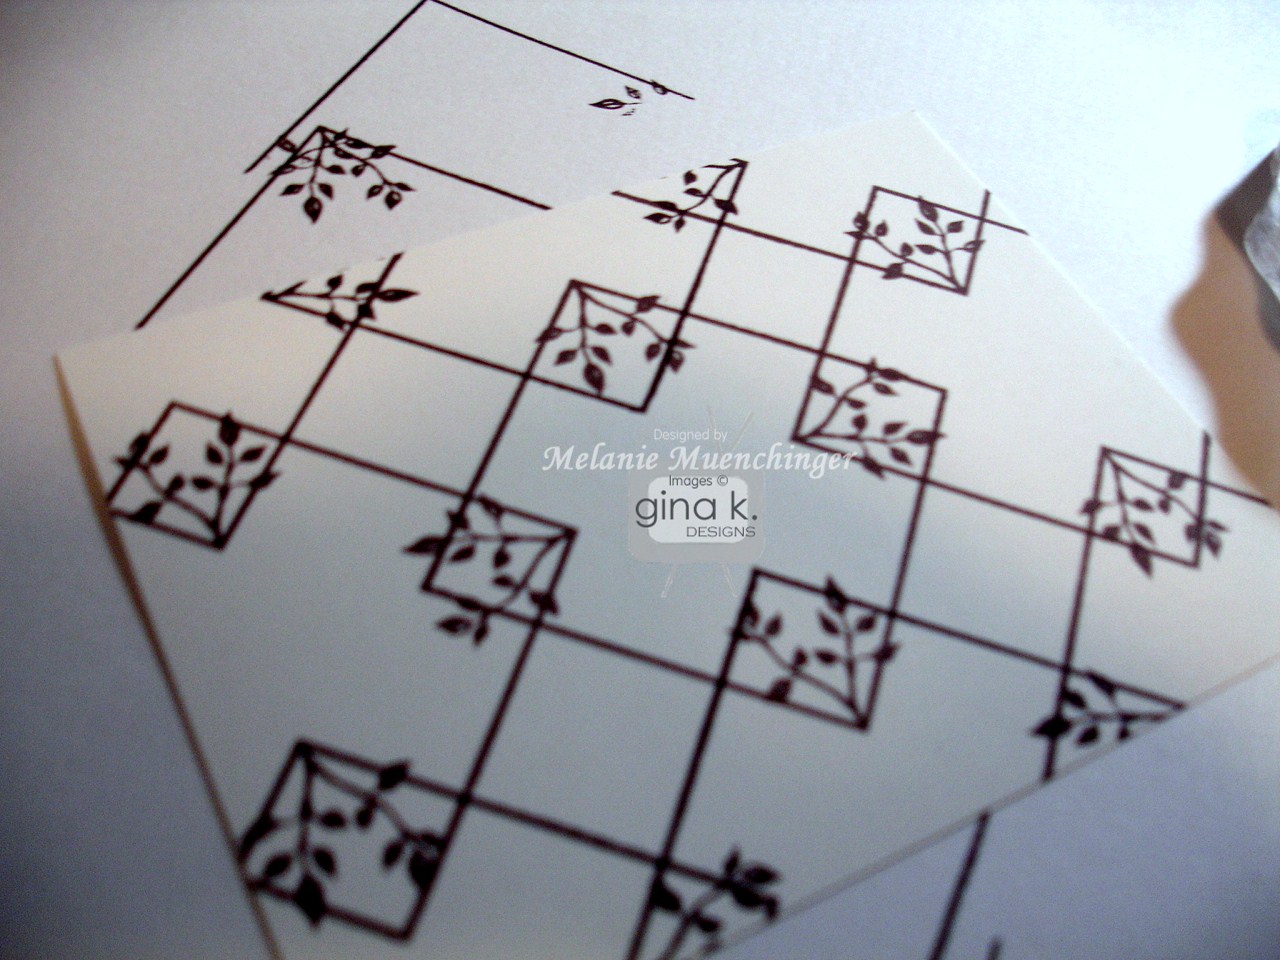
First I started with a panel of Pure Luxury White and stamped the square in vivid Coffee Bean into the center, with the branches top to bottom. Then I turned the image and stamped it again to the left and right of the center, this time with the branches side to side, slightly overlapping to make that diamond pattern. Do the same above and below.
Here is the finished pattern. you always just want to make sure when you overlap you aren't overlapping the branches one on top of the other, but the empty corner over the branches. I didn't need s stamp positioner, using a grid line block makes it really easy to line up your images.
Here is the finished card again, with a greeting from "Garden Silhouettes" popped up in the center on square punches. This time I added some sweet little paper flowers, where the diamonds intersected along the bottom, that Carolyn gave me for my birthday (among many other crafty goodies!) Finally I put some little silver adhesive nail heads in the centers.
Cardbase is Kraft. This symmetrical pattern on white reminds me of a garden trellis. I plan to try creating some other patterned designs in different colors with the oval and circle frames for this set, too.
Hope this was helpful and inspires you to try thinking outside the box with the "Branching Out" set (branch out, hee!) :)
Thanks for visiting!

Thursday, April 28, 2011

Black Tie CAS

Today I have another quickie card and wanted to show you how beautifully Gina's new "Timeless Textures" work with "Branching Out", and look, a perfect fit for the square frame image! I stamped the frame FIRST in black and then stamped the script inside it with Antique Linen distressing ink.
Here is the trimmed frame, no die this time, mounted on layers of Black Onyx and Pure Luxury White. The middle layer is embossed with the Cuttlebug Leafy Branch folder, anther spot on match for the vines in this set, and one of my favorite folders of all time, hope you can see the texture of the dry embossing, it's a little hard to photograph on black but it looks super sharp in real life!
I stamped the greeting from "Garden Silhouettes" on white and punched it with a 1 1/4" square and then layered it over a 1 3/8" square punch and popped it up over the script. No embellishments today! I love these colors and layout for a wedding or anniversary.
Thank you for visiting! I have another fun little tutorial for you (not the birds) I wanted to share today but I am so sick again (ugh! this has been goigg on for 2 and half weeks, I thought I was almost over it and then last night took a turn for the worse, so I am getting out of bed for a few minutes here to post) and this was already written up! I hope tomorrow is better, I have so much to doooooooooo!

Wednesday, April 27, 2011

CAS Card and a Couple Things...

Good morning! Here is a VERY simple CAS card I made with "Branching Out". I am still in awe over the rainbow array of Nestabilities Gina showed in her video LOL! (and I think I have them ALL, yikes, but they just look so purty and organized in their original packaging, hee hee!) but I wanted to show a quick and easy card you can make with out any dies at all, by stamping your frame of choice from the set onto a clean white backdrop.I inked up the circle frame in pink and stamped. As an afterthought, I decided to make the branches pop a little more so I traced over them in brown, this would have looked more precise had I just gone over them with my marker BEFORE stamping, but it happens! Next I added the trumpet flowers, coloring with two darker pinks and brown directly onto the stamp. There are so many different places you can add the flowers on these branches so I just try to use an odd number and stamp them in different directions, I love how they look creeping outside the frame. The bird silhouette doesn't have an eye, this way he appears to be facing away from the viewer looking off in the distance or at another bird, but here I wanted him to connect with you (hee!) so I just added a little white dot with my Inkssentials pen for a tiny detail (I thought a rhinestone would be cute but didn't have one small enough!) and added a little shading with my brown marker again on his wing and tail feathers. Greeting is from the new Free with Three "Garden Silhouettes".

Thanks so much for all your encouraging comments from our hop the last few days I so enjoyed reading them and am very excited about all the enthusiasm for our new Gina K Designs sets! I am trying to get tip sheet wrapped up for "Branching Out" so I can post that soon.
One question that was asked from Day 2 was, did I make that sunset background for the birds on the wire or buy it? That is a sponged background I created and it is VERY simple to do, I will share a step by step as well as how to add the power lines this week!
Have a great day!
Tuesday, April 26, 2011

Inspiration Hop, Day 3: "What's the Dirt"


Good morning, I hope you had a terrific weekend! Today we conclude our Inspiration Hops with the Gina K Designs team, featuring "What's the Dirt?" but you can be sure you will continue to see more samples of this set and our other new ones throughout the month and beyond on our blogs and StampTV! :) Here's the full set:

...and here's my sample! I like the little trio of pots and this particular greeting grabbed me: "you are a ray of sunshine!" I love sponging rays of light on cards but I thought using paper today for a spotlighting effect would be cool! Simply stamp your posts at the bottom of a rectangle of Little Boy Blue cardstock and then again on white. Slice a diagonal of the white from corner to corner and layer over your blue like you are paper piecing! Color the portion that's in the sun, doesn't that look so cheerful and illuminated next to the blue?

Here is a closeup. Card also uses Black Onyx, Innocent Pink, and the new KEY LIME , which I love!! I love greens and this is one of my favorites now in the Pure Luxury Line, you must try! It's so vibrant!


Here are my new "Crazy Daisy" digital papers also, they use images from my "Spring Basket" and "A Year of Flowers" stamp sets, but they are also a terrific match for "What's the Dirt?" with these sweet daisies and ladybugs! They are available to download in full sheets, if you like big sheets of single colors, or quarters if you prefer printing out smaller mats all at once which are already sized for A2 cards. Wish I had some samples with them to share today but I don't have them ready yet, please check by later this week! :)

And now please see more samples from our talented Gina K Designs team, and be sure to leave comments all along the way for more chances to win free stamps! Thank you for hopping with us! :)

Monday, April 25, 2011

Inspiration Hop, Day 2: "Branching Out" and "Follow your Dreams"


Good morning! Happy Monday and I hope you all had a terrific Easter weekend! Today our Inspiration Hops with the Gina K team continue, please enjoy all the samples and ideas our team has for you and be sure to leave comments as Gina will be drawing winners from all the comments for stamp sets! The first set I want to show you is my new "Branching Out". Here is a closeup of one of the frames, die cut with a Standard Square Nestabilitie, and layered over Labels 15 and the Fleur de Lis pendant die. As you can see, these frame images work with a lot of different die sets!
I stamped the frame in gray and then the flowers in red, this particular flower is one of my favorites in the set and I love how easy this and all the other tiny elements are to add anywhere to the vine, bringing it to life, and also adding quick pops of color.


Instead of using the large rectangle frame, which was sized with A2 cards in mind, I decided to make a background paper with the longer vine and showcase more images from the set. I placed my Pure White Luxury mat at an angle, corner to my tummy, so I could stamp the vines ion a diagonal in rows, I find it is easy to stamp them "straight" across with the paper turned rather than trying to stamp diagonally, you know?

Next I used Vivid Brick Red to add two different flowers (they can be different types or just the same trumpet flower at different angles) and the berries to random spots on the vines. Depending on the look you are going for, they can all be stamped in consistent spots on the vine for a more symmetrical print, or randomly, turning them this way and that, like real flowers would be. I sponged the edges with gray before adhering it to my card.

This measures 5 1/2" square, I don't normally make cards this large, but I really liked the Pendant die, turned and I think the delicate cut outs go so well with the vine. Cardstock is Smoky Slate, Red Hot and Black Onyx. I notched the corners with the ticket punch and added adhesive nailheads. That beautiful greeting, which really pops in black, is from our next set we are showcasing today, and is also used on the next two "Branching Out" cards which show simple ideas for the birds...
and this one, both simple ones I shared at our release party...


all three of those sentiments are from Theresa's Momber's "Follow your Dreams", another scenic set I know you will love! This boat image I think would speak to every guy in my life! :) She's made it so easy to create a scene with it at the water's edge and a pine silhouette for a background. First I stamped the boat on a 4" x 5 1/4" Pure Luxury White mat and colored it with Copics. The lines below the boat create some ripples in the water, but also help remind me I need to put a little brown there to reflect the boat! Next I masked the boat and sponged aqua ink over it covering the top half of the mat with sticky notes to make a horizon. Remove your mask and sponge more aqua randomly to make the clouds, and olive ink below it the boat for the shore. And once you have your horizon line, you have a spot to add your trees.

Before removing the boat mask, be sure to remember to flip your trees over and stamp again below it, without reinking, this creates the perfect reflection and completes the illusion of water on your card. (Refer to sample for the clouds and boat reflection in the finished scene, I forgot to get a pic of that, oops!)A scene like that deserves a spotlight, so I die cut an oval window through my Kraft mat I'd stamped with the large "Branching Out" frame and then popped it up over my focal point with foam dots. I love doing windows with nature scenes especially, like you are peeking into another world. The frame allows me to come up with a simple but interesting layout that matches nicely! Base is Pure Luxury Fresh Asparagus, and I added just a few silver adhesive nail heads to finish it off.


Friday, April 22, 2011

Inspiration Hop, Day 1: "Garden Silhouettes" and "Timeless Textures"

What a release party last night, oh my goodness, that was fun!! Thank you all for turning it out and chatting, there were faces "new" and "old" and it wouldn't be a party without all our amazing Gina K customers and fans! If you missed all or any part of it you can see all the samples, chatting thread, videos and challenges linked on the STV main page! Now, for more inspiration!
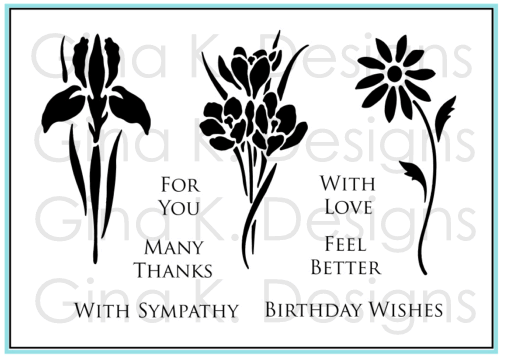
Today we focusing on Gina's sets, "Timeless Textures" and the new "Free with Three" set "Garden Silhouettes"! (I love being able to post the full set now that we do our hops after the release, and you are going to love these!) Texture stamps are such great stamps to have in your "toolbox", they are perfect as the focus of a card or a way to add just the right something to make a beautiful design even better! And chunky, bold stamps like these silhouette flowers work for so many techniques, so today I combined the two on my card.


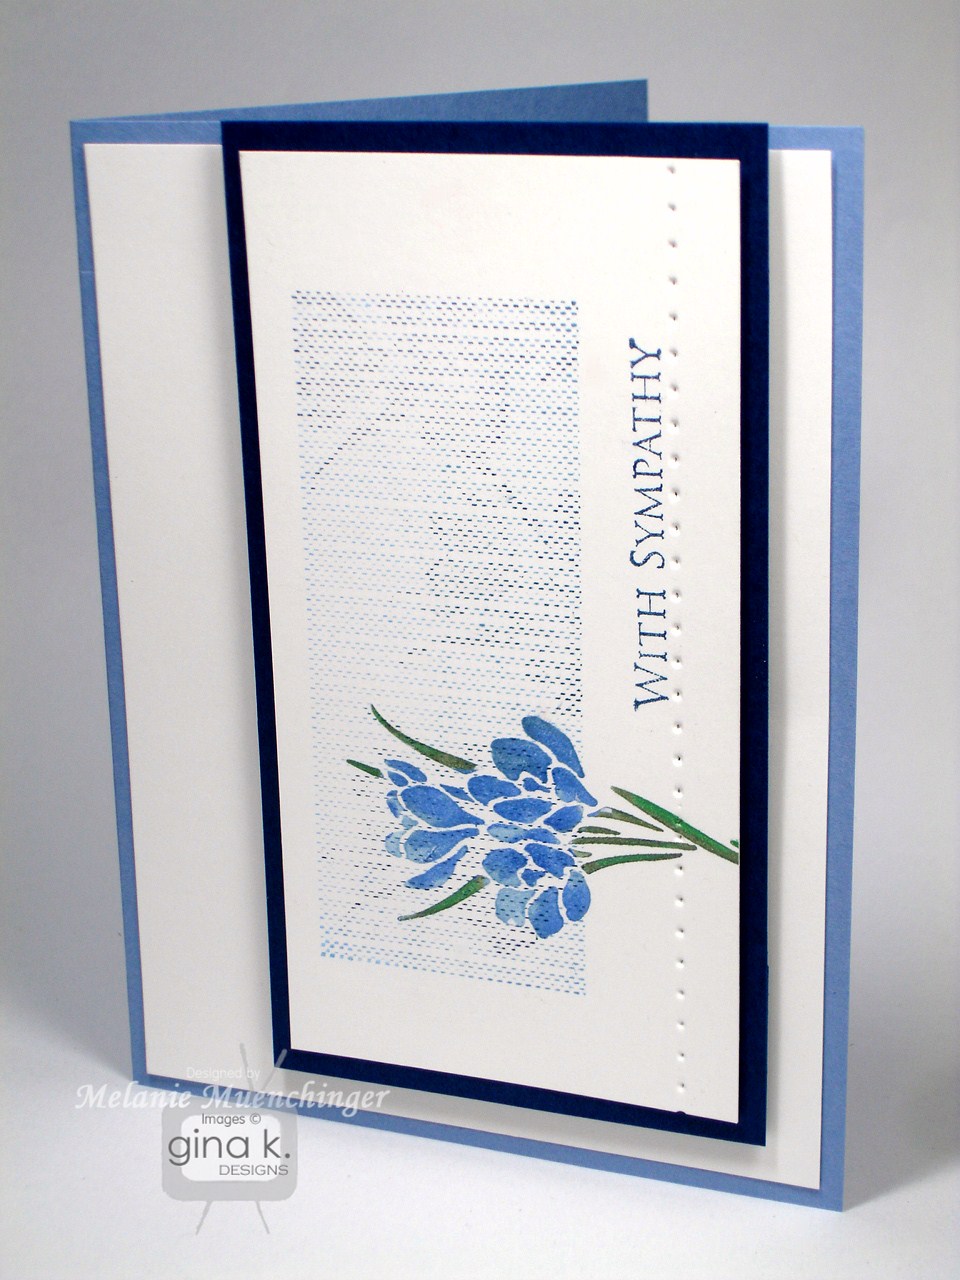
Cardstocks are Gina K Pure Luxury White, Little Boy Blue and in The Navy. I love all the white space on this card! I began by inking up the long "linen" stamp in a pale blue ink, and then inked up the bold iris in Vivid Inky Blue and kissed it all over the inked texture stamp, re-inking each time and varying the height of the flowers by stamping them in different positions. then I huffed on the texture stamp and pressed it onto the white cardstock.


The kissing effect is subtle here, but effective, see below. This texture is so fine that if you used a line art image you would hardly see it kissed, but these bold flowers are just right. :)


Next I did some Direct to Stamp by inked up the different portion of the iris with my Memento Markers, Summer Sky and Danube Blue for the flowers and Cottage Ivy for the leaves and pressed it over the textures on the left, to leave room for my greeting on the right. The bold silhouette really brings out those kissed images on the linen, and that linen block really grounds the solid flower and adds interest to the layout.


I also used the Scor-Bug and Scor-Buddy to pierce a row of holes to underscore the sentiment, skipping around the flower stem. No embellishments on this card! The colors and gorgeous images really stand out beautifully with no distractions.


I decided to go ahead and post this same card portrait style, because I think either layout looks pretty cool! If you send it in an envelope, it'll be up to the recipient to decide which way it goes anyway, and I'm sure most people will have "one" way they see it and one way only, and that's great!


      • Vicki Dutcher

      • Hope you have terrific Easter weekend with your family, and our inspiration hops will be continuing for the rest of our new sets on Monday! :)

      Thursday, April 21, 2011

      Release party tonight and some peeks!

      Hello, are you all ready to party??? We'd like to extend an invitation to you if you don't already have the Gina K Designs release on your calendar yet, it's from 7-9 PM CST in the StampTV forum! This morning we have sneak peeks from the team today of what you can expect at the release and previews of the new stamps you can order starting at 9 PM CST tonight (as well as get you ready for the festivities!) If you came from Lee Murphy's blog, you're at the right place. If not be sure to head over to Stamp TV's forum page for the full hop list. This morning I have a couple glimpses of my newest set "Branching Out", oh are you gonna love this one!"Branching Out" includes several small frames that fit the various Nestabilities dies, and small accent images for customizing and adding quick pops of color. It also has a large frame stamp that, like the one in "Inspiration Mosaic", can be turned 4 ways for different, easy layouts.
      Here is a sample showing both the large frame and the oval frame, with a little bit of direct to stamp on the vine with a darker marker to add shading to the leaves. I'll be showing more at the party tonight, tip sheet soon, and a tutorial on Monday showing other ways to use this set! :)


      I also have some new PAPER we're releasing tonight, (my first digi pack!) you can print in two different sizes and customize, here are just a few of the other colors in these 8 packs, you like??


      Okay, that's all from me today, let's go see what Michelle Woerner has for us and come back tomorrow for the beginning of our three day Inspiration Hop for April! Thanks for stopping by!


      Again, be sure to join tonight from 7-9 PM CST in the Stamp TV forum, for chatting more samples, new videos from Gina showing the new products in action, challenges, contests and prizes, it is sure to be blast, see you there! We'll of course follow up the next several days with an inspiration hop like we did last month to give you even more ideas for all the new sets, can't wait, can't wait!

      Tuesday, April 19, 2011

      We have a winner...

      from this contest! Winner of the "Celebrate in Style" mini set is... Ravengirl. Congrats, please send me your addy and I will send you these sweet stamps!
      Thank everyone whoo played!

      There is still time to enter for this blog candy and the new digii paper contest, be sure to leave your guess before our Gina K Designs release party on StampTV Thursday night! :)

      Monday, April 18, 2011

      Doodle and Daisies (plus Blog Candy!)

      Edited to add: This contest is closed, thanks to everyone for playing!! You all really opened to my eyes in your guesses that there could be more sets the new digital papers will coordinate with than I previously thought, so I don't really know exactly what the answer to my question is LOL! So I just drew randomly, the winner of the free digi pack is Frieda! Email me please Frieda to claim your paper! Everyone , please come to our release party tonight to see the new "Crazy Daisy" papers, they'll be available for purchase at 9 PM CST tonight! :)


      So remember those rockin' customizable "Doodle" speakers I told you about a couple weeks ago? Well, check this out, this is the one I made*, sitting comfortably out on my back deck, and...Origaudio is now selling the design I created for my speaker on their website! (I know, right, how crazy is that?) Check it out here: "Crazy Daisy", isn't that a sweet pattern?! (I gotta say it is pretty darn cool for me to see my drawings screen printed on a product!) :) Please tell your friends about these fun speakers, you can choose a ready made design from their site you like (this one, hello??) OR add a photo or your own creation! I love the concept and product! They've gotten many accolades for their innovations in speakers, and the Doodle is the first of it's a kind, a new product offering from them and one I think will be very popular. :)


      AND... if you LIKE that pattern, it is a SNEAK PEEK of some patterned papers coming THIS Thursday to Gina K Designs, my first digi packs!! Woo hoo!


      So, how many of my sets do you think the papers coordinate with? Maybe a little prezzie for one person with a correct guess?! I'll draw from all the ones who are right to win a pack of the paper, you'll be able to download it and start using right away! ;) Get an EXTRA chance to win by checking out the Origaudio site at the link I gave you above and leaving a comment here about what you think! Thanks! Winner announced Thursday before the party!


      And look, a couple people already bought them, (NOT anyone I know!) Come on, 'fess up, was it you?? :)


      *I know you're surprised I didn't make mine red, but I'm so happy I picked yellow, makes every day "sunshine", perfect for your tunes!

      Mosaics like Magic (and blog candy)

      I've shared this pic of William on my blog before, it's a favorite portrait of mine, but I have NOT shown you what's at this link, a mosaic of the same pic but made with some of our family photos of him, you've gotta see this! (and zoom in to see some of the shots!) You can create these for FREE at Mosaically (and download them for only $5 if you want to be able to print your creation, but making it cost me nothing), or buy the Sweet Deal being offered today only, $36 for a 24x 36" print of a mosaic you make, that would make a nice gift! You could also share the link so others can view it, so friends or family might buy it to download themselves. (Use coupon code FRIENDS2 to get $2 off if this is your first Mamapedia Sweet Deals purchase or EASTER10 to take 10% off if you've bought before.) You can use even more tiles but this was my first attempt, I got tired of uploading LOL (it was 4 in the morning!) Isn't that cool? Give it a try, if you make one, let me know, I know I'll be making more for sure! How's that to pass the time? Let's do a blog candy today, shall we?? How would you like to win this little number? "Celebrate in Style" a super cute dress and sentiment, just tell me below what's on your Gina K Designs wish list right now OR what you purchased from the last release. If you already earned this mini set you can still win it for a friend, so go ahead and play along anyway! :) I'll draw a winner tomorrow! BTW, did you see the snippets for this Thursday's Gina K Designs release and party have started already? Yeah!! Getting excited! :)

      Saturday, April 16, 2011

      Real Men Eat Cupcakes

      Here's a much easier way to decorate some cupcakes for your next sports outing instead of piping separate designs on 24 little cakes: arrange them on a huge round platter and then pipe your designs across to make it look like a big ball. My son Jonathan's baseball team got so much more excited over this than when we've done individual themed cupcakes in the past, definitely made the post game feel like party that day (even though we lost, wish I'd gotten a pic of them gobbling them up, but I was blue from the defeat, I take it harder than they do!) :( Some things would have looked more realistic than m&m's, but I didn't have to mix up another color frosting and kids will always choose cupcakes WITH candy over cupcakes without! ;) This was from a couple weeks ago, we have won the past couple ( yeah!) I just keep forgetting to share! Tonight though I am tackling a new dessert that I will have to report back on after we eat, it was crazy simple to make and I found the recipe by Googling "best chocolate desserts": the one this search pulled up first for me had over 500 5 STAR ratings and has been saved more 25,000 times. Well! How could all those people possibly be wrong?! Hope you are having a good weekend! I am feeling a lot better today, thanks for sending all the positive thoughts and prayers my way! I didn't make a card but I have been working on two special new somethin's that I know you are going to really love (not stamps!!) Thanks for visiting!