Welcome to our first day of previews! Starting off with my set "
Fun Year Round", my newest frame set will give you more options than ever before! As calm and tranquil as the squares and rectangles were in "
Inspiration Mosaic", these new overlapping circles in "Fun Year Round" just burst with energy, ready to be filled with any combination of the 23 round,
year-round elements in the set, like an explosion of fireworks, bubbles etc! Think water in the summer, snow in the winter, flowers in the summer. The different sized circles are also perfect for framing up sentiments, your other favorite stamp images, or flowers or other round embellishments, I can't wait to show you all the possibilities!
 Here I just stamped the frame in black on white and filled in a few of the smaller circles with some red stamped flowers with black centers. Next I stamped out some flower (or "snowflake", depending on what color you use !) elements in red and black onto white and punched them out with the Marvy flower punches (jumbo punch for perfect fit, larger for layering), then layering them on larger red and black circles or flowers. There are so many ways you can 2 step stamp these different images, as well as how you choose to punch them out. Place them over the circles in the frame, layer onto coordinating card stock and your card is finished!
This next card uses the same set without the frame, just the round elements and the long line included in the set, to help make symmetrical patterns when you want (although random ones will look great too!).
You will have a blast creating very simple or very ornate patterns in whatever shapes and colors you choose! First I started with a mat 4 x 5 1/4" and then centered it over the lines on my
Scor- Mat. I adhered the line to the
grid line block and stamped rows and columns at the black lines on the Scor-Mat, in
aqua ink to create a grid. As you are stamping, just line up the white line on your block over the line on either side of your card stock on the Scor-mat.

Then stamp elements into the cross hairs (or inside the boxes for a different look), here I used the large bold flower in aqua and the smaller matching one (not pictured) in turquoise, skipping every other box to leave space for a different color and image.
Next I added this bubble burst stamped in
Vivid Butterscotch, I LOVE this image (and there is a smaller one too), so fun!

Last I stamped this little button to the middle of the bubbles in
Vivid Brick Red. That's it, the pattern is done!

After making my pattern, I punched out two
Marvy flowers in
Turquoise Sea and
Ocean Mist, these punches match the flower images, and added the round greeting on white to the middle.

Next up we have
Theresa Momber's "Aloha". Full of gorgeous tropical images to color, creating with it will feel like a trip to the beach! This little barefoot sentiment she added reminds me of the little baby foot prints I make with my hands for my kids at the pool so I thought it would be fun to create a sandy backdrop with that in ink on my card. It's very simple to do...

First, make a fist and ink up the outside of your hand in a
Vivid Tuscan Tan ink, then stamp onto
Soft Sand card stock.

Now ink up your finger tip and make five little toes, reinking each time, using the most pressure for the big toe and the least for the pinky toe.

Repeat steps with the other hand, and wash up before you get ink all over your project! I stamped a little bit of my speckle image from
"Gifts from the Sea" over it to give it a sandier look, then added the sentiment over the feet in black. Images are colored with Copics and popped up. Below is a closeup to show how you can use the very tip of the brush end of a brown Copic with quick flicking strokes to give the coconut a nice, hairy texture, and also some paper piecing I did on the umbrella with
DCWV Citrus. I distressed the Soft Sand edges and layered onto
Black Onyx and
Turquoise Sea.

Our last peek today is made with
Tami Mayberry's new "
In Stitches". In this set, you get twelve great trims that can be used for adding faux stitches to your card or creating patterns, I've done both on this sample. I stamped out the flower trim in both yellow and orange, one inch apart, again using my
grid line block and
Scor-Mat as a guide. Next I added the green loopy stitch and finally the black dotted one.

Then I used the dash dot stitch across the top and on my ribbon panel and envelope to look like, even
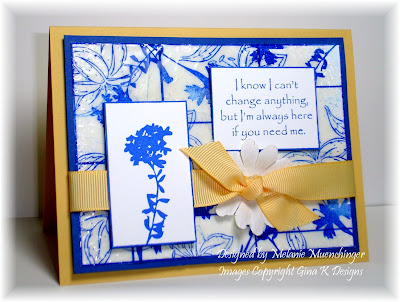
I , sew on cards! ;) This set doesn't come with greetings but will go with
any, so I used the round thank you sentiment from my
"Fun Year Round" set around a real button and layered it over those Marvy Flower punches again (green, yellow and blue size) in
Wild Dandelion and
Black Onyx,
see how the flower in that stitch matches these punches, too? (I'm a little obsessed with them right now!) Love it! her'es some of the new ribbon you'll be able to buy in wraps from Gina K Designs, can't wait, this is one of my faves!
For even more samples with the stamp sets being previewed tonight, check out these designer's links:
We'd also like to invite you to attend our
Release Party this Thursday, July 1st starting at 7 pm central on StampTV! There will be challenges, contest questions, and more samples from our designers on all the new stamp sets being released this month! We'd love to have you join in on the fun! Thank you for visiting, see you tomorrow!
 One of my main requirements for holiday cards is that they look fancy but be pretty quick to assemble when i need to make a lot, so after die cutting the image, I layered it centered over the "Fun Year Round" frame stamped in light blue on Pure Luxury White, then matted that over Pure Luxury In the Navy (although it looks really dark in the photo, it is navy blue not black!) and Little Boy Blue to match. I added a few punched ferns from Grass Green behind the popped up focal point emphasize the little branch the dove is carrying and a tiny rhinestone to the branch's berry and the little "a" in "peace". The "peace" is part of a larger greeting I inked up with my marker and stamped into the middle of a circle in the frame. I love this clean and simple look, the circles behind make me think of ornaments or snow...
 Next we have Gina' s newest Free with Three set "Versatile Verses", and it's one of my favorite "Free with Three" sets ever! The split label is a perfect fit for the Oval Nestabilities and the large and small greetings are work great inside it or separately, it will be an extremely useful set! I made this card for a friend who just had a bay, although she had a girl, her nursery is powder blue and chocolate, which I think is a very elegant combination! I used Chocolate Brown, Little Boy Blue, and White for my card.
 After die cutting my oval greeting, I used my new "Fun Year Round" to make these colors look a little more feminine by creating the border with the flowers and button images on the background and envelope, adding four white dots to each of the buttons centers with an Inkssentials pen and then carrying the sewing theme throughout: adding a real button over the Marvy punched flowers (Jumbo and ExtraJumbo) and white paper flower to match, and then one of Tami's new "In Stitches" trim in Vivid Coffee Bean around the sides. I mounted the mat at an angle to give the "HOORAY" (which I added some white circles to the o's) even more energy!


 Janice


