Monday, February 29, 2016

Gina K. Designs Inspiration Hop: A Year of Flowers 3 and Birds & Blossoms 2

Good morning! The Cast and Crew for Gina K Designs welcomes you to another fabulous blog hop celebrating the new stamps from the February Release Party. We hope to inspire you with some beautiful card projects as you hop along to each of the designer’s blogs!


Today, we are featuring the new stamp set A Year of Flowers 3 (by moi!) and the Birds & Blossoms 2 set by Theresa Momber. Please enjoy the gorgeous inspiration samples from the team and then comment on each blog for your chance to win an awesome grab bag of GKD goodies!!!  To see who won, check the Big News Forum at StampTV a few days after the hop.

First up, A Year of Flowers 3! I am so excited to give you this new set to follow up and complement the most popular set of stamps I've ever released!  While I believe A Year of Flowers will always remain a timeless set for your collection, this new set gives you the same flowers, but in different orientations than front facing, to flesh out even more realistic looking arrangements as well as showing the original seasonal flowers in different stages, form bud to more full-blown.  I love the opportunities for creating more variety in your layouts and representing the life cycle of a flower in this way. If you don't have the first set, like that original offering, these images will work for an entire year 's worth of occasions and all four seasons.  Truly a must have! Mix and match or use it on its own.  In addition to the flowers, you are also going to love the new elements, like more complicated stems, and fillers like baby's breath and ferns. And, it's in CLEAR, woo hoo!!

Here is an arrangement I masked and stamped with A Year of Flowers 3 . I used my galvanized tub from Beyond Baskets. Great containers in that set for these flowers! The baby's breath and ferns are stamped in GKD Fresh Asparagus and Grass Green. I just love these fillers so much!   It's so delicate and much faster than stamping and coloring leaves. I may go through my basket of cards and just add baby's breath to all my previous stamped floral arrangements!  It gives such an airy, fresh-cut feel. Tip: Use two shades of green for your greenery, whether that's two pads or stamped and stamped off, to create more variety and depth. I'll be doing a masking video this week to show you how to mask an arrangement into any kind of container stamp! Cardstock is GKD Pure Luxury White and Powder Blue. Greeting is from Scripty Sayings.

I showed this card at the end of last week's video, but not a close up photo. Base is the gorgeous new GKD Pure Luxury Lipstick and the tulip is colored with Spectrum Noir FL1 and CR11.  Leaves are CG3 and CG4. By the way, how do you like these new long leaves? They are just *perfect* for tulips in both sets!

This card I showed at the party, but wanted to list the colors. I actually stamped the focal point and greeting in Edible Eggplant to match the card base. A nice alternative to black ink for line art images when you are using purple shades!  Spectrum Noir HB1, LV1 for the petals and GB8, CG2 and CG4 for the eaves and centers. The lotus is collage stamped all over the Lovely Lavender layer in Wild Lilac, and then sponged with Wild Lilac and Edible Eggplant. I love this smoky look! I can demonstrate a card like this but with different flowers and colors in a video if you like.  This is one of my favorite types of coordinated backgrounds to make.

Lots more videos and samples with this set in the coming weeks! Be sure to scroll down to the previous posts if you have not see the other samples I'e shared so far with this set. 

Next we have Birds &Blossoms 2 from Theresa Momber. So many different looks you can get with this set!
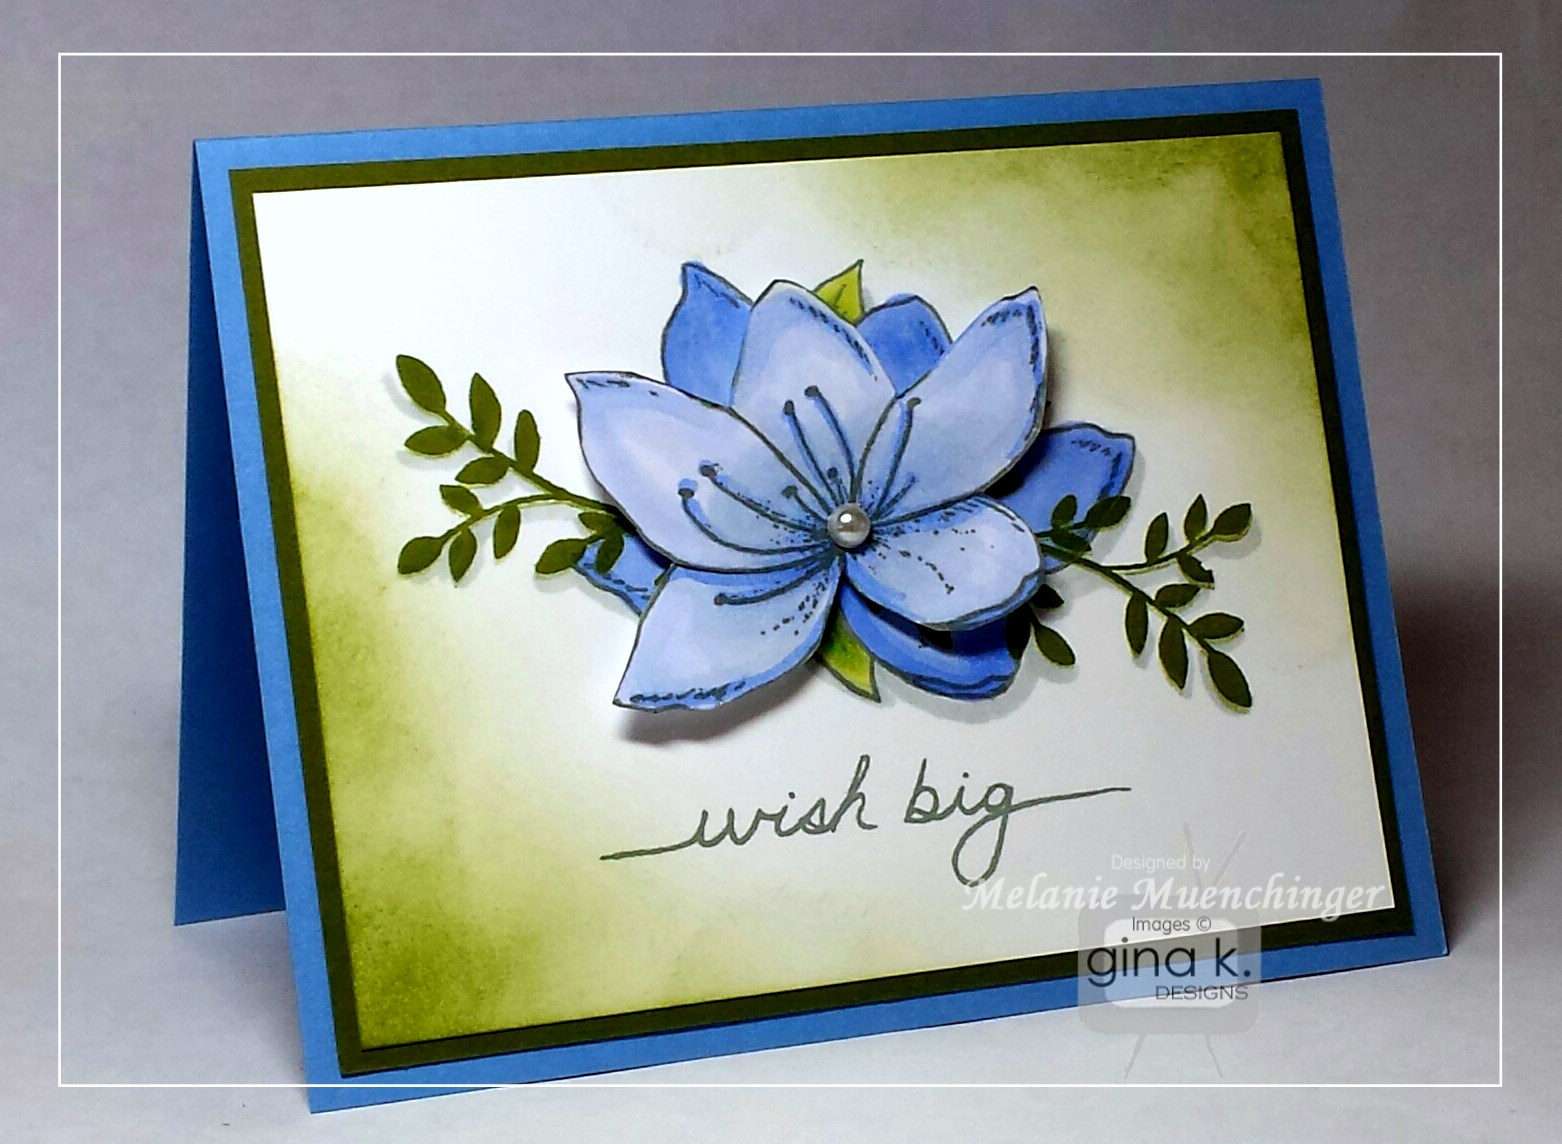
I stamped the cherry blossom branch on this 4 1/4" square Pure Luxury White card in GKD Charcoal Brown and colored with Spectrum Noir markers.  I stamped the large flower, colored, then cut out, cutting in between the petals towards the center so I could mold them with my fingers for extra dimension and popped up on a foam square.  Last I added some stamped and stamped off leaves with GKD Grass Green, like a soft breeze blowing through, before adding the sentiment. I love having stamped sentiments in one of my besties own handwriting! :)
 I shard this at the party. Cardstock is Pure Luxury Powder Blue, Fresh Asparagus and White. All stamped images and sponging were done with GKD Fresh Asparagus.  I cut out a second flower to layer over the first at an angle to give a fuller look, with more petals.
Finally, I love this sentiment! I stamped the solid leafy branch over and over with GKD Fresh Asparagus, full strength and stamped off, to create the tree top, then added the birds in Black Onyx. Honestly, I didn't mean to add so many flying birds, but I dropped the stamp and had to cover up a smudge (rather than start over!) The simple colors and layout remind me of a sweet children's storybook. Cardstock is GKD Pure Luxury White.


Birds & Blossoms 2

Fabulous set, Theresa, welcome back!


While shopping, don't forget Scripty Sayings (free with $75 order or more, for a limited time only!)


Ready for more awesome creations?! Just click on the links below for more from the Illustrators and Design Team!!


Melanie Muenchinger – Illustrator for A Year of Flowers 3
Theresa Momber – Illustrator for Birds & Blossoms 2


Don’t forget to pop over to the Gina K Designs Store and check out all of the new products available this month in the “What’s New” section at http://www.ginakdesigns.com.


Thank you for stopping by!

Friday, February 26, 2016

New Gina K. Products Available for Purchase!


Thanks for attending out release party last night! (Sorry I couldn't stay till the very end!) Here is my favorite card I shared, with my new new set A Year of Flowers 3. I used the pitcher image from Stately Flowers 9 (still a few in stock!), these flowers will mix with those as well. :) I will share another sample showing how I like to do the masking of all these images like this in my video next week, but with a different container from one of my *other* coordinating sets (which one do you think it will be?)

Which of the new flowers is your favorite, or which pieces are you most excited to use??  More inspiration for this set and all our other new stamps in our hops next Monday and Tuesday, please come back! 

Have a fabulous weekend! Tip sheet and more samples coming up!

Tuesday, February 23, 2016

Video Sneak Peek: A Year of Flowers 3!


Good morning! Today I will give you a sneak peek of my newest set (coming out in 2 days!) A Year of Flowers 3. A follow up to my bestselling A Year of Flowers, this clear photopolymer set of new stems, blossoms and fillers is the perfect companion or stand alone set for creating beautiful floral cards for any occasion or season!I think you're seriously going to flip out when you see the whole set! :) In addition to a simple coloring tutorial, you will also see this set paired in a fun way with our new Incentive Set, Scripty Sayings, free for a limited time with your order of $75 or more. These versatile sets are both must haves for your collection! (and perfect with all my container stamps! Just sayin'!)  A Year of Flowers 3 is available for purchase Thursday, February 25th at 7 PM Central at ginakdesigns.com. Please enjoy and thank you for watching! 

Supplies:
Gina K. Designs A Year of Flowers 3, Scripty Sayings stamp sets
Gina K. Black Onyx ink pad
Gina K. Pure Luxury Black Onyx  (2 5/8” x 4 ¼”), White 2 3/8” x 4”) , and Passionate Pink ( 4 ¼” x 11”, scored at 5 ½”) cardstock
Spectrum Noir markers-PL3, PP6, BP7, CG3, CG4, BG2
Adhesive, adhesive rhinestones


Squeal!!!  See you Thursday for our StampTV release party!

Saturday, February 13, 2016

Measure Once, Cut Once

Hello! Yeah, I know that's not how the saying goes, but that's how I usually practice it. Or, more likely, don't measure at all, just cut...cut, cut a little more... cut a little more!


Ever wondered how big the two focal rectangles in the

 Inspiration Mosaic frame are? 1 1/2" x 2" and 1 3/8" x 2 

3/8" Handy to know if you want to mass produce mosaic

cards and accent pieces for it! Thank you Joan Nixon for

your question this morning! 

smile emoticon Inspiration Mosaic will be back in stock soon*, thank you

 everyone for your patience! I used it here for a simple single

layer card along with Coffee Therapy, free for just another

 week or 2 with an order of $75 or more. Can you all tell how

 much I've been enjoying this little incentive set? Love how

 the mosaic and mugs looks like display cubbies in a coffee

 shop.


Thanks for all your great feedback on my Stamper's Favorites cards and videos this past week! We still have a few more in stock, but limited.

Have a fabulous weekend!

*I saw an update they were back but in limited quantity and got all excited to post this, but it sold out before I could finish posting it! Dohh! There really ARE more on the way!!

Tuesday, February 9, 2016

Video: Create a Sketchbook Look with Stamps and Pencils


Good morning! Today I will show you how to use your stamps, paper and pencils to create glorious sketchbook-like illustrations for your cards and projects!  This is a wonderful way to personalize a stamped image, and the black and white tones on gray paper is so striking and unexpected. In this video, I offer some tips about different drawing media and demonstrate a few simple shading techniques to try your hand at before making these cards with the realistic hand-drawn images in Stamper’s Favorites. Start your own practice page like I did and then get busy playing, letting go of perfectionism! The process is like sketching in a garden, and the result will have you feeling like a very accomplished artist. As you should!  

 Love how this light and airy scribble came out behind the butterfly!  The white is faint in the shadows but provides such beautiful texture!
 I think this is the first card I've made where my hummingbird was not in a sky scene, but low to the ground (pad). I love it!  Want to put my finger out for him to perch on.
 I want to keep this "gift" set for myself!!  (I'm still looking for that feather stamp! Where..??!!)
 Don't forget to the curl the edge! Like a gentle breeze ripping through, truly a moment in time! What an easy (free!) detail!

Supplies:
Gina K. Designs Stamper’s Favorites* stamp set
Gina K. Pure Luxury White  cardstock, 4 ¼” x 11”, scored at 5 ½”
Toned gray sketch paper, trimmed 4” x 5 ¼” (or Kraft of Moonlit Fog cardstock substitute)
Gina K. Black Onyx ink pad
Spectrum Noir Professional Colored Pencils- Essentials tin (you can also try graphite pencils of varying hardness for different shades)
acrylic block, adhesive

Thank you for visiting me today!

* Still in stock as of today, woo hoo! :)

Monday, February 8, 2016

Make a Mug Mask! (say it 3 times fast)

Good morning! Here is a simple card I made with the sentiment from Coffee Therapy, inspired by one of the chunky little mug images in this set.  It is easy to cut out your own mask to sponge in some color and stamp designs over it to make a big custom mug to showcase this sentiment. 


Stab your scissors into the middle of a piece of copy paper and cut out what is basically a rectangle but with curved, tapered sides.  (Or a rectangle if you want a more simple, masculine mug.) You can sketch it first if that helps but I just started cutting, you know me! Then cut a half circle on the side for the handle. Yes, it's going to fall out, you can't make that middle part stay since it's a hole, so cut a smaller half circle in a sticky note along the top edge where it's sticky. Then stick that into the open space (yellow piece in the photo).  There's your handle!

Sponge GKD Sweet Corn ink all over the mask until you have the desired look. remove mask.  I added dotted border to the top and bottom with the row of circles from Inspiration Mosaic and then used the straight edge of the paper and the piece that fell out of my cut out to mask some GKD Warm Cocoa ink below to make the table. That's it! Love the bold, but simple statement. it's really fun to make your own mask like this. I hope you try it! Sorry for the grainy step outs in this posts, it was such a last minute card, but it occurred to me as I was making it would be good to show the process, simple as it is.  

Coffee Therapy is free for a limited time with your order of $75 for more.

Thanks for visiting today!  I just love coffee cards (and miss my Mugs & Kisses set! sniff! If you by chance have that retired set, you can stamp out two different mugs for your masks!) :)

Tuesday, February 2, 2016

Video: White Watercolor Splatter with Stampers Favorites


Good morning! Today I will show you an emboss resist watercolor technique and how to do simple splattering to add texture and a more painterly look to your cards and projects.  I made this for Silke's MIUM Make a Splatter challenge at StampTV and I was so happy with it, decided it was perfect for this week's video! This butterfly is beautiful for painting panes of stained glass color, but a similar design can be recreated by repeatedly stamping any of the other images in my Stamper Favorites set. Please enjoy! 


Supplies:
Gina K. Designs Stamper Favorites stamp set
Gina K. Pure Luxury White cardstock (3 7/8” x 5 1/8” and 4 ¼” x 11”, scored at 5 ½”)
Gina K. Black Onyx ink and Tsukineko Versamark pads
Spectrum Noir Aqua markers set-Primary
Large acrylic block or palette, clear embossing powder, heat gun, water brush
Gina K. Pure Luxury white stitched ribbon, adhesive foam squares


The one on the right is the one I did before my video and showed at the beginning (and on Facebook earlier, see below). The one on the left is the one I demonstrated for you live.  Fun to see all the differences, with the same color markers.  No two watercolors are alike, but I really like how they both turned out! You can do this!
(The original)


Thank you for visiting today!  Be sure to use the tag STV16MON5 when you upload your splattered card to StampTV, I hope you'll play along!

Monday, February 1, 2016

Gina K. Inspiration Hop: Coffee Therapy

The Cast and Crew for Gina K Designs welcomes you to a special Inspiration Blog Hop featuring our new incentive stamp set called, “Coffee Therapy”. With this stamp set you will be able to make fun friendship cards to send to your favorite coffee buddy! We hope to inspire you with some beautiful card projects as you hop along to each of the designer’s blogs!


Please enjoy the gorgeous inspiration samples from the team and then comment on each blog for your chance to win an awesome grab bag of GKD goodies!!!  To see who won, check the Big News Forum at StampTV a few days after the hop.


This first one just makes me want some coffee! Simple GKD Dark Chocolate stamping on classic GKD Kraft. I am lovin' this set for single layer cards, just let the coffee speak for itself while you wake up, you know? It's fun and easy to add some doodled foam and details with your white gel pen to make these bold coffee mugs pop! Mmm, good.
And as you can see, the swirly steam bits make great borders! On the first one, I just stamped them end to end, but here I kept rotating the stamp so the opposite ends came together to make a longer swirl.  Good stuff! Mugs are stamped in GKD Dusty Rose and Blue Lagoon.  You can make a saucer for your mugs by inking up just the top, widest portion of the bold mug s by laying it across the edge of your pad to pick up just a thin line of ink, or you can do it with a swipe of your marker, and the stamping.  Just to change it up, get some different looks, you know?  Shadows are drawn with Spectrum Noir BG3.


It's adorable, right?  Free, for the next two weeks only, with an order of $75 or more. :)


I went so crazy for this set I made a BUNCH more during my stamping session the other day! So stay tuned for more ideas, these aren't even my favorites. :)

Ready for more awesome creations?! Just click on the links below for more from the Illustrators and Design Team!!


Melanie Muenchinger (you are here!)


Don’t forget to pop over to the Gina K Designs Store and check out all of the new products available this month in the “What’s New” section at http://www.ginakdesigns.com.

Thanks for visiting today!

Tuesday, January 26, 2016

Video: Clear & Simple Creating with Inspiration Mosaic


Hello! In today’s video, I will show you tips about how the frame and clear image sheet for our new clear photopolymer offering of my bestselling Inspiration Mosaic can be used to help you create interesting layouts for your photos, postcards and even pictures from a magazine, elevating them into art.  I also demonstrate a simple card with the frame and the new StampTV kit Made with Love stamps and cardstock. Please enjoy! Be sure to watch the whole video even if you know how to make the cards above so you can see a few other photo card I peeked. ;) Thanks for watching and visiting today! :)


Supplies:
Stamps: Gina K. Designs Inspiration Mosaic, StampTV Made with Love kit (image and greeting from the Better with you set in the kit)
Gina K. Pure Luxury White ( 3  7/8” x 5 1/8”), Black Onyx (4” x 5 ¼”), White and Lipstick (scrap) cardstock (all cardstock to make this is in the kit!)
Gina K. Black Onyx ink pad
Scissors, adhesive and foam squares

Monday, January 25, 2016

Gina K. Inspiration Hop: Made With Love StampTV Kit


Hello and good morning! Welcome to our January hop! Today we are showcasing the new StampTV Kit Made With Love.  Please enjoy the gorgeous inspiration samples from the team and then comment on each blog for your chance to win an awesome grab bag of GKD goodies! To see who won, check the Big News Forum at StampTV on Thursday after the hop.

Here are some new cards I created with the Made With Love and Better With You stamp sets in the kit. And I just had to use all the new ink and cardstock colors, too!
There are some really fun two step floral elements in this kit. Look how the new GKD Lipstick ink pops! POW! This one uses Massive Messages for the greeting, Gina's new incentive set. Yep, you need 'em both! Add a drop shadow under everything with BG3 Spectrum Noir marker for dimension.

Here I used one of the card fronts from the foiling element page in the kit, but I don't have a laminator so it works really well as just a printed frame. I colored the stamped image as well as the loops in the frame and border with Spectrum Noir markers to jazz it up. LG shades look good with the new GKD Applemint cardstock. I like the look!  The bird house is popped up.


Aren't these kitties fun?  I noticed they are the same width apart as the tandem bike's seats, so...Voila!  Stamp the cats in an ink other black and you an draw in some simple faces, like they are facing forward.
And finally, here is an easy one with no images, just showing off the new colors and patterned paper with one Massive Message!  I colored a white button with the F1 Spectrum Noir marker, this is a great match for the new GKD Lipstick cardstock.
These next two cards were in the release party, but wanted to point out some details.  The heart stencil in the kit is really pretty, and sponged in a similar color ink as the flowers, they remind of petals more than hearts. I used GKD Peach Bellini over the stencil and then just a bit of the Lipstick at the corners. I swiped some Wink of Stella glitter pen over the flouncy flowers for some sparkle.
It may be hard to see it in the photo, but I did the glitter thing on these butterflies also.
I really like them stamped in the new colors and then shaded like a gradient with two or three shades lighter of the Spectrum Noir markers in each color group (GT and BT for Blue Lagoon and CR shades for the Lipstick).  The flourish in the kit makes a nice trail.

Here are the pieces in the kit:

And the Incentive set Massive Messages, when shopping don't forget to get enough to qualify for that if you can!


Now please enjoy the rest of our hop and get some more inspiration from our fabulous Gina K. Designs team!


Melanie Muenchinger (you are here!)
Susie Moore
Laurie Schmidlin
Allie Gower

Have a blessed day, thank you for making us a part of it!

Tuesday, January 12, 2016

Video: Creating Easy Tags with Twine Time

Hello! Today I will show you how to make adorable tags with ease using the eyelet and twine elements in my Twine Time set.  Embellished tags like these are so versatile, and the stamps make it faster and simpler than ever!  I also share additional tips and tricks for creating this two layer greeting and stepped up card design. Please enjoy!


Supplies:
Gina K. Designs Twine Time, Triple Play Frame* stamp sets
Gina K. Wild Wisteria, Grass Green, Dark Chocolate and Kraft ink pads
Gina K. Designs Pure Luxury White (4 ¼” x 11”, scored at 5 ½”, plus scraps), Kraft (3 5/8” x 4 7/8”) , Dark Chocolate (3 ¾” x 5”) cardstock
Scissors, foam squares and adhesive, white gel pen and Spectrum Noir BG3 alcohol marker
Optional: Cropodile or hole punch

* You can make this without the "have" from Triple Play Frame, but it's a fun addition, works with most of the twine script words!

Sunday, January 10, 2016

When the Wrong Number is the Right Number

Something really blessed me today, I had to share with you. I apologize first to any of you are missing the the lack of more personal posts from me, I have just not been able to get them typed up in between videos and middle school woes!  This happy accident was too good not to make time for.

I was sitting in church today and was getting some really good nuggets of truth from our pastor Dr. Bowman.  Many people, myself included, look up the passage of scripture on our smartphones rather than the good "book" as we follow along (as he refers to his own iPad), so it's common to have phones out.  My teenager and younger son were in youth group and Sunday school that morning instead of the worship service so I decided to text a few takeaways to my own phone number to discuss with them later that I thought really speak to some things going on in my sons' peer groups right now  (Don't ask.  But you can pray, thanks in advance).  Well, as I went to put my phone away, imagine my surprise when one minute later it buzzed alerting me I had I received a reply. (From my own number? Huh?) saying, "Ain't that the truth.

Well! I have to admit, my first thought was, "God??"  but after a few seconds of processing, fear crept in that I must have sent it to someone in my contact list by mistake (Ack!  Not that that would be wrong, but without a even a "hello" or "how are you?" to lead in, I get that the message could sound a *bit* condemning, just sayin'!). Sheepishly, I replied along the lines of, "Um...who is this?", and got a reply that it was a woman who lives in my same city, the number was just one digit off.  Oops! Our convo, numbers and names removed (and a tiny bit of small talk trying to figure out what happened in between), is below.  

Now, you wonder: who knows how either of these things spoke to her or were needed  or will be used this morning?  For her own son? A friend? For her, herself? You just never know. After our pastor finished his message, I followed him out to quickly tell what had happened before he made his way to our other campus to preach the 11 o'clock service, asking for 30 seconds of his time! After sharing, being the cool, "current" guy he is, I got a big smile, a high five, and a promise to share that story and a picture of me and (more importantly) the phone on Facebook (he is all about Facebook! You can also follow him on Twitter, as he reminds us every Sunday! ) 

I went back inside and just felt crazy good as we wrapped up the service worshipping with The Robin Wymer Band, and rejoicing about how God works.  I could have sent it to a fax machine, or the electric company, or someone in another state if  that one wrong digit was in the area code instead, you know? And most certainly nothing of my own doing, other than listening to the prompt of the Spirit to take that note, and God used it.  (I have since been informed I don't really need to text myself grocery lists and the like, as Jonathan says my phone has something called "Notes" ?  But you all know how I roll with technology. I think I'll continue with the texts...who knows who we'll* reach?

By the way, I also like how the person couldn't call it anything but "the truth"! Not just an "I know, right?!" or "Makes sense..." or "Food for thought", or "WTH?**".  His word never returns void.  Amen!  Have a blessed Sunday!  

Oh, one last thing! If you happen to be in the Austin area, you are welcome to attend our church's free screening at 5PM tonight of The War Room, popcorn included, at both campuses, here is the Quarries link!  (Of course, I also invited "Wrong Number")  Maybe I 'll see you? :)

* God and I 

**Heck

Monday, January 4, 2016

Video: Creating Faux Twine Borders

Hello!  Keeping all your resolutions so far? :) In today’s video, I will show you how to use the scallop twine element from my Twine Time stamp set to create amazing borders and custom frames for any shaped dies you have!  Quick and simple, this little stamp and technique make fabulous accents that will enhance any project. Please enjoy!  (Apologies for all the head shots and (ack!) *confetti* in my hair!! My son and I celebrated with some cascarones earlier...)


The trillium I color in the video is from Fabulous Frame .
(The pink flower shown in the sample at beginning is from my Stately Flowers 9 set, currently out of stock, or I would have demonstrated it today!  On order and back in stock soon!)  I will definitely be making and showing twine frames in more shapes since I have oodles and oodles of dies! You can try this with the loop in the set as well, which I showed in the last video for a straight border, but it's a little trickier to line up around an irregular shape since one leads into the other, know what I mean?

Supplies:
Gina K. Designs Twine Time, Fabulous Frame stamp sets
Gina K. Pure Luxury White Heavy Base Weight cardstock (4 ¼” x 8 ½”, scored at 4 1/4”, or 4 ¼” x 11”, scored at 5 ½”) and scraps for die cuts
Gina K. Jelly Bean Green, Black Onyx ink pads
Spectrum Noir BG3, CG1, CG4 markers
Oval die and die cutting machine
Scissors, pencil, button, foam squares