Friday, August 3, 2012

Super Girly Day!


Here is a girly card I made for our pre-teen neighbor and family friend with Basket Additions 3 and Spring Basket. When I drew this image I thought about some iconic things of my childhood and now that represent the stuff that little girls are made of. I had fun paper piecing the Barbie dress and locked diary with papers from the GKD Hello Sunshine pack. Now I can have all those Barbie clothes I *might* have coveted, and then some! :)

What year were YOU born? Was some of this stuff in your basket? How about your daughter, what's in hers? Would love to know! Tip: If your sweetheart is really into stuffed animals you can snip out a teddy or puppy from Basket Additions 2 or Basket Blessings to add in with all these other things. Or, if she is a bit of tomboy, mix up some of the stuff from the "boy" image in the set. That would have been me!

Or, tell me about what a girly day is to you? For me, that would be shopping with a friend, cupcakes and pedicures! Ahhh! (Cammie, come back!!)

Thanks for visiting!

Wednesday, August 1, 2012

New Stuff! Now Available!

HI!! Was that a fun party or what? That was more cards than I made for a release party in awhile and I will tell you part of it is having so much fun with, being inspired by, and how fast the cut files make for cute cardmaking! Here are the full sets if you have not yet seen or need a reference: Basket Additions 3, now available, in clear or rubber.
Boy stuff. Girl stuff. Guy stuff. School stuff. Teacher stuff. Halloween stuff. And tons of words to go with these and all the previous basket sets so now you can make "for you MOM" with the spa basket or "for my husband" with the romantic picnic or Valentine basket. I'm so excited to have these options! :)

And previously released Holiday Basket is now available in clear also, woo hoo! It was easy before with straight edge in the die cut rubber lining up the toppers with the baskets, but it just got even easier with the clear. Just stamp the basket then stamp the topper and you got it, I mean, perfect! And so nice to have with all the fall and winter holidays coming up: Thanksgiving, Christmas and Valentines Day! And I apologize if I went a little cauldron/Halloween crazy with my first digital stamp Tuesday! I am just so excited I can now bring you digis for even less money and very specific themes or seasons! I also wanted to show how versatile the cauldron could be too, I had a blast coming up with new non-Halloween stuff once I started playing around with the matching cut file!Here is one my favorite cards from the party, where I used both the Holiday Basket stamp set for the roses, and then the cut file for Holiday Basket and the cut file for create a Cauldron to make this vase with handles. I used my Cropodile to punch through the handles on the sides to thread the raffia through and trimmed off the feet.

So ahem, speaking of cut files, check it!! :) Basket Additions 3
I will be doing some posts showing ways to use these, as I said, as well as all the cuts you'll receive in the file, just give me a little time to snap all the pics! For instance, here is one for Holiday Basket.

Now something to know about the Create a Cauldron file: this file is a print and cut file, meaning you get both the digital images and the cut file for it together. If you don't have a Silhouette Cameo, you only need to get the digital stamp. If you have the Cameo, and want the cauldron, be sure to only get the print and cut file you don't need to also buy the digi images, because the digi images ARE included. The reason we are offering it this way is because it is not an actual stamp, you can't stamp in the image after cutting, instead you print the digi first, then cut it with the Cameo. Make sense? But what's also nice is you can copy and paste just the cut line parts you want on to a separate file if you would like to make a few of them cut without the outline inside, the way I did on these cards.

More to come!

Monday, July 30, 2012

New Release Preview Blog Hop

Good morning! Welcome to a sneak peek of our newest sets from Gina K Designs, available this Tuesday at 11 AM CST! Gina K and the illustrators with new sets coming out are hopping, and hopping up down with excitement, over showing off the new stamps! :)

First here is peek at my latest in the series of Basket sets, Basket Additions 3! Filled with tons of new images appropriate for fall holidays, events, kids, and tons of WORDS, I know you will love this new set! And the card above actually uses two sets, because if you read on Gina's blog, this basket is from the popular Holiday Basket set, which is being re-released with a clear option, so now you can get it in clear or rubber, yeah! So easy for lining up!

And here is a peek of another image using a CUT FILE for the Silhouette! ( I made the Halloween card above before I got my cut files done!) Don't they look just like little stickers perfectly cut with the nice crisp border? I also want you to see how cute these images can be, even if you don't have any of the basket bottoms, love it snuggled under a ribbon...
And for those of you who love Halloween, we've got a little something extra for you for Halloween cards, projects and treats! One of our first digital image sets from Gina K Designs, this adorable cauldron and accessories!!
Not available in rubber or clear, this digital image fits the Halloween image you see on the card above from the new Basket Additions 3 set (how cute those spooky friends peeping out from under the lid!!), as well as any of the other Basket Additions sets (or what ever you might want to stamp into in a pot! LOL!) Hope you love this new digital option: just print, color and cut (with a cut file we'll also have if you choose!) A very affordable way to get something specific (but versatile!) that will be so fun this time of year without having to purchase a full set of Halloween stamps.

Have fun hopping and seeing what other surprises are in store for you this month! And hope that you will be able to swing by our release party Tuesday 11AM-1 PM Central at StampTV! Video with Gina and chatting with the teams, contests, prizes, full set reveals, shopping and samples--Whew! Sure to be a blast, can't wait to party with you! Hugs, thanks for visiting!

Gina K

Beth Silaika

Becky Oehlers

Melanie Muenchinger (you are here!)

Tami Mayberry

Theresa Momber

Tuesday, July 24, 2012

More Stuff on Cameo Cut Files!

A few more things to note about the Silhouette cut files coming to the Gina K Designs Store! :)

I've been working really hard on these files with your stamping and projects in mind, wanting you to get the most bang for your buck (and in this case, even less than a buck, 99 cents!) With some instructions and practice, if you have a Silhouette you can create a cut file to match images you own by scanning and editing them, but I will tell you even with practice, some sets especially those with a lot of hand drawn detail, can be very time consuming, and require a lot of erasing and tweaking to get the outline just right. So if you are very comfortable with your Silhouette, or have a lot of time on your hands to make these on your own and test them out, you absolutely can, no need to purchase new files. They can take anywhere form 15 minutes (with a lot of practice and simpler set with very few images) to a couple hours per set, most being closer to the latter time...my sets have a LOT of images!!

I have finished cut files for almost 30 sets so far. Woot! I have both cut AND mask files ready for a few that are very recent or most popular, but still working on catching up on the masks. The files with the 1/8" border are the priority to get in the store. I know Gina plans to add them all gradually to the store. I believe the priority there will be most recent sets and sets that are seasonal that you'll most likely want to purchase now as we work our way back through our catalog.

You are welcome to put in a request for a set you need file for! My goal is to have them for every set I've released! The exciting thing is, having the ability to have perfect cuts around images can make an older set seem completely new and open up lots of new possibilities! Fun to bring new life and inspiration to well loved sets of the past!

You can see from yesterday's photos I have created some cuts for sentiments! Many sets will include these when the set, font, size and greeting lend themselves to that. Some of these sentiments or single words look really cool cut out! Cuts for teeny tiny words will most likely not be included in the file, and there will NOT be cuts for words on the mask files (as words will be difficult to read cut exactly to fit, know what I mean?)

In some sets I have added a shape that will work well with the sentiments in the set, like a large oval or circle, plus one a little larger for a mat for layering. While they are not designed to fit any stamp images in the set, these will be like some fun new tags for you, planned to work nicely with the style of the set! Hope you love the convenience of that!

Some images will include more than one cut to go with it, so you'll have options! For instance, something like a frame or label, looks nice with just a cut around the outside, as well as with cutting on the inside for a window and a more detailed look. When stamping I want to be able to do both, so I want YOU to have both,too. One the same file, enjoy!

You are welcome to put in a request for a set you need file for, my goal is to have them for every set I've released! The really exciting thing is, having the ability to have perfect cuts around images can make an older set seem completely new and open up lots of new possibilities! Fun to bring new life and inspiration to well loved sets of the past, especially those that might have required a lot more fussy cutting to really shine and have lots of dimension! I know I'll be playing and posting with some oldies but goodies!

Some of you have asked here and other places about svg files. My response to that is, "What is an svg file?" No, but seriously, I *know* they're for other machines, but I don't know whether we will be able to do that with the Cameo software we have, my understanding is that the Studio files only work for the Cameo. This is all very new to me and the first cutter I have owned. Certainly it would benefit ALL of us to have everyone be able to purchase files to use with ANY cutter, so if and when that is possible, I know Gina will keep everyone in the loop as she always does. I'm my crossing fingers!

I hope this helps you have a better understanding of what to expect once the files are available. You may wish to just send the file straight to the Cameo and have a cut for every image, but often I think you'll find you just need one or several of one or two images at a time. There are many different ways to go about using the file once you have it to be as efficient as possible about making your cuts, planning your cardstock and images so you don't using more cardstock than you'll need, etc, so I plan to show screen captures and describe what is working for me, which I think will be very helpful and make the process easier and more enjoyable (as if watching your own personal professional cutter do all the hard work while you fix yourself a snack wasn't fun enough!) LOL! :)

Finally, I can't wait to see what you'll create! The Silhouette Cameo is THE coolest crafting purchase I have ever made, can't believe I have something that can do SO much of my very own. I also know it will take my designs to another level because of the precision in cutting and the time it will save, allowing me to work on things I wouldn't have attempted before because of the time factor. If you love making cards, using stamps and having gorgeous cut pieces, frames, embellishments and images, you'll definitely want to put this at the top of your crafting wishlist. (Men like it, too, it sounds like R2D2 when it cuts and it's a sleek looking "tool") ;)

Happy cutting!

CardMaker Video!

Good morning! Thanks for all your comments yesterday, it is so fun to share the excitement for the Silhouette! More Cameo cutting goodness and tips, coming soon!
Today I would like to turn your attention to the latest issue of CardMaker magazine (September 2012) I do not believe I have any projects in this one, but his morning I was treated to A VIDEO on their homepage (<--click that link to the left to watch), featuring my friend and editor Tanya Fox! Isn't she lovely? So fun to get a sneak peek inside this issue as well as look at all the fantastic changes they have made to the magazine!

Watch and listen to the video above carefully and you'll see some peeks and mentions of others on our Gina K designs team, as well as a featured article with their Designer Spotlight of the month, Carolyn King! (That stinker, she didn't tell me! hee! You can definitely trust Carolyn to keep your secrets, ha!)
Anyway, the layout, photography, formatting, and tip boxes are similar to the layout of my A Year of Flowers book, and I just think every issue and book Annie's Attic is coming out with just keeps getting more and more beautiful! Way to go go, CardMaker! So fresh, informative, and gorgeous to look at, something you want to page through again and again or study/enjoy while getting a pedicure! ;) (Click logo below to view their catalog of products)


I will try to get some more stuff scheduled for you to read over the next few days, right now I am just focused on swim! Jonathan will be swimming at the State meet on Friday morning, I am so excited I can hardly stand it! Please send up some prayers we are all healthy and he has the swim of his life!

Hugs, more later, have a terrific day!

Monday, July 23, 2012

Cut Files a' Comin'!

So how pumped is everyone after seeing Gina's video of the Silhouette Cameo in action? I am just giddy knowing there are cut files coming for all your favorite Gina K stamps, aren't you?!! So I haven't blogged in a week, because ever since I've been creating cut files for the store for my stamp sets, squeal!! So here we go: a photo a day for every day this past week I missed blogging!

First up, Pretty Patterns meets the Silhouette! SQUEEEEEEAL!!!!!
I have done some experimenting with my stamps on the different files, since some of the sets I am working on came out before we had the clear option and I'm happy to report that the close die cutting of the rubber stamps makes it super easy to stamp them inside these cut outs, perfectly lined up! I stamped all these from Stately Flowers 4 using rubber stamps ( I have both the clear and rubber version of this set, and ahem, couldn't find my clear set on my messy desk!! )

And here I am showing how to line it up just position the stamp over the cut cardstock until you can't see ANY white cardstock, whihc means you are lined up, and press down.

Now I ALSO have a few sets I wanted cut files for that I received in rubber, way BEFORE Gina K Designs was die cutting stamps! (ahh, how far we've come!) So I knew this might make it trickier, but look! Ink up your stamp facing up, here you can see my rough cutting the rubber on A Year of Borders, aren't you glad we die cut now?! (Please note: if you order this set now in rubber, IT WILL BE DIE CUT)
Flip over your cut border and carefully lay it on top of the image. Carefully run your fingers over to hit all of the image. (You may want to top it with a piece of scratch paper or pad of sticky notes to press and keep the cut out fro sliding around) Presto! Perfect!
Anyway, I couldn't be happier with the results I am getting with all my stamps, whether they are clear or rubber, die cut or not! Having said that though I think moving forward the easiest way for most people who intend to use stamps with the cut files will probably find clear the easiest. Just wanted to share the good news so you can purchase with confidence and expect great results!
And finally, I also plan to make MASK files that will cut BORDERLESS, so you can use them for masking OR when you don't want a rim around the edge, here you can see two versions of this image cut with a 1/8" border around, and also exact size, these were both cut with the Silhouette Cameo and stamped after! With a rubber stamp! (Do you recognize which set it's from??) :) Imagine having 10 of these all cut for you for an over the top fabulous arrangement! DO YOU LOVE?? So that is just one more option for you!

Thanks for visiting today! What stamp sets are YOU most excited to be able to cut??

Sunday, July 15, 2012

Scallops and Photos

Hello! Happy Sunday! Here is the last card I shared at the release party with my new Pretty Patterns set. Cardstock is from the new Gina K Pure Luxury Calypso collection (plus layering weight White), and inks are Memento Teal Zeal, Morocco, and Pistachio. Love the contrast of these colors! So fun to create rows and layers of these scallops inn different inks, what an easy way to work in a color challenge! Butterflies from A Beautiful Life are stamped onto Carnival Blue and then shaded with BG49 Copic. Greeting is from Theresa's Mountain Wilderness.

I also wanted to point out how varying the distance between the scallops when you stamp changes the look: in my card they are nested pretty closely together, but as you can see in Gina's sample above and video, you can put about 1/8" to 1/4" between each row, which will create a white space similar to the width in the patterns of each of the individual scallops. And that looks fabulous, too! The Clearly Gina K stamps make it simple to stack them however you wish!
Last thing today, I wanted to share this cool new free online service, Foto Fuze! (Does this picture look different?!) You can upload any photo to the site that you've taken on a white or black ground, then highlight the image and the shadow with your mouse, and like you magic, it erases the background and adds this bright white background for a really professional look! So I tried this one this morning, a photo I had already taken. (It would have turned out better if I had used a white sheet behind rather than the two pieces of white paper, it works better without a seam, this messes up the shadow slightly as you an see on the right. But how I love how brilliantly white it looks and how the card stands out! I'll be using an 11" x 14" piece of paper for a curved edge behind from now on because I don't have a white sheet.) Just wanted to let you know because it makes editing your photos really easy, no light box necessary. There is even a video before you do your first upload that shows you more pointers for how to use it, although it very simple without, and in it how even a light box photo can be improved. Please enjoy!

Thanks for stopping by today!

Friday, July 13, 2012

Like a Rainbow

Although I uploaded this Pretty Patterns sample to the party and our STV gallery, I hadn't put the full cards on my blog yet, oops! A couple things to point out: the space in between the two chevron on the stamp is exactly wide enough to accommodate the chevron when stamped again, so it works perfectly as a filler for gorgeous seamless color! I love stamping off this way to use it like two step and create more colorful backgrounds in half the time with half the inks!

This rainbow I made with Memento Love Letter, Tangelo, Dandelion, Cottage Ivy, Bahama Blue, so you only need to ink up the chevron one time with each, shift and stamp a second time, clean stamp and move on to the net color.

To balance this design, I chose to make the banner with Pure Luxury Blue Raspberry to bring that bottom color to the top, and in the same way stamped the balloon from Square Pegs (this bold all occasion set works nicely with the Pretty patterns) in Love Letter and stamped again without re-inking to make the pink one, putting these at the bottom. This pulls your eye back and forth and provides a nice contrast.

Tomorrow, a scalloped card and some tips for that!

Also, tip sheet is upcoming. But instead of having everything all together, I believe I will try to do more step outs with these so you can see photos of the individual elements in action! From there, you can take that and incorporate into any design you choose. Love this set! :)

Hope you have a fun weekend planned, or if not, a relaxing one! Hugs, thank you for visiting today!

Wednesday, July 11, 2012

Inspiration Hop, Day 3: The Good Life and Assorted Greetings

Good morning! Welcome to our final day of Gina K Designs Inspiration Hops with the design team! As you hop through the blogs, make sure to leave a comment on each of them because we will choose a few random comments and those stampers will each win a grab bag of deeply etched, pre-cut Gina K. Designs stamps! To see the full list of winners check the Big News forum at Stamp TV a couple of days after the hops.
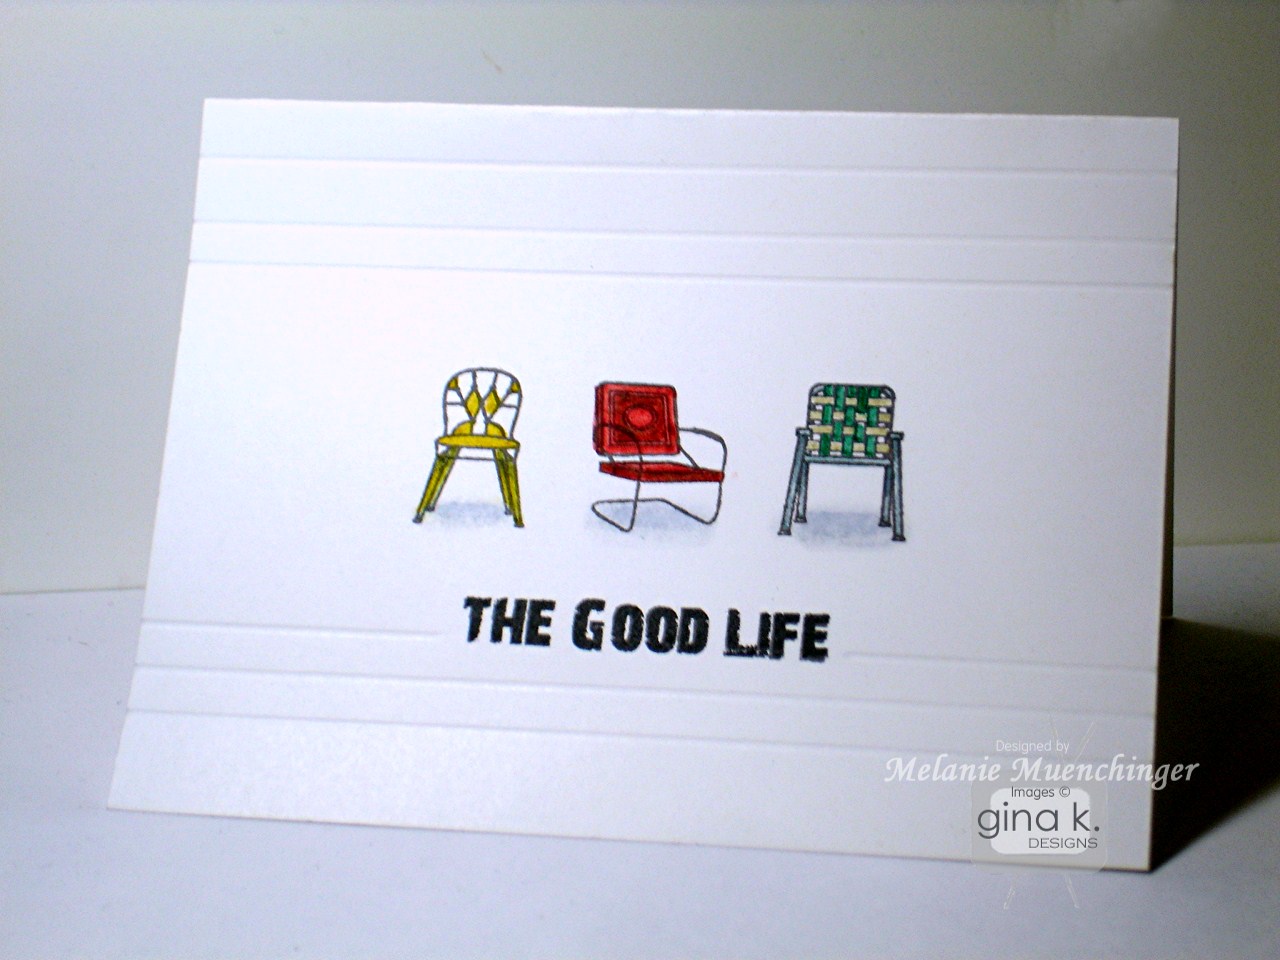
First up, we have "The Good Life"! A really terrific set if you are an outdoorsy family or have lots of friends with lots of camping and road trip memories. Perfect for scrapping too!
I made a really simple card today, because I just had to focus on this different little patio chairs! We live in a pretty quirky neighborhood and it's so fun to see the different ways people have their porches and decks decorated, creating a perfect little place in the sun with just a brightly colored chair and a plant! (I also really like the little banners and paper lanterns in this set, how festive?!) Although we don't own any this style on our deck, I have a real soft spot for the retro ones like this in the center...so now I have one as a stamp, hee! ;)
I colored them and added a little Copic C-3 below for shadows. Instead of having just a plain white card base, I added some scoring to give it some clean lines, interest and be kind of reminiscent of decking.

Next up, we have the new Free with Three set Assorted Greetings. Buy any three sets from Gina K Designs this month and get these versatile sentiments free, perfect for your cards, inside and out!
For an anytime card like the one with the chairs above, it's so nice to have a greeting like "You bring a smile to face" for the inside. Sign it and you're done! Sweet and simple, says it all. :) You can also see how I used two more of the greetings from this set on this card form Monday's hop.
http://api.ning.com/files/PsJxvi-*WJtrsT8RMY93fpIX*ncOBPlXz5QBCUxIXw9lMw1MGgzt4vrNGAam-p1JqkZyVNAlmVXhVeAhfA1Vybw7eMoRx8s-/Designteambutton.gif
Finally, please check out the rest of our fabulous team for more ideas and inspiration:

Thanks for joining us for our hops this week, hope you enjoyed and came away with tons of ideas and inspiration for the new stamps, as well as your old favorites! Have a fabulous day!

Tuesday, July 10, 2012

Inspiration Hop Day 2: Tropical Nature and I Do!

Good morning! Welcome back to our Gina K Designs Inspiration Hops with the design team! As you hop through the blogs, make sure to leave a comment on each of them because we will choose a few random comments and those stampers will each win a grab bag of deeply etched, pre-cut Gina K. Designs stamps! To see the full list of winners check the Big News forum at Stamp TV a couple of days after the hops.

First up, we have this adorable wedding set I Do! from our newest illustrator, Becky Oehlers, woot! Becky made so many cute samples for bride and groom and anniversary cards for our party, and I'm sure you'll see more on the hop, so I wanted to try to go a little out of the box with the small elements in this set if I could. It may be a little over the top...

but here's what I came up with....hee hee! Do you like it? "I do!"

Everything you need is in this set, and Clearly Gina K stamps make creating this face so easy! I don't have any mustache stamps despite how the current craze, so now I can be part of the "in crowd" lol!
Start by stamping the bracket for a mustache in Memento Tuxedo Black. Next stamp the equal sign above, centered over the bracket to create the bridge of the glasses. Color the middle with gray. stamp a circle (ahem, lens!) on both sides touching to creating the spectacles. Add a heart inked in Memento Love Letter to each side for a smitten look! The 4 suggest a cute nose and the "ever" makes a nice little mouth/chin. Now the card/face "reads" from top to bottom, almost like a rebus: "love 4 ever".
Next up we have Tropical Nature by Theresa Momber. I love how all the images in this set and her previous Aloha set complement each other, with all these elements you can create the paper islands of your dreams! I had to start with some of these beautiful palm fronds (get the clear stamps on this set too, by the way, great for two step stamping all those leafy bold and line art images!), which are so versatile as embellishments for so many cards, and her pineapple*, love this symbol of hospitality!
Cardstock is Pure Luxury Sandy Beach, Calypso Orange and Turquoise Sea. I stamped the scallop from Pretty Patterns on both the orange (in Memento Morocco) and blue cardstock (in Memento Teal Zeal) to suggest a sunset and waves. The torn edge and raffia adds to the casual, tropical feel. These waves are calling me!! Love it, Theresa!!

http://api.ning.com/files/PsJxvi-*WJtrsT8RMY93fpIX*ncOBPlXz5QBCUxIXw9lMw1MGgzt4vrNGAam-p1JqkZyVNAlmVXhVeAhfA1Vybw7eMoRx8s-/Designteambutton.gif
Now please check out the rest of our fabulous team for more ideas and inspiration:

See you back here tomorrow for our final day of inspiration hops!

*Incidentally, pineapple is one of my favorite fruits, and one I totally craved while pregnant with Jonathan. Like, go buy one, cut it up, and eat the whole thing in one sitting! I know, right?! But hey, fat free, could've been worse! Sorry, I digress, just a funny memory!

Monday, July 9, 2012

Inspiration Hop, Day 1: Pretty Patterns and Grand Tags

Good morning and happy Monday! Welcome to our first day of Gina K Designs Inspiration Hops with the design team! As you hop through the blogs, make sure to leave a comment on each of them, because we will choose a few random comments, and those stampers will each win a grab bag of deeply etched, pre-cut Gina K. Designs stamps! To see the full list of winners check the Big News forum at Stamp TV a couple of days after the hops.
First up we have my new Pretty Patterns. I got more samples made with this set in one sitting than I have with any other of my sets in quite awhile, these just go so quickly and can provide so many looks, it's easy to get started creating, and then want to re-create one in every color! :) I've already uploaded several samples using all of the different borders in the set to the StampTV gallery, which you can see here, but today I wanted to show you a one layer card using just the chevron to create a beautiful ombre.
First stamp the chevron three times in Versamark on white cardstock, leaving space above and below for the greetings. Emboss with clear EP. Just this look by itself I love, like dry embossing, very elegant for single layer white cards!
Next, ink up your jumbo dauber in Memento Dandelion and start sponging over the embossed chevron concentrating the ink near he bottom fading out toward the top.
Now do the same with just Cantaloupe near the bottom to deepen the bottom half.
Last sponge Tangelo onto just the bottom third. Isn't that build of color to the top and resist of the chevron print lovely?
Finally, add your greetings in Tangelo above and Tuxedo Black below. These sentiments are from the new Assorted Greetings and we will sharing more projects with this set on Wednesday) In these colors, the sentiments really pop and I love having this "...go above and beyond" ABOVE these mountains in the chevron, like arrows pointing upward, as well as the gradual change in color, like cream rising to the top, being at the pinnacle, blah blah! :) (I know I think about some of these things too much!!)
Next up we have Tami Mayberry's Grand Tags, perfect for music lovers with the grand piano theme and containing two large labels which fit the Spellbinders Labels 22 Nestabilities set, plus lots of truly "grand" greetings! (My mom will love cards made with these!)
I also stamped the lines and circles border from Pretty Patterns in gray to suggest a whimsical staff, (which also coordinates nicely with the art deco feel of this tag image) and two-step stamped the large black solid circles from the Pretty Patterns set in at random plus a few rhinestones for sparkle. Cardstock is Pure Luxury Black Onyx and White. Inks are Memento Tuxedo Black and London Fog, and ribbon is Pure Luxury Polka Dotted Black. I notched out the corners of white mat with a pair of scissor to match the die cut label, snipping two rectangles into each since I couldn't find my corner punch...I stamped the label again and popped up just the front portion of the piano, cutting off the propped up lid, to give more dimension to this part of the image. I added one little adhesive rhinestone and filled in the stripes with a gray Copic. Great set, Tami! :)
http://api.ning.com/files/PsJxvi-*WJtrsT8RMY93fpIX*ncOBPlXz5QBCUxIXw9lMw1MGgzt4vrNGAam-p1JqkZyVNAlmVXhVeAhfA1Vybw7eMoRx8s-/Designteambutton.gif
Please check out the rest of our fabulous team for more ideas and inspiration:

Sunday, July 8, 2012

Swimming Update! (Woot!)

Thanks so much for all your prayers, the boys had great swims yesterday! William came 1st in his heat and took another 4 seconds off from last week (but there were so many heats for that race it didn't qualify). Here is he is taking his mark.

He was actually so fast off the gun and in the pool before everyone else, I really thought he had fall start, but nope, whew! And I was just so proud of him for keeping his cool in front of all those people in this a massive indoor pool. We'll get 'em next year, William! :)

Jonathan's relay team did not place, but they and the alternate performed well and finished fourth 9so might be alternates?), and nobody else got sick, thankfully! Jonathan did qualify for state again, finishing second in both the 25 free in the 50 free, so he will be swimming both those events in Corpus at the end of the month. Jonathan had a personal best on his 25 free and missed 1st place on the 50 free by just .01 second, (35.01, versus 35.00) the closest race of the entire day. I told him we'll have to skip clipping his fingernails next time to extend his reach, hee hee! ;) He was very happy to take second to his teammate, Nicholas, who has been great competition for him all season, as both boys have been pushing the other to go faster. Now they both get to go to the State meet together (Jonathan had already qualified to go for the 25m free, so Nicholas really needed that win).

Here they are right after the 50 yd race, Jonathan on the right in the black cap and Nicholas to his left in the blue cap. I love how happy Jonathan looks, even after the narrow miss at a trophy (only first place gets one) He can be pretty intense before his races, but doesn't fall apart or stew if they don't go his way or obsess over what he might have done differently.

We celebrated with this big ol' hamburger cake after dinner that night, isn't that awesome? (and only 19.50 at HEB, a bargain I thought (looked so cute inside, too, with the bun being white cake and the burger being chocolate...pound cakes fries, mmm!)

So excited for our team since we have three kids who qualified for the city team this season! (and that I have some families to carpool with to practices, hee, more stamping time!) Thanks for letting me share our happy news!

Excuse me while I go finish a post for inspiration hop tomorrow, eek! Hope you had a terrific weekend and lots of our own things to celebrate! Hugs!