Thursday, November 22, 2012

Got Leaves?

A very happy Thanksgiving to you all! The kids had a school holiday yesterday and we just hung around the house.  I wanted to take a little break from cardmaking and do a few things to make it look a little more festive and prepare for company for our big meal today.  (Sometimes as a designer I am always working ahead on the holidays to come, and  it is easy to suddenly find myself on Thanksgiving day surrounded by a bunch of Christmas or Valentine crafts!  I have to stop and live in the moment so all the fun of the current holiday doesn't pass me by!)  I saw these cute trees made from canned goods and paper bags on Pinterest  so William and I had to give them a try.  Here is William's.
 
We also made a few Silhouette cut leaves and embossed veins before tucking them into the branches.  

 I also decided to make some leaf garlands with our FREE, abundant leaves after I saw the boys outside raking to earn a little money.  This was so simple to do, just gather some nice looking leaves, thread a needle, poke through the middle of each leaf,  space them just a few inches apart and hang up! I just tied them around our light fixture and then used clear tape in the corners, and well as just draping strands around our curtain rods in other rooms for swags.
 It was hard to capture a good pic of this, and didn't have good light last night or this morning. 
Hope you get the idea! :) I love how this easy and rustic treatment  brought the outdoors in.  I love Fall!  So while you're waiting for the yeast rolls to rise this morning, give this simple project a try!
I also saw adding corn to your candles, again really inexpensive way to complete the harvest look!

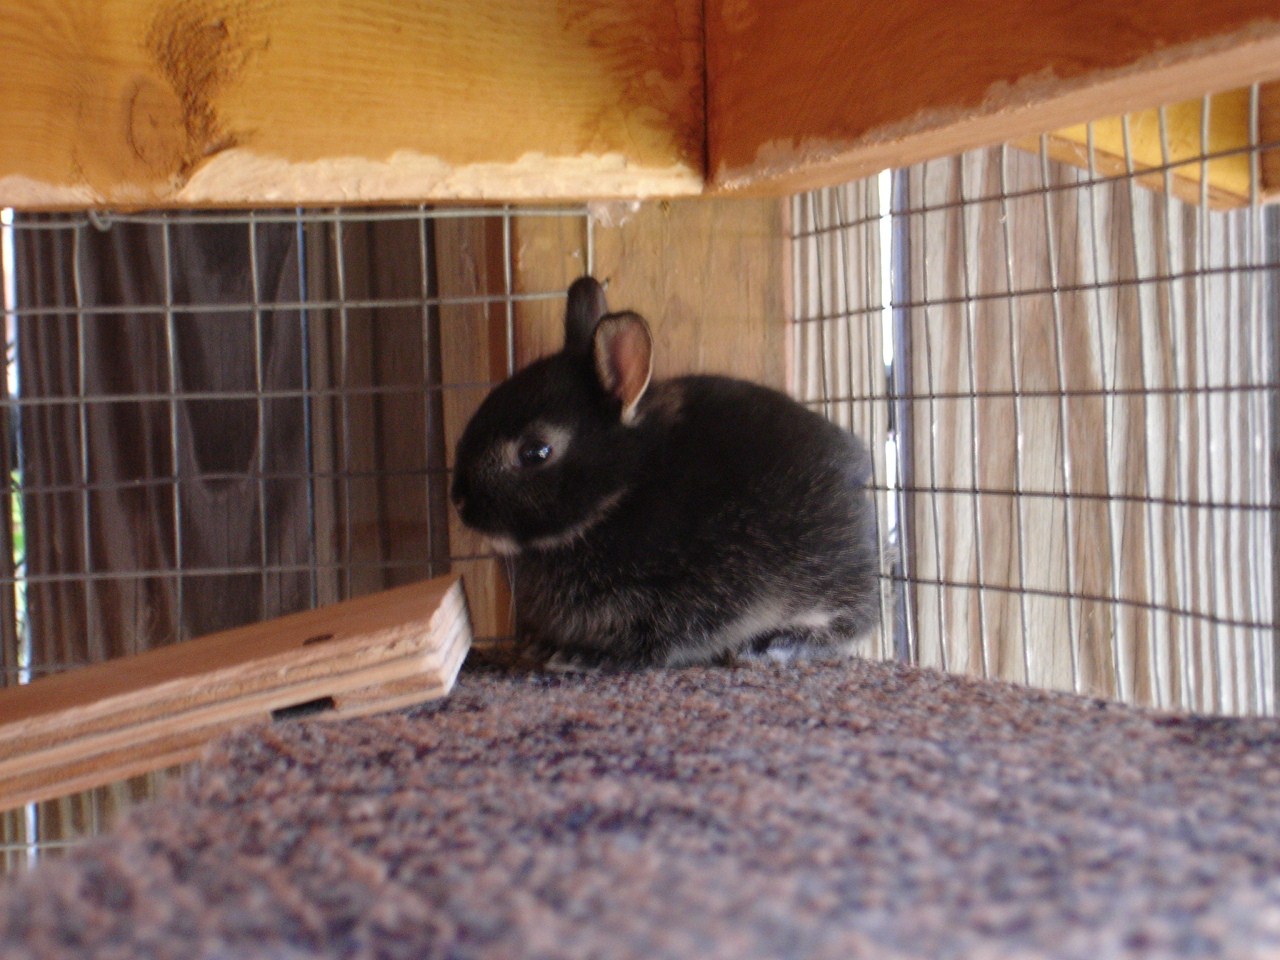
Some of the latest bunny pics! They are now three weeks old and look just like fuzzy rabbits now, no more "naked mole rats"!  This pic below was one at the TWO week mark.

 It has been very warm this week, so they are all out  of their nest box now exploring the hutch.
 
 Here's one who decided it was better to sit the hay trough than eat it!

Prayers for traveling mercies for you all this week and a peaceful relaxing time with whomever you are spending this day with: family, friends, or neighbors. If you aren't able to share a meal with someone today, I hope you have some nice phone calls and good times connecting with online friends. 

God is good! So much to be thankful for!

Hugs and blessings,
Melanie

Tuesday, November 20, 2012

Very Merry!


Hello! A Fun holiday card for you today! Color combo for this Lots of Letters card was inspired by the Holly Jolly Echo Park paper I had, so I stamped out the "very merry" with my letter stamps  in Memento Rich Cocoa, Morocco, Rose Bud, Lady Bug, Bamboo Leaves, and Bahama Blue on Pure Luxury White.  Card base is Jelly Bean Green
 TIP:  Use the different circle elements to make scalloped borders on the sides of your mats.  This circle from the set, stamped in New Sprout ink, has a cute stitched rim.  Isn't that a nice subtle border?  I also cut out a couple ornaments from the paper and stamped a "2" and "5" on them (for, the 25th, ya know? :)) and "hung" them (just draw a line of Mono Multi glue) with some coordinating bakers twine.   Finish it off with a little tied button!


TIP:  It's super cute to find other things you can stamp the letters onto: buttons large brads, inside larger images from other sets, you name it!  

Recreate this look:  If you don't have this DP, try just stamping on some ornaments or round elements that will look like multi-colored balls and punch a few circles for the dimensional ornament. :)

Thank for visiting today!   
BTW, have you checked out the board for our November release samples on Pinterest?  This is a great way to see all the inspiration in one place and easily save your faves by re-pinning them on your own boards!  Happy pinning!

Sunday, November 18, 2012

What's that Spell?

Hello, happy Sunday!  Here's an easy sample to make, I gave this to William's soccer coach at the end of season party.  This is a really nice one for sports teams that doesn't necessarily have to have a sports image on it.  You could also use the team's colors to personalize it, but I just chose to go bright and use lots of inks.  
Be sure to scroll down for sentiment ideas for these letters!

This was a super fun one to make!  These two Lots of Letters circle images two step stamped together remind me of fun retro bottle caps, so I decided to try about every bright color combo I could make with my Memento pads* and then add some dimension and shine with my page pebbles!  
TIP:  To figure out the spacing, I just placed the sheet of pebbles over the folded base and one at a time added my letter elements, then covered it with a page pebble before moving to the next.  

TIP:  Stamp in this order:  the rim first, then the burst that fits inside, then the letter in the middle.

*From left to right with rim color listed first in each :
Bahama Blue and New Sprout
Tangelo and Cantaloupe
Roe Bud and Angel Pink
Cottage Ivy and Pear Tart
Grape Jelly and Lulu Lavender
Teal Zeal and Morocco
Nautical Blue and Summer Sky

Here are some short words you can stamp quickly and that will fit well on card fronts, most six letters or less that will fit on the cool border stamp in Lots of Letters.  
These work for many occasions and holidays:

Peace 
Merry
Joy
Rejoice
Believe
Laugh
Dream
Create
Inspire
Thanks 
Us
Family
Friend
Happy
Easter
Hello
Hi
Hey
Baby
 Sweet
Bravo
Hugs
Kisses
Party
Star
For you
Sorry
Get well
Love
hee hee
Lol
Ttys
boo
Winter
Spring
Summer
Fall 
Bday
Xmas
Wish
Hugs
Pssst
xoxo
 Shut up!*

(*but you have to mean this one in the *nicest* way)

Help me add to this list! :) So many nice things to say! 
Please share your ideas with all of us below!

Saturday, November 17, 2012

Sweet Baby Girl

Good morning!  This is THE very first card I made when my Lots of Letters set arrived! I was so eager after designing this long border to use it as framework for my letters, looks cool and goes fast!


Love stamping the letters off center, up down and all around, no need to worry about centering!

Start with a 4 x 5 1/4" Pure Luxury White mat.
Stamp the long border in Memento Angel Pink in the center.
Now re-ink and stamp above and then re-ink and stamp below.  Now you have this cool stacked border and frames for all your letters.
TIP:  Count the number of letters in each word of your greetings before you start stamping to figure out placement.   This border is 6 squares long so if you have an odd number you can add an embellishment to the last space OR begin the next word at the other end of the next row to balance the spaces.
Stamp "sweet" and girl" centered (with Memento Rose Bud ink,) then add some whimsy going up and down with the "baby" part.
Tie some stitched ribbon to a white safety pin and adhere it with a glue dot, as well as the button,  for  simple babyish embellishments.
Round opposite corners to match the shapes in the border with a small corner rounder punch and mat on a corner punched Pure Luxury Passionate Pink base.

Change to seasonal colors and this design could be an easy to mass produce Christmas card, just swap out the pin for a stamped or punched snowflake!

Happy Saturday!

Friday, November 16, 2012

New Gina K Designs Now Available

Good morning!!  Thank you for coming to our release party last night!  
and
(but you *SO* want the clear for this set!) 
and all the other new release products are now available for purchase from Gina K. Designs.  
 Don't forget the matching Lots of Letters Silhouette cut file for only 99 cents*, which gives you cutting options for all the images without needing punches!

 Here is one of my favorite new cards from the party last night, had to give you some more details!  I'm a Scrabble lover, so it was really fun stamping up this tile background.  Isn't this sweet having just a few of them wonky, like real tiles would be sliding around on the board**?  So don't spend too much time stressing about making them perfectly straight or aligned, the one tippy "L" really gives it character! The premium quality clear photopolymer option however makes it simple to line them up if that is the look your going for, which will make really cool backgrounds with this dimensional looking stamp!

"Tile Love You Forever... " :)

I stamped the tiles in rows, re-inking each time in Memento Toffee Crunch on Pure Luxury Sandy Beach. I stamped the letters in Memento Tuxedo Black and only cut out the tiles for "love",  which I popped up on foam dots.  The hearts are free cut with scissors from Pure Luxury Cherry Red CS and base is Black Onyx. 

 I love you for all the love you are already giving for this set, I can feel it! :) So excited to see what you'll do and to share more ideas I have and projects I've already made!

Here is a full reveal of the set.  Which shapes are your favorites?

Thanks for visiting today! Have a terrific weekend!


* It's okay if you forget, since nothing is physically shipped to you, you can buy it later if you already checked out! :)

** If you love Scrabble, spend the extra $$ to upgrade to the board with a grid and turn table. No more straining to see your opportunities for play or tiles sliding everywhere and driving you nuts!  :) 

Thursday, November 15, 2012

Winner of the Show Me the Stamps Prize!

The winner of the Show Me the Stamps Blog Hop $50 gift certificate to Gina K Designs is....
Riette
 
       who commented on my blog: 
 
  hi melanie!!
I'm of course a follower for a while!! I just love all your cards. They are truly stunning & inspirational. Love the 'negative' die-cuts!


You're Invited to a Party!

Good morning! Today the Gina K Designs Illustrating Team is inviting you to our release party tonight at 7 PM CST on StampTV! Really hope you can make it! We are all sharing a taste of the new stamps you'll see at tonight's release! Today I am showing a gift set of cards I made, because this year, I think a lot of my gifts to friends and family will be homemade ones! (Is that your plan, too?)
To help all the cards coordinate, I used 4 Pure Luxury cardstock colors, 3 inks, and 1 pack of coordinating Gina K Designs patterned paper (Sun Kissed Autumn, love these earthy colors any time of year!), plus copper brads to embellish each.  I made all the designs very different to give you ideas, as well as showing how to stamp out your greetings or trim letters individually as tags.

This was the first card I made.  Only after I finished did I decide to make a gift set, so I took cues from this design for the rest of my choices.   First, stamp circle images in Memento Rich Cocoa onto Honey Mustard.  Stamp letters inside.  Punch with a 3/4" circle (perfect fit!), then mount each on a 1" white circle. Doesn't that look sharp?  Adhere these on a 2 1/2"x 5 1/4" scrap of Gina K  Sun Kissed Autumn DP, I popped up every other letter to add more interest. Pure Luxury White mat embossed with CB folder Forest Branches. Three brass brads to embellish.  Honey Mustard base.
 Punch outs from Sun Kissed Autumn papers range 3/4" to 1 3/8" circles.  Cardstock is Sandy Beach and Honey Mustard.
 Base is Pure Luxury Warm Cocoa.  Circles stamped with Memento Peanut Brittle (stamped off for middle circle), and Toffee Crunch. I colored in the "o" with a Peanut Brittle marker.
 For this card I just used scissors to trim the white squares.  Base is Pure Luxury Sandy Beach.
 
 Pop them in a clear box and your gift is done!  (If you don't have clear boxes, you could also put them in a gift bag or tie them up with ribbon.)  You could just do all one design, or keep it even simpler making them all white bases for fewer supplies to purchase, but I like making lots of different designs so I don't get bored!  Which of these do you like best? Let me know!

TIP:   If you make multiples of several designs, you can mix them up to make multiple gift sets so each recipient has a nice selection in their box. :)


I can't wait for you to see the full reveal of Lots of Letters tonight at 7 PM CDT! (You're going to freak when you see aall the options you'll have with the shapes!)  All new products will be loaded to the store here at that time for you to get your shop on!

Illustrator and Senior Designer

Now please visit the rest of our illustrators for peeks and inspiration for ALL the new sets:
Party starts today (Thursday), November 15, 7PM Central Time in the Stamp TV Release Party Forum. Join us for Challenges, Contest Questions, Design Team Samples, Full Stamp Set Reveals and, of course, party chit chat!!! Hope to see you there!!

Also, if you haven't yet entered to win the $50 Gina K Designs gift certificate being given away by the Gina K Designs Illustrators from our Tuesday hop, there is still time to to so. The deadline is 5pm Central this evening.  Simply scroll down to Tuesday's post for full details.

Tuesday, November 13, 2012

Show Me the Stamps Blog Hop

This prize giveaway is closed. Thanks for playing.


Welcome to the Show Me the Stamps Holiday kick off!  For this month’s hop, several of the Gina K Designs Illustrators have brought together their design teams and guests.  Each illustrator’s design group has fun and exciting things to share using their stamps.

You might have noticed that I said “Holiday kick off” instead of just blog hop. That’s because this month is special. As you may know, we don’t always have a prize each month, but this month is one that we do!  The Gina K Designs Illustrators want to help you celebrate the holidays in style with some Gina K Design stamps!

For this month’s hop, we will be giving away a $50 gift certificate to the Gina K Designs store!

All you have to do to enter is leave a comment on each of the Illustrators blogs.

Want an extra entry?
Become a blog follower of any of the illustrators and leave a comment letting them know you did. That’s up to 8 chances to win if you become a follower of each illustrator and leave a comment!!

Of course, you’ll want to check out the blogs on the designer list below, too. Why? Because I will personally be sending out a surprise gift to someone who comments on their blogs as well.

Now for today's projects!  Here's what I've been stamping with lately...
 First, I paired October's Stately Flowers 5 mistletoe and sentiment with one of my bestsellers from the past, Festive Frame.  Aren't they lovely together?  I stamped the frame in Rich Cocoa on Kraft cardstock and colored with Copics R22, R29, E13, E57, and G99. Mistletoe is stamped in Memento Pistachio, greeting in Rhubarb Stalk,  cut with a Spellbinders Decorative Oval die.  I added pearls to the poinsettia centers and card base is Pure Luxury base weight White.
Next I used the Mistletoe image again stamped in Memento Cottage Ivy on Pure Luxury Jelly Bean Green, and used a white Picket Fence marker to color the berries and CopicYG06 to darken the leaves.  TIP:  Use a 3/4" circle punch to create a chain of 6 openings in the green panel to stamp "kisses" inside ("under the mistletoe", you know??) :) Hold the punch facing up so you can see where they will overlap as you punch.   After punching (this is such a fun look and easier than having to adhere 6 punched circles!) place your white layer underneath and stamp the letters from Lots of Letters in Memento Cottage Ivy, Bamboo Leaves, and Lady Bug, alternating the colors.  Then pop up the green layer over the white with pop dots.  Love how these white round openings mimic the berry clusters.  Finally, add some bakers twine and buttons.Card base is Pure Luxury Red Hot.


Finally, I had to share something with Pretty Patterns, one of my latest personal favorite sets and one I had in mind for coordination when I designed Lots of Letters.  See how pretty the framed letters look nested into the stamped chevron borders?  And the greeting: hee hee! Just showing you some uses for numbers, not just for dates! I used Memento Angel Pink, London Fog, and Rose Bud on Pure Luxury White. Card base is Pure Luxury Smoky Slate.

You can also find more designs using my line of stamps (can't wait to see what they've chosen to use!) on the blogs of my stamping friends:

Carolyn King 


 Thank you, ladies, and big hugs for playing today! :)

When you get done be sure that you hop on over to the blogs of these Gina K Design illustrators to see what their designers have cooked up as well.


Deadline to enter for the gift certificate drawing is 5PM Central time on Thursday. November 15, 2012—release party day! AND just in time for someone to do some exciting release party shopping when the new stamps become available at 7PM!

Check back here before the release party to find who the prize winners are and see the full reveal of my latest stamp set--Lots of Letters!

ALSO!! Be sure to come back Thursday too because the Gina K Designs Illustrator Team will be hopping again sharing a peek at our sets before the party. But this time we will be showing you peeks from the NEW stamp releases!

My stamp sets you'll see in today's hop!
 
Stately Flowers 5


Monday, November 12, 2012

Sneak Peek!


Good morning!  If you are coming from Gina's blog, you may have already seen a tiny peek of my new set coming out this Thursday from Gina K Designs! (if not, check back later for her snipet!) Lots of Letters is the first alphabet and number set from Gina K Designs, available in premium clear photopolymer, of course, making lining up things up a breeze!  So stinkin' excited for this one, I have been waiting for an alpha for sooo long, and now with Clearly Gina K stamps, this is a *must have* for your stamp collection.  So much more than *just* an alphabet set, tough, you also get numbers, plus a border and FIFTEEN shapes that are perfect for framing the letters and numerals, which can be punched (or cut with the cut file) for tags or making backgrounds as well, this is sure to become a new favorite!

I just love words and being able to spell out my own greetings (in a clean font that works with everything) and I have been cranking out the cards with this one, looking forward to showing you more ideas at the party!  I just can't get enough of this set!  This card uses one tag shape (punched with a 1 1/4", and then matted on a punched 1 3/8" square), the letters  and numbers, and the border, which I stamped  tone on tone with Memento Lady Bug and Rhubarb Stalk on Pure Luxury Red Hot, love how it looks embossed! 

What's the first thing *you* will to spell?! I wanna know! :)
 You can also see a peek of Beth Silaika's new set her Sentimental Holiday here!

This week we have so much fun stuff going on! A hop with the illustrators special guests featuring our past sets (with a big ol' prize you won't want to miss!)  the release party on Thursday night at 7 PM CST!  Whew! Tons of inspiration in store!

Thanks for visiting today! See you back here tomorrow for our hop, can't wait to see what my guests lined up as well reveal *the big prize*!!