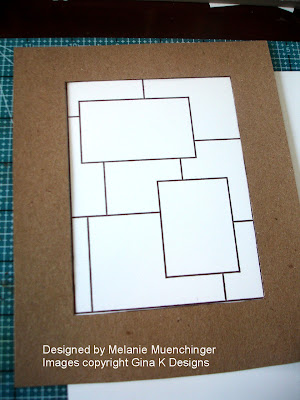
 Now stamp your image into the grid, here I'm using one of the images from the "Signs of Autumn" StampTV kit, mounted on a round acrylic block.
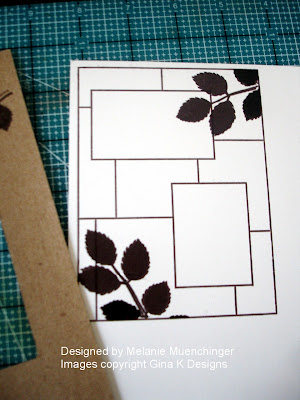
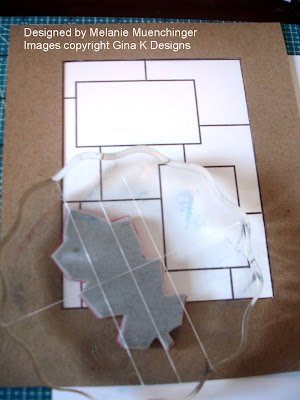 Here's what it looks like after stamping another branch and pulling the mask away, see how you still have a clean border surrounding the image? TIP: When I stamp things into my grid, I like doing "corner to corner" this way with my images, (as well as turning them to point inward towards the other elements I'm going to add) to help balance the layout. You could also do the reverse: top left and bottom right. An odd number like three branches would be nice, just try to keep them from bring too heavily concentrated in one area. (I'm going to add a third element at the end). I like having the branch overlap into the top box I'll use for my greeting just bit.
 Now I'm going to cover it back up with both the big window AND the cutout of the entire grid, minus the smaller windows, and stamp one more branch into the bottom box.
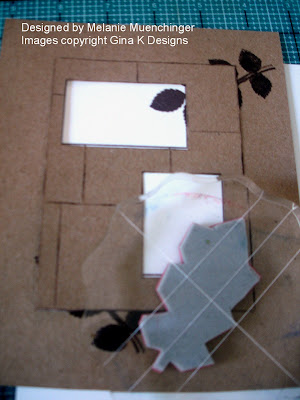 Here it is pulled away again, having just part of the branch emerging creates a feeling of depth and multiple layers.
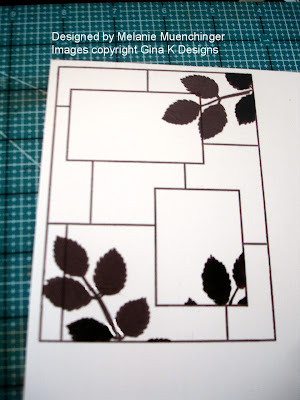 Last I'm going to use the large window and one of the little rectangles for some sponging action. Covering the boxes keeps these areas bright white, they will really pop after I'm done adding my orange ink.
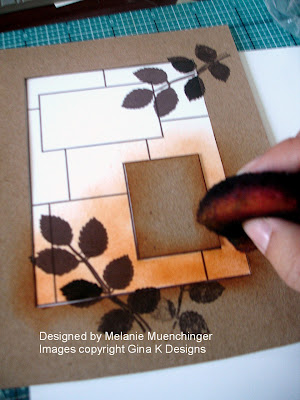 This is what it looks like! You can pull your mask away as many times as you like to see if you are happy with the look or want to add more ink.
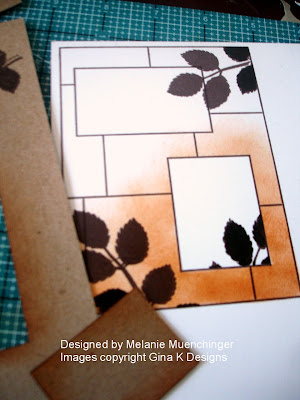 Finish sponging the top corner and trim your stamped grid like I did in the prepping post. Add your greeting (also from the STV kit), a popped up a butterfly ("Take Flight"), and adhere to your card base. I put the butterfly at an angle in between the branches, pointing towards my quote.
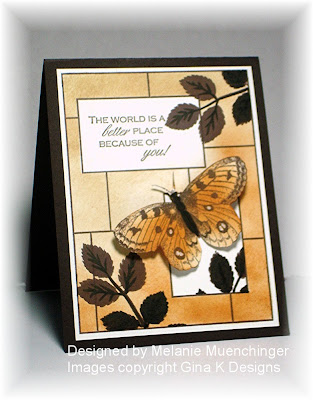 I added a few more touches like some veins on the bold leaves with my marker onto the CS after stamping. That's it, a 2 layer card, plus the butterfly.
 You can of course make masks for every separate piece of this grid, or just the ones you will use most often like the masks I've recommended keeping with your set. Because the grid is all straight lines and right angles, Post-it notes works perfectly for the smaller boxes and areas. I'll share a sample when I opted for Post-its instead becuae I masked a different image into every box, wait til you see! :)
Hope this is helpful seeing some quick and easy options for filling out the mosaic! More to come!
REALLY awesome!! Thanks for all the enabling... oops! I mean inspiration! :)
ReplyDeleteFabulous card Melanie! Love what you did with the leaves.. thanks for the masking tuntorial... this grid stamp us growing on me!:o)
ReplyDeleteYou are totally amazing. Thank you so much for so much easy to use information!
ReplyDeleteOMGosh.. this is BEAUTIFUL!!! You are not kidding you MUST have made 40 different cards wih this set!! Did you leave any ideas for us to come up with? LOL I'm working on my first and have been to busy at home to finish it. But I will. Did I tell you this was an awesome set you designed??? *grin*
ReplyDeleteThank you for being very generous and sharing all of your secrets!
ReplyDeleteThis stamp is on my wish list ....
Sandra
This is truly my favorite stamp ..it has it's own block...now I'm going to use your tutorials this afternoon - I was working with post-its also...dont know why I didnt stop and make some masks :) duuuhhhhhh (me smackin my forehead) lol
ReplyDeleteYou are totally rockin' your new set. I love all the projects you have shared. It is such a cool stamp. So versatile.
ReplyDeleteThe tutorials - and the set - are superb! I just received my purchase yesterday and hope to use your tutorials for a set of cards tomorrow! THANKS!
ReplyDeleteMelanie, I love your tutorials. I can't wait till my order comes and I can try out some of these ideas!
ReplyDeleteMelanie,
ReplyDeleteThis card is beautiful! I like to use post-it notes (sticky-side used) to cover over items I want to avoid - but your idea gives you a forever template. Then the sponging is so soft! It is really beautiful! Thank you for sharing your idea!
Michelle
Stop by my blog and say hi, http://michellesinkyfingers.blogspot.com
this is fantastic!!! love your card
ReplyDeleteHi, Melanie,
ReplyDeleteIt is a beautiful card! Your stamp is really cool as there seems to be no limit to create any card with it. Thanks for detailed tutorial.
Seongsook
OK, now I have IM tutorial #2...and I am finally ready to dig in with the stamp set! You are an amazing lady. Creativity just pours out of you! Thanks so much!!
ReplyDeleteSuch a beautiful card! Love it!
ReplyDelete