This first pic shows what the mosaic grid looks like adhered to the 6x6 acrylic gridline block. (First I did a superclose trim with my Tim Holz scissors) I have it centered two squares over on each side with the top edge of my image (not the top of the rubber!) lining up with the gridline on my block, make sure both corners meet the line and it WILL be lined up! It doesn't quite meet one of the lines at the bottom, but that's okay, you will only be looking at this top line when you are stamping.
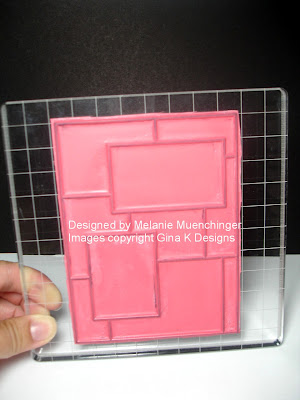 TIP: If this is the only BIG stamp you have, leave it on the block! :)
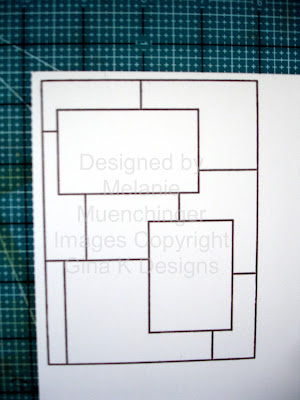
Now, you're going to want to make some masks. Keep these with your set, they will allow you a variety of looks and can be used again and again. Stamp the grid into the middle of a thin sheet of scratch paper, I usually just use printer paper, the thinner the paper you use the better, a thick paper will "bump back" the image and keep all of your image from stamping properly up to the edge of your masking. (Here I'm using text weight kraft paper just so you can see it better when I place it over a white sheet I'm stamping on) Trim along the edge with a craft knife, here I'm using the Tim Holtz retractable knife. You can finish this up with scissors, but the reason I start it with a knife is so I don't have to cut in from the edge to get to the image, this piece will just fall out and I'm left with a window.
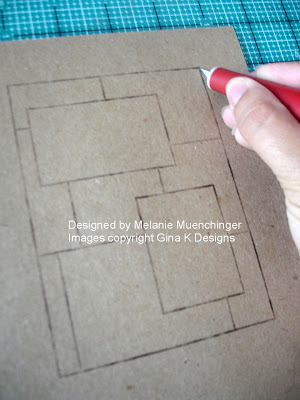 Be sure to leave a couple inches of room on the sides so that when you are sponging or stamping off the sides it won't hit your paper outside the mask.
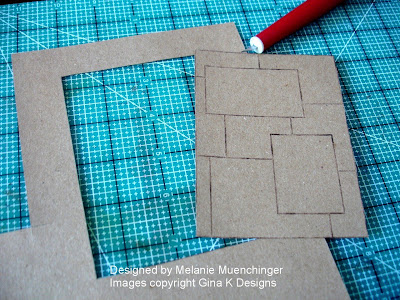 Now cut out the two top rectangle layers", you are left with FOUR pieces you can use: the large window (to use like a reverse mask), the grid with the two cut outs (you can stamp inside these), and then the two little rectangles you can place over the rectangles when you are sponging to keep these areas clean and blank.
 I will show you how to mask with all these in my next post!!
Now , here is a pic of me stamping the grid onto my CS I will be using on my project, you can just see the edge of the white paper peeking out. So I only have to cut on two sides, I make sure the line on the grid block that is lined up with the top of my image is parallel to the top of my CS, that way I know it will be straight. I also bring it down about 1/8" from the top and 1/8" over the side (It make look like its further over on the left, but it's the angle I'm taking the pic at)
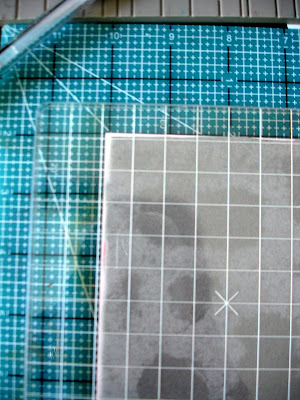 When I pull the stamp away, my CS is ready to cut on the right side and below the image so it will be perfectly framed up on my paper. Stamping it this way into the corner of a sheet of CS, I can get 4 mats from an 8 1/2" by 11 piece with very little waste. Love it!
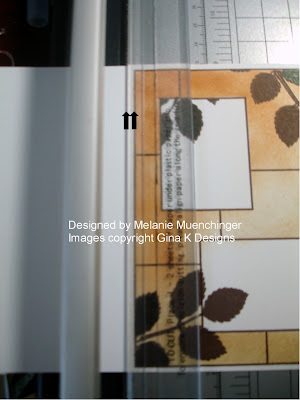
 Now, to cut! Your cutter may be a little different than mine, but see how the border of my stamp is parallel to the edge of the plastic grip and cutting track? I put in 1/8" over, this way I will come out with a mat that has even borders on all sides, AND, even if I didn't stamp it exactly square to the corner, because the image is a rectangle, when you line it up to the border of the stamp and NOT the bottom of the cardstock, all the sides will be squared up. I love that! You will have a mat ready to adhere to your A2 card front.
What a terrific tutorial! Love it! I can't wait to see installment #2.
ReplyDeleteLoved this Mel. Thanks. Only problem is ----------- I wish I had ordered it along with your Year of Flowers and your other large stamp (sorry! can't remember the name), but I WILL get it at some point. You have the BEST stamp designs.
ReplyDeleteGreat tutorial - can't wait to get mine so I can PLAY and try it out. Thanks for always helping US become better stampers, Mel.
ReplyDeleteARRANGED WITH LOVE! Yea, that's it!!
ReplyDeleteVery clear tutorial. I hope my stamps come soon!
ReplyDeleteAWESOME tutorial! Can't wait to try it out! Looking forward to the next part! Thanks for taking the time to make it for us!:)
ReplyDeleteHugs
Great idea....I was using sticky notes. Obviously an actual template would be a WHOLE lot easier :o) (duh!)
ReplyDeleteGreat tutorial and will be creating my own. Looking forward to the next installment!
thanks Melanie - this is wonderful!
ReplyDeleteSandra
Great tutorial! I'm still waiting for my stamp - next to purchase the grid-lined acrylic stamp handle. Does Gina sell one like that? I can't seem to remember...
ReplyDeleteBrilliant!!! Thank you for sharing this - will look forward to the next installment :)
ReplyDeleteThank you for the tips.
ReplyDelete